KitchenAid KCM534OB Support Question
KitchenAid KCM534OB Support Question
Find answers below for this question about KitchenAid KCM534OB - Programmable Coffee Maker.Need a KitchenAid KCM534OB manual? We have 1 online manual for this item!
Question posted by mysoleanson on October 27th, 2022
Coffee Pot Replacement
Where can I buy a pot replacement for this coffee maker
Current Answers
Answer #1: Posted by SonuKumar on October 27th, 2022 9:06 PM
SonuKumar

Member since:
May 9th, 2021 Points: 16,554,550

Member since:
May 9th, 2021 Points: 16,554,550
Please respond to my effort to provide you with the best possible solution by using the "Acceptable Solution" and/or the "Helpful" buttons when the answer has proven to be helpful.
Regards,
Sonu
Your search handyman for all e-support needs!!
Answer #2: Posted by HelpHero on October 27th, 2022 5:08 PM
HelpHero

Member since:
September 3rd, 2022 Points: 523,400
Member since:
September 3rd, 2022 Points: 523,400
Visit www.amazon.com
Search for KitchenAid KCM534OB coffee maker pot replacement, If the product is still in stock for your country, you will be able to buy it.
I hope this is helpful? PLEASE "ACCEPT" and mark it "HELPFUL" to complement my little effort. Hope to bring you more detailed answers.
Helphero
Answer #3: Posted by Technoprince123 on October 27th, 2022 5:34 PM
Technoprince123

Member since:
February 8th, 2021 Points: 1,196,770
Member since:
February 8th, 2021 Points: 1,196,770
Please response if this answer is acceptable and solw your problem thanks
Related KitchenAid KCM534OB Manual Pages
Use & Care Guide - Page 3
... Arrange for Great Taste 11
CARE AND CLEANING Cleaning the Coffee Maker 12 Descaling the Coffee Maker 12 Troubleshooting ...13
WARRANTY AND SERVICE INFORMATION KitchenAid® Coffee Maker Warranty 14 Hassle-Free Replacement Warranty - 50 United States and District of -Day Clock 7 Operating Your Coffee Maker 8 Brewing Coffee...8 The Pause and Pour Feature 9 Using the Automatic Brew Timer...
Use & Care Guide - Page 4
...gas or electric burner, or in a heated oven. 11.
Unplug Coffee Maker from outlet before cleaning the appliance. 6. ENGLISH
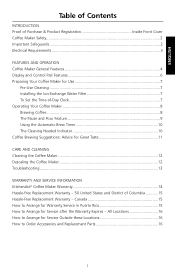
Coffee Maker Safety
Your safety and the safety of others . All safety messages...'t follow instructions. To protect against electrical shock, do not immerse cord, plugs, or Coffee Maker in this manual and on or near children. 5. Return appliance to persons. 8. Read...
Use & Care Guide - Page 5
ENGLISH
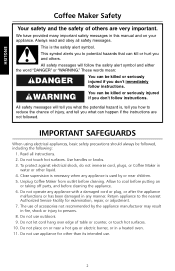
12. Do not use an extension cord. only. Do not remove ground prong.
NOTE: Your Coffee Maker has a 3 prong grounded plug.
Do not use a cracked container or a container (carafe) having a loose or
weakened handle. 16. If the power supply cord is designed ...
Use & Care Guide - Page 6
ENGLISH
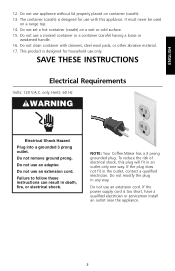
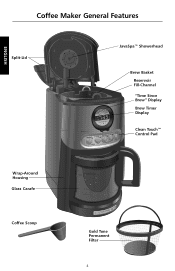
Coffee Maker General Features
Split-Lid
JavaSpa™ Showerhead
Brew Basket Reservoir Fill-Channel "Time Since Brew" Display Brew Timer Display
Clean Touch™ Control Pad
Wrap-Around Housing Glass Carafe
Coffee Scoop
Gold Tone Permanent Filter
4
Use & Care Guide - Page 7
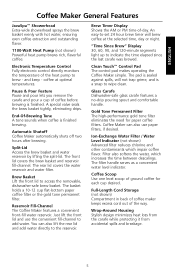
... Permanent Filter The high-performance gold tone filter eliminates the need for each cup desired. Coffee Maker can also lift the rear lid and add water directly to wipe clean. Ion-Exchange Water...increases the time between descalings. Full-Length Cord Storage (not shown) Compartment in back of coffee maker keeps excess cord out of -day. The front lid covers the brew basket and reservoir fill...
Use & Care Guide - Page 8
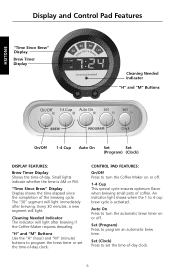
... Shows the time-of the brewing cycle.
"H" and "M" Buttons Use the "H" (hour) and "M" (minute) buttons to turn the Coffee Maker on or off .
1-4 Cup This special cycle ensures optimum flavor when brewing small pots of -day clock.
6 Small lights indicate whether the time is activated. The "30" segment will light after brewing.
Auto...
Use & Care Guide - Page 9
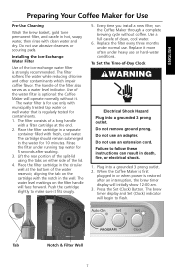
... clean, cool water.
6.
Place the filter cartridge in the circular well at the end. 2. Every time you install a new filter, run the Coffee Maker through a complete brewing cycle without it. Replace it fits snugly.
5. To Set the Time-of the water reservoir, aligning the tab on the cartridge with fresh, cool water. Tab...
Use & Care Guide - Page 10
...) and "M" (minute) Buttons below the brew timer display to AM or PM.
5. ENGLISH
"H" and "M" Buttons
Operating Your Coffee Maker
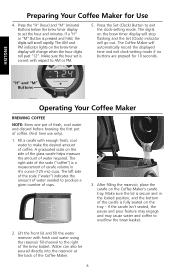
BREWING COFFEE
NOTE: Brew one pot of fresh, cool water and discard before brewing the first pot of coffee. Fill a carafe with respect to set is pressed and held, the digits will automatically record the displayed time...
Use & Care Guide - Page 11
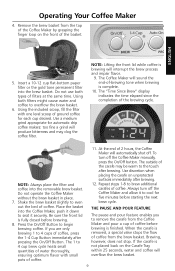
Operating Your Coffee Maker
4. Using the included scoop, fill the filter with small pots of coffee. The "Time Since Brew" display indicates the time elapsed since the completion of ground coffee for each cup desired. Shake the brew basket slightly to even out the bed of coffee, press the 1-4 Cup Button immediately after pressing the On/Off...
Use & Care Guide - Page 12
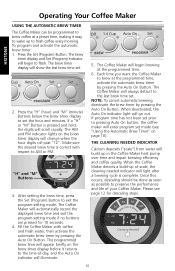
... and held, the digits will enter program set . Press the "H" (hour) and "M" (minute) Buttons below the brew timer display to pressing Auto On button, the coffee maker will scroll rapidly. "H" and "M" Buttons
3. If program time has not been set prior to set .
2. After setting the brew time, press the Set (Program) Button...
Use & Care Guide - Page 13
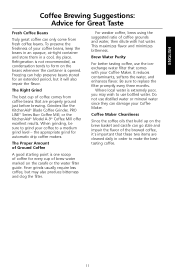
To preserve the freshness of your Coffee Maker. Freezing can only come from coffee beans that comes with hot water.
For weaker coffee, brew using the suggested ratio of coffee comes from fresh coffee beans.
Coffee Maker Cleanliness
Since the coffee oils that build up on the brew basket and carafe can damage your coffee beans, keep the beans in an...
Use & Care Guide - Page 14
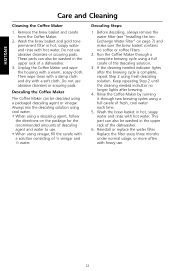
... the brewing cycle is complete, repeat Step 2 using a full carafe of 1⁄2 vinegar and 1⁄2 water. Run the Coffee Maker through two brewing cycles using fresh descaling solution. Reinstall or replace the water filter. Replace the filter every three months under normal usage, or more often with a solution consisting of fresh, cool water each...
Use & Care Guide - Page 15
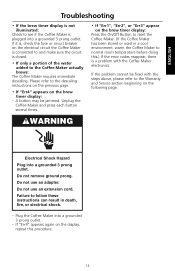
...Do not use an extension cord.
If "Err4" appears again on the electrical circuit the Coffee Maker is connected to and make sure the circuit is closed.
• If only a ...can result in a cool environment, warm the Coffee Maker to the Coffee Maker actually brews:
The Coffee Maker requires immediate descaling.
Failure to see if the Coffee Maker is a problem with the steps above, ...
Use & Care Guide - Page 16
... OR EXCLUSIONS MAY NOT APPLY TO YOU. ENGLISH
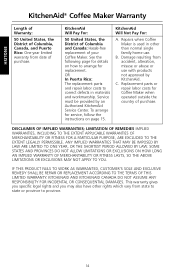
KitchenAid® Coffee Maker Warranty
Length of Warranty:
50 United States, the District of Columbia, Canada, and Puerto Rico: One-year limited warranty from accident, alteration, misuse or abuse or use . To arrange for replacement.
C. KITCHENAID AND KITCHENAID CANADA DO NOT ASSUME ANY RESPONSIBILITY FOR...
Use & Care Guide - Page 17
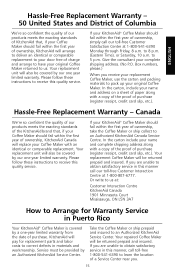
... in this manner call toll-free 1-800-541-6390 to learn the location of a Service Center near you receive your replacement Coffee Maker, use the carton and packing materials to pack up your original Coffee Maker. Give the consultant your complete shipping address. (No P.O. KitchenAid will pay for Warranty Service in Puerto Rico
Your KitchenAid...
Use & Care Guide - Page 18
...: Customer Interaction Centre KitchenAid Canada 1901 Minnesota Court Mississauga, ON L5N 3A7
To order accessories or replacement parts for your Coffee Maker in Mexico, call toll-free 1-800-807-6777. Joseph, MI 49085-0218
To order accessories or replacement parts for service, please review the Troubleshooting section on how to : Customer Satisfaction Center KitchenAid...
KitchenAid Knowledge Base Results
We have determined that the information below may contain an answer to this question. If you find an answer, please remember to return to this page and add it here using the "I KNOW THE ANSWER!" button above. It's that easy to earn points!-
Descaling the espresso machine
...espresso machine on , and flush the espresso machine by turning it to run completely dry. Descaling the espresso machine How do I descale the espresso machine? Scale should be removed every four months; See, Remove the water reservoir and rinse with fresh water, then replace... Descaling the Espresso Machine Coffee maker is empty. Cleaning the espresso machine shower screen ... -
How often to descale a KitchenAid JavaStudio Coffeemaker.
... deposits (scale) from water will illuminate after brewing process is complete The "Cleaning Needed" indicator light is showing an Error Code Descaling the espresso machine Coffee makers should be descaled are: Long brew times Excessive steam Loud "gurgling" sounds during brewing Large amounts of water remaining in the tank after a brewing cycle ... -
Coffee/Espresso temperature
...and temperature consistency have a direct impact on the flavor of espresso coffee. The Pro Line Series Espresso machine is designed to achieve an optimum 180-182° F...; Great C) and 205° espresso comes from brewing at an optimum temperature. C). Coffee/Espresso temperature What is the temperature of the coffee in order to provide an optimum brewing temperature...
Similar Questions

I Would Like To Know How To Get A Coffee Pot Replacement.thanks!
(Posted by dbermudez 9 years ago)

Where Do I Find Replacement Coffee Pot For The Kcm222cu
(Posted by klhackworth 11 years ago)

Programmable Kcm 534obo Coffee Maker.
I set the auto program with digital confirmation, but it does not turn on at the time selected. Why?
I set the auto program with digital confirmation, but it does not turn on at the time selected. Why?
(Posted by dw1447 12 years ago)
How Do I Clean This Coffee Pot?
(Posted by savanah12 13 years ago)

How Do I Program The Coffee Pot?
(Posted by josegura 13 years ago)