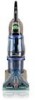
Hoover F7441 Support Question
Hoover F7441 Support Question
Find answers below for this question about Hoover F7441.Need a Hoover F7441 manual? We have 1 online manual for this item!
Question posted by bporcase on October 31st, 2012
When I Release The Switch, The Steamvac Continues To Dispense Water And Cleaner.
my steamvac continues to drop water and cleaning solution even when the switch is released. The water and solution continue to pour out and empty within minutes. It sucks up but at the same time is dispensing water and cleaner.
Current Answers
Related Hoover F7441 Manual Pages
Manual - Page 1
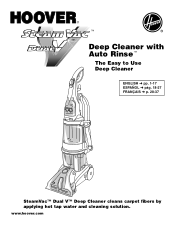
www.hoover.com ™
®
™
Deep Cleaner with Auto Rinse™
The Easy to Use Deep Cleaner
ENGLISH § pp. 1-17 ESPAÑOL § pág. 18-27 FRANÇAIS § p. 28-37
SteamVac™ Dual V™ Deep Cleaner cleans carpet fibers by applying hot tap water and cleaning solution.
Manual - Page 2

...not fill with water above 140˚F (60˚C).
• Use extra care when cleaning on a nominal ...time.
• Do not point tools toward people or pets.
• Use only commercially available Hoover SteamVac™ cleaners...cleaner when not in use in areas where they are in reducing drying time, be plugged into water, take it should , has been dropped, damaged, left outdoors, or dropped...
Manual - Page 3
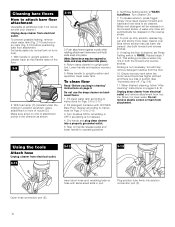
....
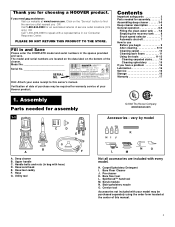
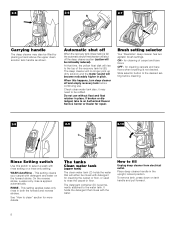
Hose/cord hook E. Hose/tool caddy F. Crevice tool
Accessories not included with every model. Contents
Important safeguards 2 Parts needed for assembly 3 Assembling deep cleaner 3-5 Deep cleaner description 6 General operation 6-8
Filling the clean water tank . . . 7-8 Emptying the recovery tank . . . . 8 Brush speed selector 7 Automatic shut-off 7 How to use Before you begin 9 After...
Manual - Page 4

... to the cleaner at this model. Replace clean water tank (upper tank) by positioning bottom first. If you do not want to attach the caddy to be used , it is repositioned properly before continuing with SpinScrub... and hose, or if the tools are needed on this time, proceed to back of your convenience.
Snap hook onto cleaner.
4
Slide tabs (E) on caddy into holes on back ...
Manual - Page 5
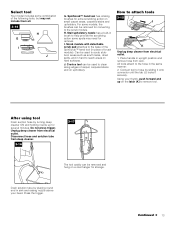
... top of hook (K). Nozzle connector end J. J
Repeat on cleaner.
Press solution tube (J) into opposite side of caddy. Solution tube
I
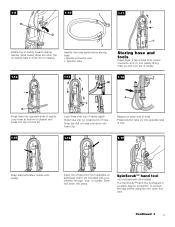
Storing hose and tools
Press hose, a few inches from nozzle connector end (I . Insert top of bare floor tool (available at bottom of cleaner and press into place. Continued §
5 1-9 H
1-10
I
1-11
G
Rotate top of caddy toward...
Manual - Page 7

...
Rinse ON
ON/OFF switch
To turn cleaner OFF, push switch up. Solution trigger: press to operating position. Bare floor tool (available at voltage specified on data plate on back of cleaner. A
Handle release pedal
Step on wheels and push forward. Clean water tank 9. To transport
To move your cleaner) 22.
Clean water tank handle 8. 2. Plug deep cleaner into a single position but...
Manual - Page 8
... a hand above the upper clean solution tank handle as shown.
Slide selector button to the desired setting before continuing use without float and float retainer in pitch. At that will rise to fill
Unplug deep cleaner from electrical outlet.
ON -
The tanks
Clean water tank
(upper tank)
The clean water tank (C) holds the water that time, the yellow float disk...
Manual - Page 9
... of tank to upright
position and reposition upper clean
water tank.
Lower handle to front of deep cleaner to unlock lid.
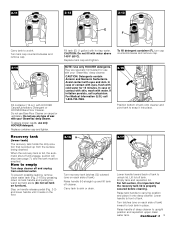
Continued § 9 Turn tank cap counterclockwise and remove cap.
2-14
Fill container (16 oz.) with your 'SteamVac' deep cleaner. Lift lid off and unplug from the surface being cleaned. Do not use only HOOVER detergent. How...
Manual - Page 10
... electical outlet and check and clean this screen. For carpet, use the 'SteamVac' deep cleaner as follows.
If it is visible, spray PreCleaner onto spots and traffic areas. c. Wait ten minutes and check for best results. carefully scrub with clear water and let air dry. Remove lint from possible water spray.
No cleaning solution removes all stains from...
Manual - Page 11
... nozzle must be emptied and filled. Fill detergent container with holes (B) in nozzle, it . To avoid walking on page 9. 1. Continue using dry strokes until little water is best to release cleaning solution and slowly push deep cleaner forward (equals one area. Avoid saturating carpet, as described above. Slide tabs into a properly grounded outlet. Slide nozzle completely...
Manual - Page 12
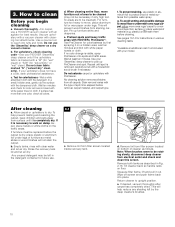
...replace recovery tank. 5. To clean floor
Read "Before you begin cleaning" instructions on hardwood floors. 1. Dry hands and plug deep cleaner into solution connection port (F). Set Rinse Setting switch to 2-15. 3. To release solution, press trigger. To pick up dirty solution, release trigger and slowly move deep cleaner forward and backward over area where solution has just been dispersed...
Manual - Page 13
... place of carpet, carpeted stairs and on hard surfaces. Continued § 13 J. Disconnect hose and solution tube from electrical outlet. 1. For some models, the ...clean along edges of brush module). Crevice tool can be used to the scrub module. SpinScrub™ hand tool has rotating brushes for several minutes. How to attach tools
3-15 J
K
Unplug deep cleaner from deep cleaner...
Manual - Page 14
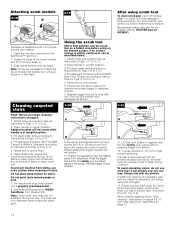
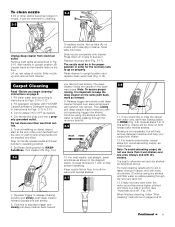
... machine be cleaned and press trigger to 2-15. 5. The hose will only dispense water mixed with HOOVER Bare Floor Cleaner according to instructions for Figs. 2-13 to dispense solution. 7. Using the scrub tool
With a little solution, test the scrub tool on a hidden area before using tool" instructions on page 13.
14 Fill detergent container with detergent. Release trigger...
Manual - Page 15
....
3. Agitator brushes will only dispense water mixed with detergent.
3-22
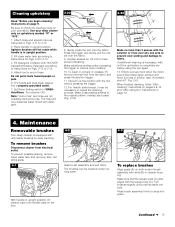
8. Attach tool to snap into place. Empty recovery tank when the motor sound becomes higher pitched and there is in cleaner housing. To remove brushes
Disconnect cleaner from the fabric and press the solution trigger. 11. To prevent possible leaking, remove clean water tank and recovery tank...
Manual - Page 16
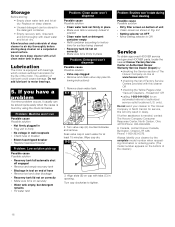
... at least 15 minutes. Problem: Brushes won 't dispense
Possible cause Possible solution • Clean water tank not firmly in place • Make sure tank is equipped with tabs (C) in place
Problem: Detergent won't dispense
Possible cause Possible solution • Valve cap clogged • Remove and clean valve cap (see fol- Allow brushes and underside of deep cleaner to air...
Similar Questions

Why My Fh500fo Will Not Dispense Cleaning Solution? Rinse Brushes Work Fine.
(Posted by wilsoncg34 9 years ago)


Hoover Spin Scrub Max Extract 60 Wont Dispense Cleaning Solution
(Posted by Anonymous-74842 11 years ago)
When You Release Switch To Rinse The Brushes Keep Turning And Dropping Cleaner.
(Posted by haroldwhite 11 years ago)
The Brushes Won't Rotate. Switched The Button To Off - On, Still Won't Rotate.
(Posted by Dlockhart001 11 years ago)