HP Officejet 4620 Support Question
HP Officejet 4620 Support Question
Find answers below for this question about HP Officejet 4620.Need a HP Officejet 4620 manual? We have 3 online manuals for this item!
Question posted by fowlerjam on December 30th, 2013
Cleaning Scanner Glass
How do I clean the INSIDE of the scanner glass ? Easy (obviously) to clean the outside, but I have some lint or dust on the INSIDE surface which is a problem with high resolution scans.
Current Answers
Answer #1: Posted by TommyKervz on December 30th, 2013 9:24 PM
TommyKervz

Member since:
January 10th, 2013 Points: 17,776,793

Member since:
January 10th, 2013 Points: 17,776,793
Greetings.
This document shows how to clean both sides of the HP Officejet G Series products scanner glass. A dirty or blurry scanner glass may cause a deficient scanning quality or even a Scanner failure message on the unit monochrome display warning about the unit being unable to complete the initialization process. This document can be used with the HP Officejet G55, G55xi, G85 and G95 All-in-One products. Figure 1: HP Officejet G SeriesDeclaration Read carefully the following list before following any of the instructions contained in this document:
- If your HP All-in-One product is still within the HP warranty period, please contact HP to return the unit for service.
- To dismantle the scanner glass of an HP All-in-One product which is still under warranty will cause the warranty to be void.
- Please make sure the cleaning is performed in an enclosed environment, and away from any dust source.
- The instructions contained in this document are only intended for glass cleaning. Any further manipulation on scanner itself may cause unpredictable results.
- One screwdriver provided with a T20 screw bit.
- One clean cloth. It is highly recommended a lint-free cloth, as it will not leave any fiber on the glass.
- One Scotch tape (wider than 19 mm. [0.75 inch.]).
- Distilled water, only in case the dirt or haze is not easily removable.
- Turn around the HP Officejet unit. .
- Unplug the ADF (Automatic Document Feeder) cord from the rear of the unit.
- Push the cable up to release it from the hook.
- Turn the unit front facing you and lift up the ADF.
- Use both hands to tightly hold the ADF and lift it vertically up. After this, please remove the ADF from the unit.
- Using one single hand, please hold the control panel bezel as shown in the image below.
- Lift the bottom edge of the control panel bezel to remove it from the unit.
- Look for a hook at the control panel right bottom side as pointed in the image below.
- Push the hook up and then, push the control panel towards your left side.
- Lift the control panel bottom edge up and then, slightly move it towards you in order to get the three hooks off the unit body. WARNING:Be careful, there is one cable connected to the back of the unit control panel. 1 - Hook detail (Left side)
- Flip the control panel over and unplug the cable, then remove the control panel from the unit.
- There are two screws at the back of the unit which stay into two deep wells as shown in the image below. Use the screwdriver to remove both screws and keep them apart.
- Open the print cartridges access door. Looking from below, notice there are two plastic tongues located at the left and the right corner of the front of the unit. 1 - Print cartridges access door2 - Left plastic tongue detail
- Use both index fingers to push the left and right tongues towards you and then push them up to disengage the two snap locks. 1 - Pushing the tongue (Left side)2 - Snap lock (Right side)
- Use both hands to tightly hold the glass bezel and lift it vertically up to remove it from the unit.
- Use the scotch tape (19 to 30 mm. [0.75 to 1.18 inch.] width) to cover the opening of the scanner so no humidity or foreign material can penetrate inside it. See the image below. 1 - Scotch tape covering the scanner opening
- Flip over the glass bezel so the internal surface of the scanner glass can be cleaned easily. Use the cloth to remove the dirt or haze from the scanner glass internal surface. If the dirt or haze cannot be easily removed, distilled water should be used for help. 1 - Scanner glass internal surface NOTE:The amount of distilled water should be just enough to clean the dirt because too much water might leave traces on the glass after it gets dry.A dry cloth should be used to wipe the scanner glass surface off. WARNING:Do not leave the water dry out itself .
- There is a black-and-white strip under the glass. Please make sure the glass area over this strip is completely free of dust and haze by cleaning it using the cloth and, if necessary, distilled water; otherwise it will leave a streak in every scanned image.
- After the cleaning process is complete, please follow the reverse procedure to return the HP All-in-One product to its original status.
Source: https://support.hp.com/us-en/document/c00498704
Related HP Officejet 4620 Manual Pages
Getting Started Guide - Page 14

... a fax from a computer • Send a fax from the receiving fax machine.
14 changing the resolution or contrast or your document print-side down on the
sending the fax, inform the recipient that they ...before sending the fax. fax tones. Send faxes
You can send faxes in a variety of the scanner glass or print-side up in the fax number you can try
right of Black or Color. Load your...
User Guide - Page 5

...Scan to Computer...15 HP Digital Fax (Fax to PC and Fax to Mac 15 Select print media...15 Recommended papers for printing and copying 15 Recommended papers for photo printing 17 Tips for selecting and using media 17 Load an original on the scanner glass...paper 23 Maintain the printer...25 Clean the scanner glass and lid backing 25 Clean the exterior ...26 Clean the ADF...27 Update the printer...
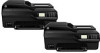
User Guide - Page 13
... details about how to use the printer and how to resolve problems. • Accessibility • Eco • Understand the printer parts • Use the printer control panel • HP Digital Solutions • Select print media • Load an original on the scanner glass • Load an original in the automatic document feeder (ADF...
User Guide - Page 15

... parts
This section contains the following topics: • Front view • Printing supplies area • Back view
Front view
10
9
8 1
7
2
6
3
45
1 Automatic document feeder (ADF) 2 Scanner glass 3 Output tray 4 Output tray extension 5 Input tray 6 Power button 7 Control panel display 8 Control panel 9 Document feeder tray 10 Width guides
Understand the printer parts
11
User Guide - Page 22
... is too lightweight or stretches easily ◦ Media that contains staples or clips
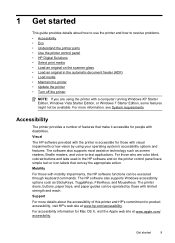
NOTE: To scan, copy, or fax documents that contain pages that do not work correctly if the glass and lid backing are not clean.
Lift the scanner lid. 2. Chapter 1
• Do not overload the tray or ADF.
For more help on...
User Guide - Page 29
...the printer. 2.
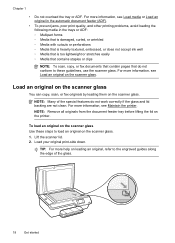
Perform these maintenance procedures as necessary. • Clean the scanner glass and lid backing • Clean the exterior • Clean the ADF
Clean the scanner glass and lid backing Dust or dirt on the scanner glass, scanner lid backing, or scanner frame can slow down performance, degrade the quality of scans, and affect the accuracy of special features such as fitting...
User Guide - Page 30

... that has been sprayed with a dry, soft, lint-free cloth. 5. Clean the exterior WARNING! If too much glass cleaner is applied, the cleaner could leak under the glass and damage the scanner. 4. Dry the glass and lid backing with a mild glass cleaner.
1
2
1 Lid backing 2 Scanner glass
CAUTION: Use only glass cleaner to wipe dust, smudges, and stains off by using a soft...
User Guide - Page 41
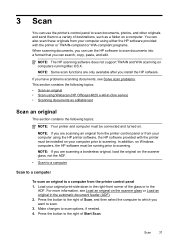
... you have problems scanning documents, see Load an original on a computer. Press the button to the right of Start Scan. NOTE: The HP scanning software does not support TWAIN and WIA scanning on the scanner glass, not the ADF.
• Scan to a computer
Scan to a computer
To scan an original to a computer from your computer using Webscan (HP Officejet 4620 e-All-in...
User Guide - Page 42
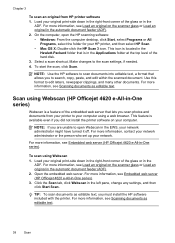
... your computer using Webscan 1. For more information, see Load an original on the scanner glass or Load an original in -One series). 3. For more information, see Embedded web server (HP Officejet 4620 e-All-in the automatic document feeder (ADF). 2. Click the Scan tab, click Webscan in the automatic document feeder (ADF). 2. For more information, see...
User Guide - Page 43
... corner of the hard disk. 3.
To start the scan, click Scan. For more information, see Load an original on the scanner glass or Load an original in the Applications folder at the top level of the glass or in the scan:
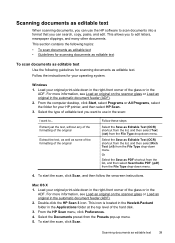
I want to use the HP software to scan documents into a format that you can search, copy...
User Guide - Page 44
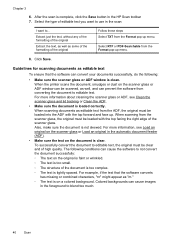
.... When the printer scans the document, smudges or dust on the scanner glass or Load an original in the foreground to ... When scanning from converting the document to use in the HP Scan toolbar 7. Select the type of high quality. For more information about cleaning the scanner glass or ADF, see Load an original on the scanner glass or ADF window can...
User Guide - Page 46
... Color Copy. NOTE: If you are copying a photo, place the photo on the scanner glass face down on the scanner glass or face up in the ADF.
This section contains the following :
• Number of...document when a fax arrives, the fax is stored in the main tray. 4 Copy
You can produce high-quality color and grayscale copies on a variety of fax pages that can make quality copies from the ...
User Guide - Page 49
..., see Load an original on to tone prompts while dialing.
If this is turned on the scanner glass or Load an original in the fax number you are also useful when you want to use ...To add a pause in the automatic document feeder (ADF). 2. Send a fax You can try changing the resolution or contrast of your fax. TIP: You can create a speed dial entry to hear dial tones, telephone prompts...
User Guide - Page 50
...your original on the scanner glass, select Fax from Glass. 3. Load your originals. Scroll to select the speed dial entry where you to and select Scan and Fax. 4. The printer scans the originals into memory...are trying to select a number from the document feeder tray or scanner glass. From the Home screen on the scanner glass or Load an original in the automatic document feeder (ADF). ...
User Guide - Page 52
...Start Fax, and then press the button to and select Phone Book, and then select the recipient group. 3. The printer scans the fax into group speed dial entries. If a connection cannot be called Properties, Options, Printer Setup, Printer, or Preferences... dial entries to multiple recipients using the installation program provided on the scanner glass or Load an original in your originals.
User Guide - Page 96
... the ADF width adjusters are snug against the sides of the original. Try cleaning the printer. The accuracy of Fast (which produces draft-quality copies) might be closed correctly. • The scanner glass or lid backing might be able to resolve poor quality copy problems. For more information, see Change copy settings.
92
Solve...
User Guide - Page 98

... a problem Scan takes too long Check the settings ◦ If you set to scan from the scanner glass. You can lower the resolution to scan more information, see Load an original on the scanner glass or Load... the TWAIN program for the original that scanning is enabled in the HP printer software might be set the resolution too high, the scan job takes longer and results in the automatic...
User Guide - Page 101
... dirty. Graphics look different from the original Scan at high resolution can take a long time, and it
might skew, which causes unclear images. Be sure to use the scanned page. ◦ Use or make a carrier sheet to protect your computer. Try cleaning the scanner glass and lid backing. Solve scan problems
97 If the media is placed correctly. For...
User Guide - Page 220

See ink cartridges clean automatic document
feeder 27 exterior 26 printhead 126 scanner glass 25 clear fax logs 65 color copy 42 colored...problems,
troubleshoot 27 load originals 19 media sizes supported 143 automatic fax reduction 53
B
backup fax 51 baud rate 63 black and white pages
copy 42 fax 44 black dots or streaks, troubleshoot copies 92 scan 97 blank pages, troubleshoot copy 91 print 85 scan...
User Guide - Page 223
... reprint faxes from memory 52 rings to answer 60
S
save faxes in memory 51
scan error messages 96 from printer control panel 37 from Webscan 38 OCR 39 quality 96 scan specifications 147 slow 94 troubleshoot 93
scanner glass clean 25 load originals 18 locating 11
schedule fax 46 send faxes
basic fax 45 manually...
Similar Questions

Where To Get Staples For A Hp Laserjet M4345mfp Multifunction Device
(Posted by jrodrarmand 9 years ago)

Hp Officejet 4620 How To Enlarge A Scan To Computer
(Posted by stufscolt 10 years ago)
How To Clean An Adf Scanner Of An Hp Officejet 4620
(Posted by snahJmars 10 years ago)

How To Scan High Resolution Picture In Hp Officejet 6500
(Posted by wanha 10 years ago)

4620 Officejet Starts Page Print Fine But Trails Off To Blank; New Ink Cartridge
Bought HP 4620 printer 12/8/12. Was able to set up wirelessly without a problem. Read instructions ...
Bought HP 4620 printer 12/8/12. Was able to set up wirelessly without a problem. Read instructions ...
(Posted by murphaleen 11 years ago)