Get support for HP 15-d074nr

HP 15-d074nr Support Question

HP 15-d074nr Support Question

Find answers below for this question about HP 15-d074nr.
Need a HP 15-d074nr manual? We have 6 online manuals for this item!
Question posted by rocky5824 on June 29th, 2015

Screen Will Not Turn On.

I recently purchased the HP 5 d074nr and have now had issues with the computer turning on completely. It makes sounds, the wifi light turns on as well as the charging light, but screen remains off. Any help would be appreciated. -Rocky

Current Answers

Answer #1: Posted by TechSupport101 on June 30th, 2015 1:04 AM
This answer was accepted by the poster of the original question.
TechSupport101

Member since:
May 24th, 2013

Points: 12,171,305
1,100
points
Follow the steps in this document to resolve an issue with the screen remaining blank after the computer is turned on. If the computer does not turn on (no lights or sounds) or the screen is displaying an error message, see Computer Does Not Start.

This video shows how to troubleshoot your notebook computer when it starts but the screen remains blank

Click here to see this video in full screen on YouTube.

Step 1: Performing a hard reset to resolve a blank screen

Completely resetting the computer can resolve many issues that cause a blank screen. Follow these steps to perform a hard reset:
  1. Turn off the computer.
  2. Disconnect all peripheral devices and remove all USB devices and media cards.
  3. Disconnect the AC power adapter and remove the battery.
  4. Press and hold the power button for at least 15 seconds.
  5. Reconnect the AC power adapter, but do not connect the battery.
  6. Turn on the computer.If the blank screen issue is resolved, you are done.If the screen is still blank, continue with the next step to connect an external monitor to test the display.

Step 2: Connecting an external monitor to test the display

The notebook's screen display may remain black when there is a corrupted graphics driver, or a problem with the LCD display's back light. You can test the display by attaching an external monitor and restarting the computer. Testing with an external display is helpful if the notebook display is black but you can hear sounds; such as fans, spinning drives, or beep tones which indicate that the computer is operating. If you can hear sounds of operation but no image is visible on either display, contact an authorized repair center.
  1. If you are having trouble viewing the external monitor, press F4 (or the key with this symbol ) to switch the screen image among display devices connected to the system.
  2. If an image displays on the external monitor, there may be a graphics driver conflict with the notebook's LCD display. With the external monitor connected, go to the HP Support Software & Driver Download page to download and install the latest drivers for your specific computer and graphic chip set.

If there is an image on the external monitor and you have installed the latest BIOS, updated CPU chips set, and updated graphics drivers but the notebook display remains black, the LCD may be defective. It may be necessary to contact HP for technical assistance or send the notebook for service to replace the display.

Step 3: Recovering the notebook BIOS using a key press combination

When you upgrade the BIOS on your notebook, a copy of the previous BIOS version is stored in the HP TOOLS partition of your hard drive. Many HP notebook computers have an emergency BIOS recovery feature that allows you to recover and install the last known good version of the BIOS from the hard drive, as long as the hard drive remains functional. This emergency recovery feature is separate from the BIOS and is designed to work in the event of a catastrophic BIOS failure.

You can use these steps even though you will not be able to see anything on the monitor.

To recover an earlier version of the BIOS on your notebook:

  1. Turn off the computer.
  2. Plug the notebook into power using the power adapter.
  3. Press and hold the Windows key and the B key at the same time while the computer is off.
  4. While still pressing the Windows key and the Bkey, hold down the Power button on the notebook for one second, and then release the Power button and the keys .The Power LED light remains on, and the screen remains blank for about 40 seconds. You might hear beeping sounds. Eventually, an HP BIOS Update screen displays and the BIOS update begins automatically.If the screen is still blank, continue with the next step to reseat the memory modules.

Step 4: Reseating the memory modules to resolve a blank screen

A computer may not display an image if a memory module is loose. Reseating the memory modules may resolve blank screen issues. To reseat the memory module, take the memory module out of the memory slot and then put it back into the slot to get a better connection so that the computer can recognize the memory.

Use the following steps to remove and reseat the memory modules:

note: These steps will work for most notebook computer models. To find steps for your specific computer, enter your computer model number and replace memory into the search field at the top of this window. For example, if you have an HP Mini 210-3000, you would search for 210-3000 replace memory. If you cannot find a memory replacement procedure for your computer module, check the User Guides.
  1. Remove electrical power To remove all power from the computer and prevent accidental damage to the electronic components, do the following:
    1. Turn off the computer by pressing and holding down the Power button for about 30 seconds.
    2. Unplug the AC adaptor from the notebook.
    3. Slide and hold the battery release latch to the unlock position.
    4. Use your finger to lift the battery up and out.
  2. Remove the memory module Follow these steps to remove and reseat the memory module:
    1. Follow these steps to remove and reseat the memory module:Remove the memory module cover on the bottom of the notebook.
      1. Loosen the compartment's retention screws
      2. Lift up and remove the memory compartment cover
    2. Remove the memory modules from the memory slots.
      1. Pull the retention clips away from sides of the memory module
      2. Gently pull the module out of the memory module slot
caution: To prevent damage to the memory module, grasp the memory module by the side edges. Do not touch the metal contacts.
  • Reseat the memory module by holding module at a 45-degree angle, and pressing it firmly into the memory slot until it is seated.
    1. Align the notched edge of the module with the tab in the slot.
    2. Firmly press the module into the slot.
    3. Pivot top edge of memory module downward until retention clips snap into place.
  • After reseating the memory module, replace the cover over the memory compartment before restarting the computer.
    1. Align the cover tabs
    2. Tighten the memory compartment cover screws
  • Replace electrical power When troubleshooting problems, use only the AC power to perform the tests. After the problem is resolved, you can turn off the computer and insert the battery into the notebook.
    1. Plus the connection from the AC adapter into the notebook, and then connect the AC adapter to a working power supply.
    2. Perform any tests to verify the computer can startup and run in the Windows operating system.
    3. With the computer turned off, push the battery into the base enclosure until the retention clips click into position.
    If the computer fails to boot to the Windows desktop after the memory is reseated and the battery is installed, contact HP for support.
  • Related HP 15-d074nr Manual Pages

    User Guide - Ubuntu - Page 6

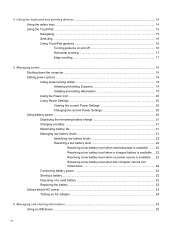
    ...14 Using the action keys ...14 Using the TouchPad ...15 Navigating ...15 Selecting ...16 Using TouchPad gestures 16 Turning gestures on and off 16 Horizontal scrolling 17 Edge ...Settings 20 Changing the current Power Settings 20 Using battery power ...20 Displaying the remaining battery charge 21 Charging a battery ...21 Maximizing battery life ...21 Managing low battery levels 21 Identifying...
    User Guide - Ubuntu - Page 23

    ...screen image alternates from the computer display to the monitor display to go. Navigating To move the on-screen... pointer, slide one finger across the TouchPad in the direction you to the system. Most external monitors receive video information from the computer. f11 Mutes or restores speaker sound... screen ...Turns the wireless feature on both the computer and the monitor. Using the...
    User Guide - Ubuntu - Page 60

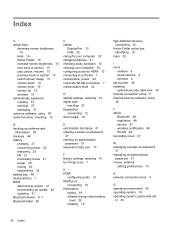
    ... screen brightness 14 Help 14 Home Folder 15 increase screen brightness 14 next track or section 15 play, pause, resume 15 previous track or section 15 switch screen image 15 volume down 15 volume mute 15 volume up 15 wireless 15 ... 12 drive media 19 B backing up software and information 39 backups 44 battery charging 21 conserving power 22 disposing 23 life 21 low battery levels 21 power 20 ...
    HP 15 Notebook PC HP 15 TouchSmart Notebook PC Compaq 15 Notebook PC Compaq 15 TouchSmart Notebook PC HP 250 G2 Notebook PC HP 2 - Page 9

    ... HM76 Express Chipset models Category Description Product name HP 15 Notebook PC HP 15 TouchSmart Notebook PC Compaq 15 Notebook PC Compaq 15 TouchSmart Notebook PC HP 250 G2 Notebook PC Processors Intel i5-3230M ... Chipset models 1 typical brightness: 200 nits Touchscreen, 39.6-cm (15.6-in ), high-definition (HD), light-emitting diode (LED), SVA BrightView (1366×768) display;
    HP 15 Notebook PC HP 15 TouchSmart Notebook PC Compaq 15 Notebook PC Compaq 15 TouchSmart Notebook PC HP 250 G2 Notebook PC HP 2 - Page 12

    ... Category Product name Processors Chipset Graphics Panel Description HP 15 Notebook PC HP 15 TouchSmart Notebook PC Compaq 15 Notebook PC Compaq 15 TouchSmart Notebook PC HP 250 G2 Notebook PC Intel Pentium N3520 processor ...7.5 W) Bay Trail UMA graphics: Intel HD graphics 39.6-cm (15.6-in), high-definition (HD), light-emitting diode (LED), SVA BrightView (1366×768) display; UMA √ Touch...
    HP 15 Notebook PC HP 15 TouchSmart Notebook PC Compaq 15 Notebook PC Compaq 15 TouchSmart Notebook PC HP 250 G2 Notebook PC HP 2 - Page 15

    ...; WLAN module Non-touch; Non-touch; UMA √ √ √ √ √ √ AMD models Category Description Product name HP 15 Notebook PC HP 15 TouchSmart Notebook PC Compaq 15 Notebook PC Compaq 15 TouchSmart Notebook PC HP 255 G2 Notebook PC Processors AMD A6-5200 (2.0 GHz, 2 MB cache, 25W AMD A4-5000 (1.5 GHz, 2 MB cache, 15W...
    HP 15 Notebook PC HP 15 TouchSmart Notebook PC Compaq 15 Notebook PC Compaq 15 TouchSmart Notebook PC HP 250 G2 Notebook PC HP 2 - Page 28

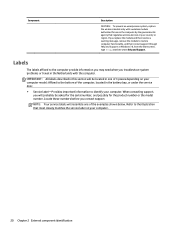
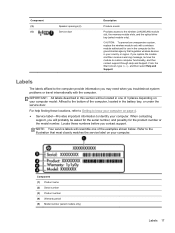
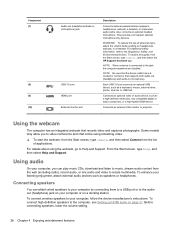
    ... 2 External component identification Refer to restore computer functionality, and then contact support through Help and Support. NOTE: Your service labels will probably be located in your country or region. In Windows 78, from the Start screen, type help, and then select Help and Support. If you contact support. Component Description CAUTION: To prevent an...
    HP 15 Notebook PC HP 15 TouchSmart Notebook PC Compaq 15 Notebook PC Compaq 15 TouchSmart Notebook PC HP 250 G2 Notebook PC HP 2 - Page 131

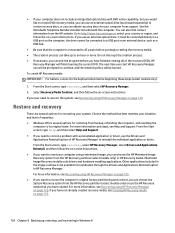
    ... to create system restore points and create backups of HP Recovery media can use rewritable discs such as CD±RW, DVD±RW, double-layer DVD±RW, or BD-RE (rewritable Blu-ray) discs; From the Start screen, type help, and then select Help and Support. Creating recovery media and backups 123...
    HP 15 Notebook PC HP 15 TouchSmart Notebook PC Compaq 15 Notebook PC Compaq 15 TouchSmart Notebook PC HP 250 G2 Notebook PC HP 2 - Page 132

    ...have created. For more information, see Recovering using HP Recovery Manager on page 125. From the Start screen, type help, and then select Help and Support. ● If you use an ...external optical drive (purchased separately) to create recovery discs, or you can choose the HP Minimized Image Recovery option from the HP Recovery partition (select models only) or HP Recovery media. Do...
    User Guide - Windows 8.1 - Page 12

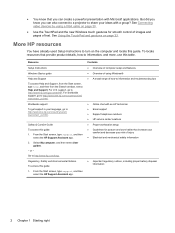
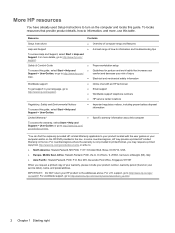
    ...screen, type support, and then select the HP Support Assistant app. 2. From the Start screen, type support, and then select the HP Support Assistant app. More HP resources You have already used Setup Instructions to turn...Instructions Windows Basics guide Help and Support To access Help and Support, from the Start screen, type help, and then from the Search window, select Help and Support. &#...
    User Guide - Windows 8.1 - Page 25

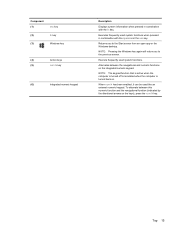
    ... Windows desktop. NOTE: Pressing the Windows key again will return you to the previous screen. NOTE: The keypad function that is active when the computer is turned off is reinstated when the computer is turned back on the keys), press the num lk key. Component (1) esc key (2)...directional arrows on . When num lk has been enabled, it can be used like an external numeric keypad. Top 15
    User Guide - Windows 8.1 - Page 27

    ... label-Provides important information to restore computer functionality, and then contact support through Help and Support. For help , and then select Help and Support. From the Start screen, type help finding these numbers before you replace the module and then receive a warning message... bay (select models only). Component (5) (6) Speaker openings (2) Service door Description Produce sound.
    User Guide - Windows 8.1 - Page 29

    ... HP Mobile Broadband Module (select models only)-A wireless wide area network (WWAN) device that world. In a WLAN, the mobile wireless device in your computer are enabled at the factory, you turn... or more of wires. From the Start screen, type help you wireless connectivity over a much larger area. NOTE: On some models, the wireless light is on. All of websites using these ...
    User Guide - Windows 8.1 - Page 30

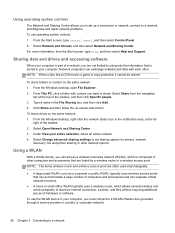
    ... is composed of a network, you are linked by a wireless router or a wireless access point. To share folders or content on -screen instructions. Select Share from the Start screen, type help, and then select Help and Support. Click Share and then follow the on the same network: 1. From the Windows desktop, right-click the network...
    User Guide - Windows 8.1 - Page 32

    ... the WLAN you to manually search for HP Mobile Broadband is a cellular phone network operator... the list. 5. Some networks use WWANs to complete the connection. Type the code, and then click...light is off . 2. Wireless encryption uses security settings to protect your WLAN from more information, from the Start screen, type help, and then select Help and Support. From the Start screen...
    User Guide - Windows 8.1 - Page 38

    ... optional video or audio device, such as speakers or headphones. From the Start screen, type help, and then select Help and Support. To reduce the risk of applications. To access this guide, from... USB port or to music, stream audio content from the Start screen, type support, and then select the HP Support Assistant app. WARNING! For details about using streaming video. ▲...
    User Guide - Windows 8.1 - Page 81

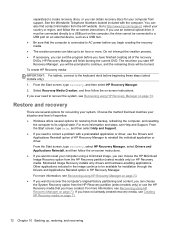
    ... personal information. See Creating HP Recovery media on the computer. From the Start screen, type help, and then select Help and Support. Handle these ...HP Recovery media can use rewritable discs such as CD±RW, DVD±RW, double-layer DVD±RW, or BD-RE (rewritable Blu-ray) discs; For more information and steps, see Help and Support. Do not use an external optical drive (purchased...
    User Guide - Windows 8.1 - Page 82

    ... screen, type help, and then select Help and Support. ● If you can take up , restoring, and recovering Do not interrupt the creation process. ● If necessary, you need to an hour or more information and steps, see Recovering using HP Recovery Manager on the computer; From the Start screen, type recovery, and then select HP...
    User Guide - Windows 8.1 - Page 90

    ... 22 Z zooming touch screen gesture 41 zooming TouchPad gesture 35 V vents, identifying 16 VGA port, connecting 30 video 30 W webcam identifying 8, 9, 25, 27 using 28 webcam light, identifying 8, 9, 25..., 27 Windows File History 72 restoring files 72 system restore point 71 Windows key, identifying 14, 15 Windows passwords 64 Wireless Assistant ...
    User Guide - Windows 7 - Page 12

    ... on your service label), name, and postal address. More HP resources You have already used Setup Instructions to turn on the computer and locate this table. IMPORTANT: Do NOT return your HP product to information and troubleshooting tips To access Help and Support, select Start > Help and Support. For more , use this guide. Resource Contents...

    Similar Questions

    Ask a New Question
    Use the box below to post a new question about this HP product .
    Points & Prizes
    • You can earn points for nearly everything you do on HelpOwl.com
    • You can trade in those points for gift cards at leading retailers such as Amazon.com and Walmart
    • It's that simple!
    See How it Works
    Create a Free Account

    HP Manuals

    Find free HP 15-d074nr manuals and user guides available at ManualOwl.com. Try out our unique manual viewer allowing you to interact with manuals from directly within your browser!

    HP Reviews

    View thousands of HP user reviews and customer ratings available at ReviewOwl.com.

    Contact Information

    Complete HP customer service contact information including steps to reach representatives, hours of operation, customer support links and more from ContactHelp.com.

    Scoreboard Ratings

    See detailed HP customer service rankings, employee comments and much more from our sister site.

    HP Recalls

    Find comprehensive HP recall information updated hourly on RecallOwl.com.