Get support for Harbor Freight Tools 61969 - 12 in. Double-Bevel Sliding Compound Miter Saw

Harbor Freight Tools 61969 Support Question

Harbor Freight Tools 61969 Support Question

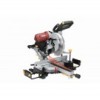
Find answers below for this question about Harbor Freight Tools 61969 - 12 in. Double-Bevel Sliding Compound Miter Saw.
Need a Harbor Freight Tools 61969 manual? We have 1 online manual for this item!
Question posted by Chetmaniak on May 30th, 2023

How Do I Change The Turn Table Plates

how do I change turntable plate

Current Answers

Answer #1: Posted by SonuKumar on May 30th, 2023 7:40 PM
This answer was accepted by the poster of the original question.
SonuKumar

Member since:
May 9th, 2021

Points: 16,648,060
1,110
points
To change the turntable plates on the Harbor Freight Tools 61969, you can follow these steps:

Ensure safety: Make sure the turntable is turned off and unplugged from the power source. This will help prevent any accidental injuries during the plate replacement process.

Locate the retaining clips: The turntable plates are typically held in place by retaining clips or similar mechanisms. Locate these clips or mechanisms on the underside of the turntable.

Release the retaining clips: Depending on the specific design of the turntable, you may need to press or lift the retaining clips to release them. This will allow you to remove the existing turntable plates.

Remove the old plates: Once the retaining clips are released, carefully lift and remove the old turntable plates from the turntable. Be cautious not to damage any other components or wiring while doing this.

Clean the turntable: Before installing the new plates, take a moment to clean the turntable surface. Wipe away any debris or residue to ensure a clean and smooth surface for the new plates.

Install the new plates: Take the new turntable plates and align them with the appropriate slots or mounting points on the turntable. Gently press them down to secure them in place.

Engage the retaining clips: Once the new plates are installed, engage the retaining clips or mechanisms to secure them. This may involve pressing or sliding the clips back into position to hold the plates securely.

Test the turntable: After replacing the turntable plates, plug the unit back in and turn it on to ensure that it operates properly. Verify that the new plates are rotating smoothly and evenly.

If you encounter any difficulties during the plate replacement process or have concerns about the specific instructions for the Harbor Freight Tools 61969 turntable, it is recommended to consult the user manual provided with the product or reach out to Harbor Freight Tools customer support for further assistance.


Please respond to my effort to provide you with the best possible solution by using the "Acceptable Solution" and/or the "Helpful" buttons when the answer has proven to be helpful.

Regards,
Sonu
Your search handyman for all e-support needs!!

Related Harbor Freight Tools 61969 Manual Pages

User Manual - Page 1

... THIS MANUAL. Due to do so can result in the back of the manual near the assembly diagram (or month and year of Harbor Freight Tools. ITEM 61969 12" DOUBLE-BEVEL SLIDING COMPOUND MITER SAW WITH LASER GUIDE REV 14e Note: Blade sold separately. All rights reserved. Write the product's serial number in serious injury. Keep this product. Copyright...
User Manual - Page 2

... situation which , if not avoided, will result in death or serious injury. Item 61969 Indicates a hazardous situation which , if not avoided, could result in death or serious injury. Addresses practices not related to avoid possible injury or death. Table of Contents Safety 3 Specifications 6 Setup 7 Operation 10 Maintenance 14 Parts List and Diagram...
User Manual - Page 3

... 8. MAINTAIN TOOLS WITH CARE. Keep tools sharp and clean for lubricating and changing accessories. 15. when changing accessories, such...tool is tipped or if the cutting tool is in moving parts, breakage of injury to see that keys and adjusting wrenches are NOT safety glasses. 12. TURN...cord will operate properly and perform its operation. Table A shows the correct size to determine that ...
User Manual - Page 4

...Miter Saw Safety Warnings For Your Own Safety Read Instruction Manual Before Operating Miter Saw 1. Item 61969... electric shock, double insulated equipment has...Turn off . 12. Disconnect power before moving workpiece or changing settings. 7. Coasting Cutting Tool Can Be Dangerous - Always use of accessories or attachments not recommended by the manufacturer may be used in either of the saw...
User Manual - Page 5

... should consult their physician(s) before turning on the tool. 28. If any medical or...sawing, grinding, drilling, and other reproductive harm. Do not smoke during operation. 23. Let the tool do this product contains lead, a chemical known to the State of vibration-related injury: 1. SAFETY SETUP Miter Saw Safety Warnings (cont.) 22. Vibration Safety This tool...
User Manual - Page 6

Accessory Diameter 12" Arbor 5/8″ Round with 1″ Adapter 90° Straight 3-1/2″ x 13-3/8″ Cutting 45° Miter Capacities 45° Straight Bevel 3-1/2″ x 9-1/2″ 2-1/8″ x 13-3/8″ 45° Compound (L/R) 2-1/8″ x 9-1/2″ 216045 Caution: Use of controls or adjustments or performance of optical instruments with this opening....
User Manual - Page 7

... the tool from its electrical outlet before performing any procedure in place. 3. SETUP OPERATION MAINTENANCE Item 61969 For technical questions, please call 1-888-866-5797. Thread the Miter Knob into the holes in place. TO PREVENT SERIOUS INJURY FROM ACCIDENTAL OPERATION: Turn the Power Switch of the saw . Assembly 1. Insert the ends of the Table Extensions...
User Manual - Page 8

Item 61969 SAFETY SETUP Functions Dust Collection Bag Slide Lock Knob Bevel Angle Indicator Bevel Lock Knob Fence Table Extension Trigger Lock Turntable Trigger Lock Trigger Lower Guard Blade Clamp Miter Scale Kerf Board Miter Lock Miter Knob OPERATION MAINTENANCE Page 8 For technical questions, please call 1-888-866-5797.
User Manual - Page 9

... forth for chopping cuts. Do not interfere with shallow groove to its safety position. Loosen this to slide. Guard operation: When the Handle is raised the Lower Guard returns to unlock cutting head. Item 61969 For technical questions, please call 1-888-866-5797. Note: Additional functions are explained elsewhere in the manual...
User Manual - Page 10

... ACCIDENTAL OPERATION: Turn the Power Switch of the tool off and unplug the tool from its electrical outlet before using the saw ′s head and hold it in the Spindle Lock (150) on the Spindle. SETUP OPERATION MAINTENANCE Figure A Page 10 Figure B 7. Replace the Outer Flange and Spindle Bolt. Rotate the Guard Pivot Plate (132...
User Manual - Page 11

... 45º miter cuts to the cutting angle. If it with the table, and so that the bevel angle is at an angle across the horizontal surface of the saw. 2. If the... table will lock into position by turning it will make a chamfered end. 1. Loosen the Miter Knob by rotating the Bevel Lock Knob clockwise. Compound angle cuts are level with a miter cut in combination with the Table,...
User Manual - Page 12

... change the setting, first loosen the knurled Depth Stop Nut on the same level as the saw table....61969 Only adjust the front Bolt. Pull down , see page 9. 2. The power cord must not allow the Bolt to support the workpiece. Mount the Miter Saw... Lock-down on the same level, unwanted bevel angles will also improve cutting accuracy by children... it . Turn the Depth Stop Bolt clockwise to ...
User Manual - Page 13

MITER SAWS CAN QUICKLY AMPUTATE FINGERS IF MISUSED. Make sure all adjustment knobs are tight (Miter Knob, Bevel Lock Knob, Fence and Table Extension Knobs). 3. When the cut is level and supported securely, use saw horses or supports if necessary. 7. Clean, then store the tool indoors out of cutting area. 1. Note: If the laser guide line does not...
User Manual - Page 14

...table with one last time, then proceed to work . The Fence is held in a miter or bevel...Saw Blade. 1. Figure E: Left Fence Adjusting Screw Access 5. AFTER USE, wipe external surfaces of the tool. Checking and Calibrating the Fence The Fence holds the workpiece in a fixed position while the Table... OPERATION: Turn the Power Switch of the tool off and unplug the tool from the...
User Manual - Page 15

... Screw (63) on the back near the Bevel Locking Lever. To adjust the Kerf Board: 1. Loosen the Bevel Lock and set the Bevel Angle at exactly 90º. 3. Item 61969 For technical questions, please call 1-888-866-5797. SAFETY SETUP OPERATION Figure F: Miter Table Angle Indicator Adjustment Calibrating the Bevel Angle For making any adjustment to the...
User Manual - Page 16

...of cut . Material must be flat on table, flush against Fence and supported on Table. Check condition of material and check compatibility...as 1/4″ plywood, underneath or behind the material to material. 1. Item 61969 Depth Stop setting in . 1. SETUP OPERATION MAINTENANCE Page 16 For technical ...saw . Tool operates sporadically or at ends when cut completely through workpiece....
User Manual - Page 17

...10 Cross Pan Head Bolt 6 Table Extension 7 Table Extension Plate 8 M6×20 Wing Screw 9 M6 Nut 10 Ø6 Flat Washer 11 Fence 12 Square Washer 13 Lock Washer 14...32 Turntable 33 Miter Indicator 34 Ø8 Fender Washer 35 M8 Nut 36 Bevel Scale 37 Ø2×4 Rivet Qty 1 4 1 2 15 2 2 5 4 10 1 2 2 2 2 2 4 1 1 2 2 2 1 1 1 1 1 1 1 1 8 1 1 2 2 1 2 Part Description 38 Bevel Hinge...
User Manual - Page 18

...61969...89 Connecting Bar Screw 90 M4×12 Cross Pan Head Bolt 91 Spindle 92 ... 128 Lower Guard Coil Spring 129 Lower Guard Washer 130 Rubber Stopper 131 M6×7 Flat Head Bolt 132 Guard Pivot Plate 133 Lower Guard 134 Turntable Plate Qty 1 1 1 1 1 0 1 6 8 8 1 1 1 1 1 2 1 1 1 1 2 1 2 1 1 1 1 1 2 2 2 4 1 1 1 2 1 1 1 1 ...168 Cable Clamp 169 Grommet 170 Slide Rail Cover 171 5×40 Roll...
User Manual - Page 19

Page 19 MAINTENANCE Assembly Diagram (1 0) SAFETY SETUP OPERATION 173 64 191 63 190 189 188 187 186 185 184 192 183 182 181 180 179 178 177 176 126 125 156 157 158 159 160 164 163 Item 61969 For technical questions, please call 1-888-866-5797.
User Manual - Page 20

... effort to assure that its products meet high quality and durability standards, and warrants to lack of our product. Limited 90 Day Warranty Harbor Freight Tools Co. This warranty does not apply to damage due directly or indirectly, to misuse, abuse, negligence or accidents, repairs or alterations outside our facilities, criminal...

Similar Questions

Measurements For Connecting Bar For 61969 - 12 In. Miter Saw
61969 - Chicago Electric 12 in. Double-Bevel Sliding Compound Miter Saw.I bought this miter saw but ...
(Posted by mathewpatterson 2 years ago)
Need 102 Outer Fllange For Chicago Electric 10” Sliding Compound Miter Saw Ite
looking for outer flange for Chicago electric 19" sliding compound miter saw item 61972
(Posted by nelliethedog1 2 years ago)
Ask a New Question
Use the box below to post a new question about this Harbor Freight Tools product .
Points & Prizes
  • You can earn points for nearly everything you do on HelpOwl.com
  • You can trade in those points for gift cards at leading retailers such as Amazon.com and Walmart
  • It's that simple!
See How it Works
Create a Free Account

Harbor Freight Tools Manuals

Find free Harbor Freight Tools 61969 - 12 in. Double-Bevel Sliding Compound Miter Saw manuals and user guides available at ManualOwl.com. Try out our unique manual viewer allowing you to interact with manuals from directly within your browser!

Harbor Freight Tools Reviews

View thousands of Harbor Freight Tools user reviews and customer ratings available at ReviewOwl.com.

Contact Information

Complete Harbor Freight Tools customer service contact information including steps to reach representatives, hours of operation, customer support links and more from ContactHelp.com.

Scoreboard Ratings

See detailed Harbor Freight Tools customer service rankings, employee comments and much more from our sister site.

Harbor Freight Tools Recalls

Find comprehensive Harbor Freight Tools recall information updated hourly on RecallOwl.com.