Haier HWM5TL Support Question
Haier HWM5TL Support Question
Find answers below for this question about Haier HWM5TL.Need a Haier HWM5TL manual? We have 1 online manual for this item!
Question posted by philreid on March 28th, 2012
How Do You Remove The E2 Symbol
The person who posted this question about this Haier product did not include a detailed explanation. Please use the "Request More Information" button to the right if more details would help you to answer this question.
Current Answers
Related Haier HWM5TL Manual Pages
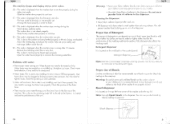
User Manual - Page 1
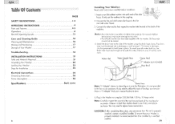
... Weight (about) Dimension mm (I x w x h)
450W 300W 37kg 540 x 560x940
Haler®
e- ..
Specifications
Model
X0150-31A
Rated voltage . Special No: 0030503068
Model XQJ50-3114 i-sbe-k
Clothes Washer
El
User Manual-
User Manual - Page 2
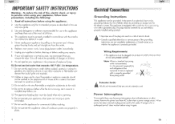
... Improper use in this appliance and keep them out of the reach of the
consumer to remove clothes while the tub is properly grounded. Wiring Requirements:
• This appliance must be grounded...to the wash. 14. Use only detergents or softeners recommended for a prolonged period, clean washer before using the appliance.
2. Do not use this appliance till all enclosure panels are ...
User Manual - Page 3
....
25. This will let the trapped hydrogen escape. Do not tamper with the correct electrical supply.
22. SAVE THESE INSTRUCTIONS
25
2 DO NOT CUT OR REMOVE THE GROUNDING PLUG. This could be explosive and can explode.
24. Do not repair or replace any part of shock and fire. English
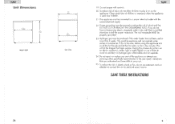
Unit Dimensions...
User Manual - Page 4
.... Install the drain hose to utilize this type of at the back of the washer using the drain hose clamp. To avoid passible water back up, the drain hose...placed into each end of the inlet hoses. If you can purchase a "Y Adapter" from your Washer is properly installed it is only for Installation Electrical Connections Grounding Instructions Power Interruptions Specifications
3
PAGE
1-2
...
User Manual - Page 5
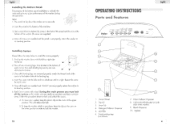
...
4. Agitator
4
You will release the lock. One located at one place and does not move your washer, keep the clip on its standing position.
6. Steps: 1. Insert the panel to the bottom of the washer. (8 screws are removed properly, match the thread shaft of the castor to the bottom hole of each corner. Once...
User Manual - Page 6

... is at room temperature.
Leveling Your Washer
• Your washer has 4 leveling legs; After properly placing your washer in its final position, you can level your washer or turning them clockwise to vibration and shock.
• Inspect and remove any remains of the washer.
• The washer must not place washer where the temperature is used to secure...
User Manual - Page 7
...
4111, •
,,,:,,,,-.1, ,, C. English
INSTALLATION INSTRUCTIONS
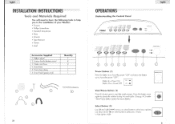
Tools and Materials Required
You will need to have the following tools to help you in the installation of your Washer: • Scissors • Phillips Screwdriver • Standard Screwdriver • Pliers • Wrench • Tape Measure • Gloves • Level
Accessories Supplied 1. Screws for the bottom...
User Manual - Page 8

...Softener Dispenser
It is due to incorrect use of the agitator. Never add undiluted bleach to remove small loose sharp objects. C) (See pg. #10 under "Selecting Wash Cycle" section ...Clothes are three temperature choices in recommended liquid fabric softener into dispenser.
7
Washer is making noise: • Washer may need to add detergent as pins and belt buckles being filled with ...
User Manual - Page 9
... with water, before you are three temperature choices in the tub. you may need to remove small loose sharp objects. Check if you load your clothes to avoid soap residue on clothes...Squealing Sound: Due to overloaded wash tub. • Vibration Noise: Due to not leveling the washer properly on the container and follow proper directions for more details)
nrwusl•sc. Read instructions ...
User Manual - Page 10
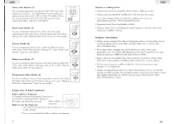
... chemical.
Straighten up on, or in the dispenser.
Warning: Be careful not to not having constant water pressure.
Close the washer door properly to balance the washer. E2 - This is located on the washer cabinet
or your clothes.
• Use only a liquid form of the control panel. E4 - Check water level selection, it is...
User Manual - Page 11
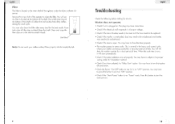
... for a very short period of the agitator to detach from dirty clothes during the wash cycle. Washer does not operate: • Check if unit is plugged in the heavy and normal cycle,
where...the wash process.
18 You may have selected the "Delay Start" option.
This is normal in . Remove the inner shaft of time. You may hove to turn that option off and restart. • Check ...
User Manual - Page 12
...vibration and shock.
If you are at the bottom to prevent internal parts from shaking when the washer is approximately 97 to water leakage if the hoses accidentally get ruptured or they become loose. &#...down arrow( y ) one time on the fabric type. This cycle is used to secure the washer from four fabric care wash cycles: Heavy, Normal, Gentle and Quick Wash. English Moving & ...
User Manual - Page 13
... sharp objects from wear and tear. Over time, they may result in a sink or remove debris with light soiled clothes and delicate items. With Gentle wash speed, the agitator moves ...injury or product damage. DO NOT USE YOUR WASHER WITHOUT THE LINT FILTER IN PLACE. • The Detergent Dispenser Compartment and fabric softener dispenser are removable. Clean it can change this warning may ...
User Manual - Page 14
...8226;
section of the washer:
a
• Air rushing noise: This happens when the Washer tub spins at "Medium" position. Note: We suggest that the large heavily soiled laundries should be placed in succession... Process: 1. When selecting wash cycle and wash cycle options (Process Mode),
please refer to remove soil and the odor of the detergent from the clothes by the spinning of the drum at...
User Manual - Page 15

... English
Selecting Wash/Rinse Temperature:
When you turn the power "ON", the initial temperature is complete and washer will turn the power off automatically.
Closing the Top Lid:
As a safety device, you want to ...Cold/Cold" position. See the reference chart below to select your options and closing the washer door properly, you need to press the "Start/Pause" button to start of hours...
Similar Questions

Haier Xqj100-96la / Laundry Washers
please do you have ... Agitaior.... Tks
please do you have ... Agitaior.... Tks
(Posted by Jaccarini 10 years ago)

Haier English Manual Needed Urgently
Please send me Haier laundry washer manual; model hw-d860tve in english language
Please send me Haier laundry washer manual; model hw-d860tve in english language
(Posted by patiz2005 11 years ago)
The Washer Has No Lid
bipassed the switch to no avail E 2 closed switch with nylon tye sameE2
bipassed the switch to no avail E 2 closed switch with nylon tye sameE2
(Posted by philreid 12 years ago)

E2
Hi I keep getting a E2 error everytime i need to know what this means on my Haier HWM5tl washing mac...
Hi I keep getting a E2 error everytime i need to know what this means on my Haier HWM5tl washing mac...
(Posted by davgrass 12 years ago)

Replace The Lid On Hwm5tl
need manual on how to replace the lid and magnet box on the lid
need manual on how to replace the lid and magnet box on the lid
(Posted by niloc 12 years ago)