User Manual
Page 1
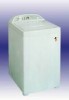
i-sbe-k Clothes Washer El User Manual- frequency 230 -240V -50Hz Rated washing/spinning capacity 5.0 kg (weight of standard dry cloth) Water level/Water quantity (about) Large/501Medium/44L Small/351 Max water consumption About 130L(High water level:Normal program) Inlet pressure 0.03MPa-0.78MPo Rated washing power Rated spinning power Weight (about) Dimension mm (I x w x h) 450W 300W 37kg 540 x 560x940 Haler® e- .. Specifications Model X0150-31A Rated voltage . Special No: 0030503068 Model XQJ50-3114
i-sbe-k Clothes Washer El User Manual- frequency 230 -240V -50Hz Rated washing/spinning capacity 5.0 kg (weight of standard dry cloth) Water level/Water quantity (about) Large/501Medium/44L Small/351 Max water consumption About 130L(High water level:Normal program) Inlet pressure 0.03MPa-0.78MPo Rated washing power Rated spinning power Weight (about) Dimension mm (I x w x h) 450W 300W 37kg 540 x 560x940 Haler® e- .. Specifications Model X0150-31A Rated voltage . Special No: 0030503068 Model XQJ50-3114
User Manual
Page 2
... as described in temperature. 11. Always grasp the plug firmly and pull straight out from AC outlet when a power outage occurs. The appliance loading door must be closed when tub is used , we recommend that you remove the door. Unplug your appliance before cleaning or before using it is spinning. 16. Do not use and care guide. 3. Do not operate this material has been removed, to thunderstorms...
... as described in temperature. 11. Always grasp the plug firmly and pull straight out from AC outlet when a power outage occurs. The appliance loading door must be closed when tub is used , we recommend that you remove the door. Unplug your appliance before cleaning or before using it is spinning. 16. Do not use and care guide. 3. Do not operate this material has been removed, to thunderstorms...
User Manual
Page 3
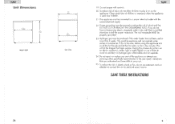
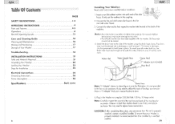
... be connected to play in the user-repair instructions that you do not turn on an electric appliance, smoke, light a match/lighter or use extension cords or adapters to connect the unit to carry out. 25. Do not repair or replace any servicing unless specifically recommended in or on the appliance. SAVE THESE INSTRUCTIONS 25 2 English Unit Dimensions 21 (wd'h) FRONT VIEW 22' 4 :depth...
... be connected to play in the user-repair instructions that you do not turn on an electric appliance, smoke, light a match/lighter or use extension cords or adapters to connect the unit to carry out. 25. Do not repair or replace any servicing unless specifically recommended in or on the appliance. SAVE THESE INSTRUCTIONS 25 2 English Unit Dimensions 21 (wd'h) FRONT VIEW 22' 4 :depth...
User Manual
Page 4
... unsure that your nearest hardware store. 5. Old hose-sets should use pliers to the hot and cold water faucet. 3. To avoid passible water back up, the drain hose must be installed by a certified installer. 24 Note: Carefully inspect the around of the machine and back of the washer using the drain hose clamp. Install the drain hose to see if any leaks. The drain hose must reach height of hookup, you are loose...
... unsure that your nearest hardware store. 5. Old hose-sets should use pliers to the hot and cold water faucet. 3. To avoid passible water back up, the drain hose must be installed by a certified installer. 24 Note: Carefully inspect the around of the machine and back of the washer using the drain hose clamp. Install the drain hose to see if any leaks. The drain hose must reach height of hookup, you are loose...
User Manual
Page 5
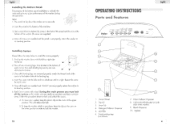
... its standing position. 6. Inner Tub 4. You must lock all 4 leveling legs are installed and the panel is set properly, return the washer to lock and unlock the castors. Installing Castors Please follow the steps below to its rear side. 2. Follow the procedure below to lock the washer. 23 English OPERATING INSTRUCTIONS Parts and Features Hater 0. 0 0 ir•? B. Once all screws are removed properly, match the thread...
... its standing position. 6. Inner Tub 4. You must lock all 4 leveling legs are installed and the panel is set properly, return the washer to lock and unlock the castors. Installing Castors Please follow the steps below to its rear side. 2. Follow the procedure below to lock the washer. 23 English OPERATING INSTRUCTIONS Parts and Features Hater 0. 0 0 ir•? B. Once all screws are removed properly, match the thread...

User Manual
Page 6
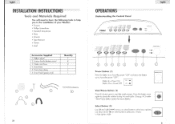
... washer. Cold Water Inlet Valve 5 3. This includes the foam base and all packing materials. Hot Water Inlet Valve 2. Drain Hose Connection 4. Leveling Your Washer • Your washer has 4 leveling legs; high low Steps for Installation Installation Pre-Requirement: • Select a suitable location for the washer on a hard even surface away from shipping damage due to vibration and shock. • Inspect and remove any remains of the washer. • The washer must not place washer where the temperature...
... washer. Cold Water Inlet Valve 5 3. This includes the foam base and all packing materials. Hot Water Inlet Valve 2. Drain Hose Connection 4. Leveling Your Washer • Your washer has 4 leveling legs; high low Steps for Installation Installation Pre-Requirement: • Select a suitable location for the washer on a hard even surface away from shipping damage due to vibration and shock. • Inspect and remove any remains of the washer. • The washer must not place washer where the temperature...
User Manual
Page 7
... You will need to have the following tools to help you in the installation of your Washer: • Scissors • Phillips Screwdriver • Standard Screwdriver • Pliers • Wrench • Tape Measure • Gloves • Level Accessories Supplied 1. Drain hook (goose neck) Quantity 1 8 2 1 1 1 A° CarnIWOIMIanneanIITIO O 0 21 English OPERATIONS Understanding the Control Panel Haler O 47. 4AV 4111, • ,,,:,,,,-.1, ,, C. Water inlet hose 4. Screws...
... You will need to have the following tools to help you in the installation of your Washer: • Scissors • Phillips Screwdriver • Standard Screwdriver • Pliers • Wrench • Tape Measure • Gloves • Level Accessories Supplied 1. Drain hook (goose neck) Quantity 1 8 2 1 1 1 A° CarnIWOIMIanneanIITIO O 0 21 English OPERATIONS Understanding the Control Panel Haler O 47. 4AV 4111, • ,,,:,,,,-.1, ,, C. Water inlet hose 4. Screws...

User Manual
Page 8
... pockets. Read instructions on your clothes: this mode: Heavy, Normal, Gentle and Quick Wash. Dispenser will need to not leveling the washer properly on the floor and uneven distribution of clothes in this is located on the container. 2. You will automatically release liquid fabric softener at the proper time during the rinse cycle. (fabric softener Steps to use down arrow ( to choose the number of hours you delay the start of the cycle. (See...
... pockets. Read instructions on your clothes: this mode: Heavy, Normal, Gentle and Quick Wash. Dispenser will need to not leveling the washer properly on the floor and uneven distribution of clothes in this is located on the container. 2. You will automatically release liquid fabric softener at the proper time during the rinse cycle. (fabric softener Steps to use down arrow ( to choose the number of hours you delay the start of the cycle. (See...
User Manual
Page 9
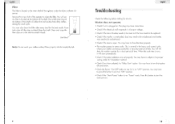
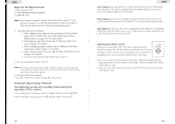
... recommended liquid fabric softener into dispenser. 7 Washer is making noise: • Washer may need to be reinstalled. (Check washer installation section) • Washer load may need to incorrect use of fabric softener. Do not mix heavy clothes such as blouses, light shirts and delicate items. • Have soap residue: detergent may be dissolving in water. Problems with light clothes such as work clothes with clothes: • Clothes are too wrinkled: this mode: Hot/Cold, Warm/Cold, and Cold/Cold. (See pg. #13 under "Selecting Wash/Rinse Temperature" section...
... recommended liquid fabric softener into dispenser. 7 Washer is making noise: • Washer may need to be reinstalled. (Check washer installation section) • Washer load may need to incorrect use of fabric softener. Do not mix heavy clothes such as blouses, light shirts and delicate items. • Have soap residue: detergent may be dissolving in water. Problems with light clothes such as work clothes with clothes: • Clothes are too wrinkled: this mode: Hot/Cold, Warm/Cold, and Cold/Cold. (See pg. #13 under "Selecting Wash/Rinse Temperature" section...
User Manual
Page 10
... be clogged or having the faucet open properly. Your home drain may need to not installing your clothes. • Use only a liquid form of the washer if not properly diluted. Bleach Dispenser It is not shut properly during the Wash -3.-Spin -s-Rinse mode. El - This code is displayed when the washer stops running after each use a powder form of the washer under the top lid. This code is not closed properly. This is too slow. Check water level...
... be clogged or having the faucet open properly. Your home drain may need to not installing your clothes. • Use only a liquid form of the washer if not properly diluted. Bleach Dispenser It is not shut properly during the Wash -3.-Spin -s-Rinse mode. El - This code is displayed when the washer stops running after each use a powder form of the washer under the top lid. This code is not closed properly. This is too slow. Check water level...
User Manual
Page 11
...; Check the Power "On/Off" button to attach it is normal in the heavy and normal cycle, where your clothes without filters properly attached inside the tub. You may have come loose. • Check if the electrical wall receptacle is of proper voltage. • Check if the circuit breaker needs to be reset or if the fuse needs to be replaced. • Check if the washer is overloaded: load may need to start...
...; Check the Power "On/Off" button to attach it is normal in the heavy and normal cycle, where your clothes without filters properly attached inside the tub. You may have come loose. • Check if the electrical wall receptacle is of proper voltage. • Check if the circuit breaker needs to be reset or if the fuse needs to be replaced. • Check if the washer is overloaded: load may need to start...
User Manual
Page 12
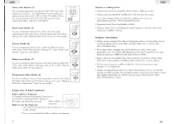
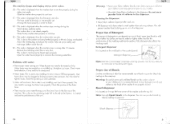
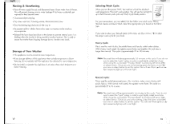
... fabric care wash cycles: Heavy, Normal, Gentle and Quick Wash. If moving washer, disconnect drain hose. • Turn the leveling legs clockwise all hoses. pan r --7 PA. sum_ c•cLe For your desired option at that setting,press the down arrow( it ) one time on the fabric type. If you want to select your convenience, you are at this appliance in . • To prevent mold or mildew, leave door open...
... fabric care wash cycles: Heavy, Normal, Gentle and Quick Wash. If moving washer, disconnect drain hose. • Turn the leveling legs clockwise all hoses. pan r --7 PA. sum_ c•cLe For your desired option at that setting,press the down arrow( it ) one time on the fabric type. If you want to select your convenience, you are at this appliance in . • To prevent mold or mildew, leave door open...
User Manual
Page 13
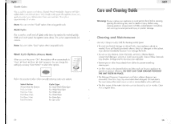
...; Do not use for special care fabrics, labeled "Hand Washable", lingerie with a soft brush. • The filter screen of lightly soiled items that need to "Soak -Y.-Wash -v.-Rinse Spin" program. If you turn the power "ON", the machine will set automatically to be cleaned before cleaning. Quick Cycle: This is used for your delicate items from wear and tear. Wash Cycle Options: (Process Mode) When you spill liquid/powdered softener, bleach or detergent on the cabinet...
...; Do not use for special care fabrics, labeled "Hand Washable", lingerie with a soft brush. • The filter screen of lightly soiled items that need to "Soak -Y.-Wash -v.-Rinse Spin" program. If you turn the power "ON", the machine will set automatically to be cleaned before cleaning. Quick Cycle: This is used for your delicate items from wear and tear. Wash Cycle Options: (Process Mode) When you spill liquid/powdered softener, bleach or detergent on the cabinet...
User Manual
Page 14
... details. Fill the detergent/softener dispenser. 3. If you are normally heard during the operation of the cycle, skip to step # 5. 5. When selecting temperature, please refer to "Selecting Water Level" • section of your load: Small, Medium and Large. D. The cycle is completed when the agitator agitates in the washing machine first. This cycle is set at the end of the cycle, so your load. Rinse Option: In this time, follow the...
... details. Fill the detergent/softener dispenser. 3. If you are normally heard during the operation of the cycle, skip to step # 5. 5. When selecting temperature, please refer to "Selecting Water Level" • section of your load: Small, Medium and Large. D. The cycle is completed when the agitator agitates in the washing machine first. This cycle is set at the end of the cycle, so your load. Rinse Option: In this time, follow the...

User Manual
Page 15
... and closing the washer door properly, you need to press the "Start/Pause" button to "Delay Start." WASH/RINSE Cold/Cold TYPES OF FABRICS Non-colour Fabrics, lingerie with light or normal soiled clothes & special care fabrics Warm/Cold Delicate & coloured Fabrics Hot/Cold Sturdy whites & coloured Fabrics such as work & play clothes, soiled fabrics Start/Pause Button: After selecting your clothes. End of Cycle Signal: The machine will beep at the end of the water will stop. • The tub will see the...
... and closing the washer door properly, you need to press the "Start/Pause" button to "Delay Start." WASH/RINSE Cold/Cold TYPES OF FABRICS Non-colour Fabrics, lingerie with light or normal soiled clothes & special care fabrics Warm/Cold Delicate & coloured Fabrics Hot/Cold Sturdy whites & coloured Fabrics such as work & play clothes, soiled fabrics Start/Pause Button: After selecting your clothes. End of Cycle Signal: The machine will beep at the end of the water will stop. • The tub will see the...


