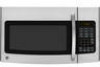
GE JVM1740SPSS Support Question
GE JVM1740SPSS Support Question
Find answers below for this question about GE JVM1740SPSS.Need a GE JVM1740SPSS manual? We have 3 online manuals for this item!
Question posted by suebane2850 on April 19th, 2014
Ducted Or Ductless
Can this model be ducted to the outside?
Current Answers
Related GE JVM1740SPSS Manual Pages
Installation Instructions - Page 1
....2737) or Visit our Website at: GEAppliances.com
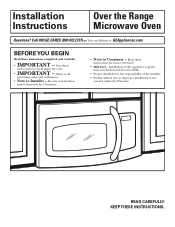
BEFORE YOU BEGIN
Read these instructions for future reference.
• Skill level -
Installation Instructions
Over the Range Microwave Oven
Questions? Save these instructions completely and carefully.
• IMPORTANT - KEEP THESE INSTRUCTIONS.
Installation Instructions - Page 2
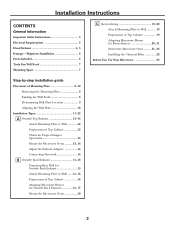
... to Wall 12 Preparation of Top Cabinet 13 Check for Proper Damper Operation 13 Mount the Microwave Oven ..........13, 14 Adjust the Exhaust Adaptor 14 Connecting Ductwork 14
B Outside Back Exhaust 15-18
Preparing Rear Wall for Outside Back Exhaust 15 Attach Mounting Plate to Wall ......15, 16 Preparation of Top Cabinet 16 Adapting...
Installation Instructions - Page 3

...and supply circuit should be capable of supporting the cabinet load, in the cabinet above the microwave oven.
Wire size must be installed by a qualified electrician.
Do not use
The power cord ... injury or death: THIS APPLIANCE MUST BE PROPERLY GROUNDED to the added weight of this microwave oven.
3 CAUTION: To avoid the risk of personal
injury (back injury or other injuries ...
Installation Instructions - Page 7
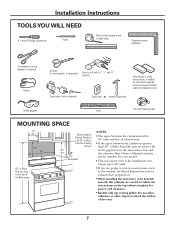
.... Your Owner's Manual contains the kit number for your model.
• This microwave oven is for installation over ranges up to 36″ wide.
• If you are going to vent your microwave oven to the outside, see Hood Exhaust Section for exhaust duct preparation.
• When installing the microwave oven beneath smooth, flat cabinets, be careful to follow...
Installation Instructions - Page 8

... carton over onto the top side.
You may discard these screws.
8 REMOVING THE MICROWAVE
OVEN FROM THE CARTON/ REMOVING THE MOUNTING PLATE
1 Remove the installation instructions, filters, glass tray and the small hardware bag. The oven should be 16″ or 24″ from the mounting plate. The center of any adjacent studs...
Installation Instructions - Page 11
...ventilation required for your Owner's Manual for the kit number.) Outside Top Exhaust (Vertical Duct) B. Recirculating (Non-Vented Ductless)
NOTE: This microwave is shipped assembled for Outside Top Exhaust (except for non-vented models).
Installation Instructions
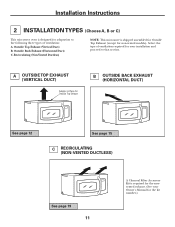
2 INSTALLATION TYPES (Choose A, B or C)
This microwave oven is designed for adaptation to that section. Select the type...
Installation Instructions - Page 12

... More Than Wall Thickness
Toggle Wings Toggle Bolt
Attach the plate to Wall A2.
Mount Microwave Oven A5. At least one wood screw must be used to attach the plate to a wall...and the wall.
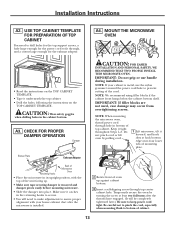
4 Tighten all bolts. Prepare Top Cabinet A3. Installation Instructions
A OUTSIDE TOP EXHAUST (Vertical Duct)
INSTALLATION OVERVIEW
A1. Connect Ductwork
A1. Pull the plate away from the bolts. 2...
Installation Instructions - Page 13
... overtightening screws.
Installation Instructions
A2.
NOTE: If your house exhaust duct after the threads have engaged. (It will need to drill holes for the top support screws, a hole large enough for the exhaust adaptor.
Temporarily secure the oven by pulling cord.
1 Lift microwave, tilt it catches in its upright position, with your cabinet...
Installation Instructions - Page 14

... Needed
A6. See the Owner's Manual packed with the microwave.
14 MOUNT THE MICROWAVE OVEN (cont.)
Cabinet Front Cabinet Bottom Shelf Filler Block
Equivalent to Depth of the microwave oven. (While tightening screws, hold the microwave oven in place against the wall and the top cabinet.)
1 Extend the house duct down to connect to the top cabinet.
5 Insert...
Installation Instructions - Page 15
...Microwave Oven
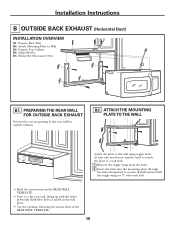
B1. Attach Mounting Plate to the wall using toggle bolts. PREPARING THE REAR WALL FOR OUTSIDE BACK EXHAUST
You need to the rear wall, lining up with the holes previously drilled for outside... WALL TEMPLATE.
15 Adapt Blower B5. Installation Instructions
B OUTSIDE BACK EXHAUST (Horizontal Duct)
INSTALLATION OVERVIEW
B1. ATTACH THE MOUNTING PLATE TO THE WALL
Attach the plate to Wall...
Installation Instructions - Page 19

Attach Mounting Plate to the wall using toggle bolts. Mount the Microwave Oven C5.
Prepare Top Cabinet C3. Adapt Blower C4. At least one ... wings into drywall and reattach the toggle wings to mount the plate.
Installation Instructions
C RECIRCULATING (Non-Vented Ductless)
INSTALLATION OVERVIEW
C1.
CAUTION: Wear safety goggles
when drilling holes in the wall to 3⁄4″ onto...
Quick Specs - Page 1
...Outside exhaust (horizontal) • Recirculating (non-vented ductless - Important Information: When installing the Spacemaker microwave oven over a range, allow minimum of 2" from bottom of Spacemaker microwave oven...X 10" duct
24-1/2
105° Door open
(without obstruction)
29-7/8
Minimum distance from floor
30" MIN.
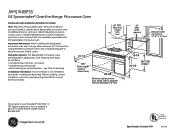
JVM1740SPSS
Over-the-Range Microwave Oven
GE Spacemaker&#...
Quick Specs - Page 2
... be taken to align exhaust with a standard 3-1/4" x 10" rectangular duct.
For answers to your Monogram,® GE Profile™ or GE® appliance questions, visit our website at the time it is to be used .
Read the following carefully. JVM1740SPSS
GE Spacemaker® Over-the-Range Microwave Oven
Hood Exhaust Duct: Outside ventilation requires a HOOD EXHAUST...
Quick Specs - Page 3

... not be able to cook large quantities of the food, and
the oven automatically sets the optimal defrosting time and power level or set your Monogram....
Brilliant, natural-looking lighting fully illuminates the cooking surface • M odel JVM1740SPSS - JVM1740SPSS
GE Spacemaker® Over-the-Range Microwave Oven
Features and Benefits • 1 .7 Cu. One touch quickly removes smoke, ...
Use and Care Manual - Page 1
Model:
JVM1730 JNM1731 JVM1740
Spacemaker Microwave Oven
Owner's Manual
Important Safety Instructions
2
Precautions to Avoid Possible Exposure
to Excessive Microwave Energy
2
Special Notes About Microwaving
5
Operating Instructions
10
Features of Your Microwave
10
The Controls on Your Microwave
11
Time Features
14
Convenience Features
20
Other Features
24
Oven Shelf
29
...
Use and Care Manual - Page 10

... from your model.)
Features
3
4
2
1
7
896
5 7
1 Door Handle. Screen allows cooking to open the door. Pull to be removed for the microwave to operate.
2 Door Latches.
3 Window with Metal Shield. Turntable and support must be securely latched for cleaning.
9 Convenience Guide. NOTE: Rating plate, oven vent(s) and oven light are located on the oven floor or...
Use and Care Manual - Page 11
Power level 1-10. Starts immediately!
11 Starts immediately! Quick Start
The Controls on Your Microwave Oven
(Throughout this manual, features and appearance may vary from your model.)
You can microwave by time or with the convenience features.
1 Time Features
Time Cooking
Press TIME COOK I & II (Press once or twice) DEFROST AUTO/TIME (Press twice) EXPRESS...
Use and Care Manual - Page 29
...; DO NOT store the oven shelf in the microwave oven.
2-level reheating Switch places after 1/2 time.
• To reheat on 2 levels
or
• To reheat 2 dishes on the shelf.
This could overheat.
• Do not use the oven with Sensor Cooking or Reheat.
(on some models)
Food microwaves best when placed on the microwave floor. Shelf
How...
Use and Care Manual - Page 32
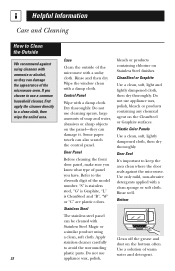
...model number. Refer to the eleventh digit of panel you choose to use appliance wax, polish,
bleach or products containing chlorine on the bottom often. Do not use cleaning sprays, large amounts of the microwave oven...cleaner directly to a clean cloth, then wipe the soiled area.
32
Case
Clean the outside of warm water and detergent. Rinse well. If you have.
Dry thoroughly. "S" is ...
Use and Care Manual - Page 40
...Damage to the original purchaser and any part in an area where service by our authorized Customer
oven that fails due to replace the defective part.
If you have an installation problem, contact your ... to you may also have serial and model numbers available when calling for a particular purpose, are in Malaysia MICROWAVE OVEN WARRANTY
Staple sales slip or cancelled check here.
Similar Questions

Ge Microwave Oven With Browner Model#jes1384sf06
GE microwave oven with Browner model#Jes1384Sf06 stop working. When the timer is selected and press ...
GE microwave oven with Browner model#Jes1384Sf06 stop working. When the timer is selected and press ...
(Posted by Erdaize 8 years ago)


Is It Normal For A Microwave Oven To Get Hot On Outside?
(Posted by formavr 10 years ago)

Problems With Ge Jes0738dpww Microwave Oven?
Is there a known defect in or recallforthis item manufactured in Summer 2011?The "Start/Pause" and "...
Is there a known defect in or recallforthis item manufactured in Summer 2011?The "Start/Pause" and "...
(Posted by friendomine 12 years ago)
Ge Microwave Oven Model Jvm64001-no Front Panel Power But Lights & Fan Work
Microwave oven front control panel LED display doesn't power up but the fan and lights switch functi...
Microwave oven front control panel LED display doesn't power up but the fan and lights switch functi...
(Posted by MrK 12 years ago)