Electrolux E30MH65GPS Support Question
Electrolux E30MH65GPS Support Question
Find answers below for this question about Electrolux E30MH65GPS - Icon - Microwave.Need a Electrolux E30MH65GPS manual? We have 4 online manuals for this item!
Question posted by mdillonrealtor on August 12th, 2014
Where Can I Get A Replacement Rack For The Oven?
model number E30MH65GPS
Current Answers
Answer #1: Posted by TechSupport101 on August 13th, 2014 4:00 AM
TechSupport101

Member since:
May 24th, 2013 Points: 12,171,305

Member since:
May 24th, 2013 Points: 12,171,305
Hi. Use the platform here http://www.electrolux-store.com/electrolux-replacement-parts-appliances.html for the best results.
Related Electrolux E30MH65GPS Manual Pages
Specification sheet - Page 1
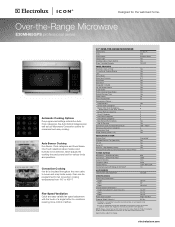
...ACCESSORIES Two-Position Adjustable Rack
Included
SPECIFICATIONS Oven Cavity Dimensions - ...Microwave
E30MH65GPS professional series
Automatic Cooking Options Pre-programmed settings include five Auto Cook categories, five Auto Defrost categories as well as four Microwave Convection options for conditions requiring more control of airflow.
30" OVER-THE-RANGE MICROWAVE
Oven Cavity Watts Oven...
Specification sheet - Page 2
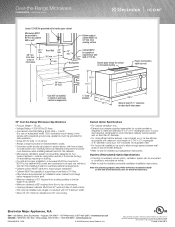
...service with 33" maximum width.
• Allow 25-1/2" minimum clearance for 90° door swing.
Over-the-Range Microwave
E30MH65GPS professional series
Locate 120V/60Hz grounded outlet inside .
• Refer to web for detailed convertible ventilation installation instructions. ... of exhaust - mean we are constantly working to change
specifications or discontinue models without notice.
Wiring Diagram - Page 5
E30MH65GP / E30MH65GS
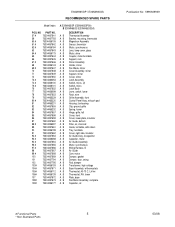
RECOMMENDED SPARE PARTS
Model Index:
POS. NO PART NO.
57 #
75304457641
59... B Support, stirrer A B Cover, stirrer A B Latch Assembly A B Switch, micro, (2) A B Switch, micro A B Latch Body A B Lever, switch, lower A B Rack, wire A B Grille Assembly, front A B Control Panel Assy, w/touch pad A B Housing, fan bearing A B Clip, ground, grille A B Spring, louver A B Hinge, ...
Installation Instructions - Page 1
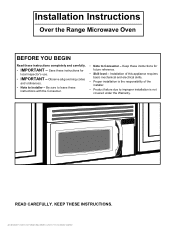
...for future reference.
• Skill level - Keep these instructions completely and carefully.
• IMPORTANT - KEEP THESE INSTRUCTIONS. READ CAREFULLY. Installation Instructions
Over the Range Microwave Oven
BEFORE YOU BEGIN
Read these instructions for
local inspector's use.
• IMPORTANT - Observe all governing codes
and ordinances.
• Note to Consumer - Installation of...
Installation Instructions - Page 2
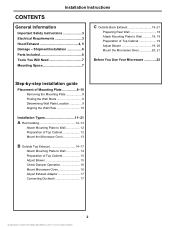
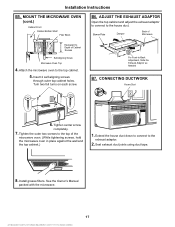
... 19 Preparation of Top Cabinet 19 Adjust Blower 19, 20 Mount the Microwave Oven 20, 21
Before You Use Your Microwave 22
Step-by-step installation guide
Placement of Mounting Plate 8-10 Removing the... Recirculating 12-13
Attach Mounting Plate to Wall 12 Preparation of Top Cabinet 12 Mount the Microwave Oven 13
B Outside Top Exhaust 14-17
Attach Mounting Plate to Wall 14 Preparation of Top...
Installation Instructions - Page 3
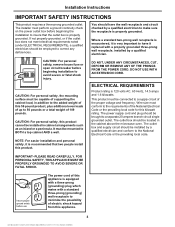
... this 59 pound product, plus additional oven loads of up to the requirements of supporting the cabinet load, in the cabinet above the microwave oven. Wire size must be capable of the...The power cord of 109 pounds. Where a standard two-prong wall receptacle is encountered, it replaced with a standard three-prong (grounding) wall receptacle to make sure the receptacle is properly ...
Installation Instructions - Page 7
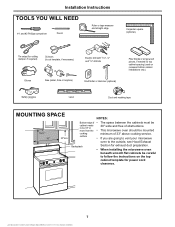
... blocks or scrap wood pieces, if needed for top cabinet spacing (used on the top
cabinet template for exhaust duct preparation.
• When installing the microwave oven
beneath smooth flat cabinets be careful
to follow the instructions on recessed bottom cabinet installations only)
Safety goggles
Level
Duct and masking tape
MOUNTING SPACE...
Installation Instructions - Page 8

... from this mark.
3. FINDING THE WALL STUDS
Wall Studs Center
Carton
Styrofoam
3. Find the studs, using one of the oven.
2. Then carefully roll the oven and carton over onto the top side.
REMOVING THE MICROWAVE
OVEN FROM THE CARTON/ REMOVING THE MOUNTING PLATE
1. Remove the installation instructions, Exhaust
adaptor, filters, glass tray and the...
Installation Instructions - Page 9
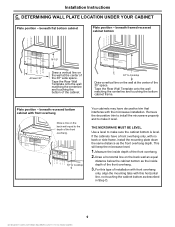
.... beneath recessed bottom cabinet with this horizontal line, not touching the cabinet bottom as the front overhang depth. Remove the decorative trim to install the microwave properly and to the depth of the 30″ wide space. Draw a horizontal line on the wall at the center of the front overhang.
3. Plate...
Installation Instructions - Page 11
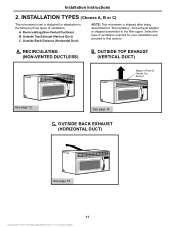
... installation and proceed to the filler-upper.
RECIRCULATING
(NON-VENTED DUCTLESS)
B. And exhaust adaptor is shipped assembled to that section. INSTALLATION TYPES (Choose A, B or C)
This microwave oven is shipped after being assembled for Outside Top Exhaust
See page 12
See page 14
C. Installation Instructions
2. Outside Top Exhaust (Vertical Duct) C. A. Select the type...
Installation Instructions - Page 12

... "Rear wall Template" and then the Mounting plate is properly centered under the cabinet. Installation Instructions
A. RECIRCULATING (Non-Vented Ductless)
INSTALLATION OVERVIEW
A1. Mount the Microwave Oven
A1. Remove the toggle wings from the wall
to Wall A2.
Tighten all bolts. Prepare Top Cabinet A3. ATTACH THE MOUNTING PLATE TO THE WALL...
Installation Instructions - Page 13

... slots at least two full turns after the threads have engaged. (It will be completely tightened later.) Be sure to bottom of the
microwave oven. (While tightening screws, hold the microwave oven in bottom of the cord. Be careful not to pinch the cord,
especially when mounting flush to keep power cord tight.
See...
Installation Instructions - Page 14
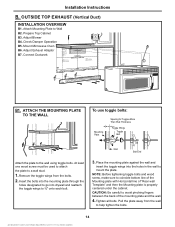
.... At least one wood screw must be used to attach
the plate to mount the plate. OUTSIDE TOP EXHAUST (Vertical Duct)
INSTALLATION OVERVIEW
B1. Mount Microwave Oven B6. Attach Mounting Plate to coincide bottom line of the Mounting plate with Horizontal line of the mounting plate and the wall.
4.
Installation Instructions - Page 16
...cabinet bottom shelf. IMPORTANT: If filler blocks are not pinched.
6. NOTE: When mounting the microwave oven, thread power cord through top center
cabinet hole.
Make sure the wires are not used, ...outer
FOR EASIER INSTALLATION AND PERSONAL SAFETY, WE RECOMMEND THAT TWO PEOPLE INSTALL THIS MICROWAVE OVEN. Remove and save screw
from over tightening screws. NOTE: If your house exhaust duct ...
Installation Instructions - Page 17
... top cabinet.
5.
Tighten the outer two screws to Depth of the
microwave oven. (While tightening screws, hold the microwave oven in place against the wall and the top cabinet.)
1. Blower-Plate
Damper
Back of Microwave
Equivalent to the top of Cabinet Recess
Self-Aligning Screw
Microwave Oven Top
4. Insert 2 self-aligning screws
through outer top cabinet holes...
Installation Instructions - Page 18
... cut an opening , following the instructions of the
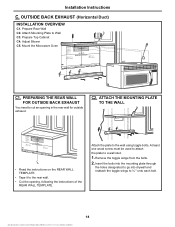
REAR WALL TEMPLATE. OUTSIDE BACK EXHAUST (Horizontal Duct)
INSTALLATION OVERVIEW
C1. Prepare Rear Wall C2. Mount the Microwave Oven
C1. PREPARING THE REAR WALL FOR OUTSIDE BACK EXHAUST
You need to a wall stud.
1. ATTACH THE MOUNTING PLATE TO THE WALL
CL
• Read the...
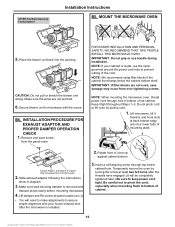
Installation Instructions - Page 20
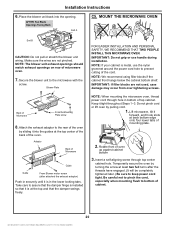
... least two full turns after attached the exhaust adaptor)
Push in securely until it tight throughout Steps 1-3. Keep it is in bottom of the oven. Rotate front of microwave oven.
7. Secure the blower unit to assure that the damper hinge is installed so that the damper swings freely.
IMPORTANT: If filler blocks are...
Installation Instructions - Page 21
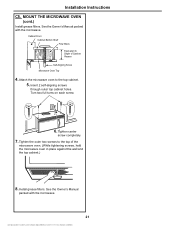
... two screws to the top cabinet. 5. Tighten center
screw completely.
7. See the Owner's Manual packed with the microwave.
21
Install grease filters. Installation Instructions C5. Attach the microwave oven to the top of Cabinet Recess Self-Aligning Screw Microwave Oven Top
4. Turn two full turns on each screw.
6. See the Owner's Manual
packed with the...
Installation Instructions - Page 22

Install turntable and ring in cavity.
4. Installation Instructions
BEFORE YOU USE YOUR MICROWAVE
1. Make sure the microwave oven has been
installed according to instructions.
6.
Insure proper ground exists before use
22 Remove all packing material from the microwave
oven.
3. Replace house fuse or turn breaker back on.
7. Plug power cord into a dedicated 20 amp
electrical outlet. ...
Owners Guide - Page 1

Use & Care Guide
Over-the Range
Microwave Oven
E30MH65GSS
Similar Questions

Electrolux Microwave Model E30mo75hpsa
I have the microwave model E30MO75HPSA. The microwave works in all aspects except for regular microw...
I have the microwave model E30MO75HPSA. The microwave works in all aspects except for regular microw...
(Posted by cindylu5 6 years ago)

Part No. For The Safety Door Latch
My Electrolux Icon Microwave Model No. E30MO75HPSA door latch is broken and I need the part number t...
My Electrolux Icon Microwave Model No. E30MO75HPSA door latch is broken and I need the part number t...
(Posted by bomab 7 years ago)

Ei30bm55hsc Microwave Over The Range Light Won't Shut Off.
press the light button 4 times but light will stay on the lowest setting instead of shutting off
press the light button 4 times but light will stay on the lowest setting instead of shutting off
(Posted by janedigrandi 10 years ago)

Microwave Owen Gets On And Off Automatically
my microwave owen fluctuates between on and off states ....it starts and hardly its on for three min...
my microwave owen fluctuates between on and off states ....it starts and hardly its on for three min...
(Posted by manglaniias 11 years ago)

Dead Of Microwave
My microwave is dead iwant to repaire it , iwant to know about your sevice center number
My microwave is dead iwant to repaire it , iwant to know about your sevice center number
(Posted by shweta1434kapoor 12 years ago)