Get support for Dymo LetraTag Plus LT-100H

Dymo LetraTag Plus LT-100H Support Question

Dymo LetraTag Plus LT-100H Support Question

Find answers below for this question about Dymo LetraTag Plus LT-100H.
Need a Dymo LetraTag Plus LT-100H manual? We have 1 online manual for this item!
Question posted by richygriffiths on January 23rd, 2016

Printinf Problem

Hi I haven't used my label maker in a while and it won't print. I have tried cleaning the head but still doesn't print

Current Answers

Answer #1: Posted by TommyKervz on January 27th, 2016 10:14 PM
This answer was accepted by the poster of the original question.
TommyKervz

Member since:
January 10th, 2013

Points: 17,776,813
1,090
points
  • Batteries might be low.
  • All batteries used in the machine should be of the same brand.
  • Old batteries should not be used in combination with new batteries
  • Is the cassette correctly positioned?
    Push the cassette firmly into the compartment in order to make sure it fits at the bottom of the cassette compartment.
  • Take out the cassette and check if the ink ribbon isn't at its end or isn't broken.

If the problem persists, your labelmaker will have to be repaired. Register the defective device via www.dymoservice.com.


Hope that is helpful.
Kervz at www.satechhelp.co.za

Related Dymo LetraTag Plus LT-100H Manual Pages

User Guide 1 - Page 2

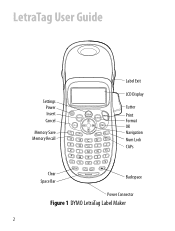
LetraTag User Guide Settings Power Insert Cancel Memory Save Memory Recall Label Exit LCD Display Cutter Print Format OK Navigation Num Lock CAPs Clear Space Bar Backspace Power Connector Figure 1 DYMO LetraTag Label Maker 2
User Guide 1 - Page 3

... to print your first label. Connecting the Power The label maker is powered by standard batteries or an AC power adapter. You can create a wide variety of inactivity. Visit www.dymo.com/registration for your label maker. The label maker uses DYMO LetraTag (LT) 12 mm label cassettes. About Your New Label Maker With your new DYMO LetraTag® label maker, you can choose to print your labels in...
User Guide 1 - Page 4

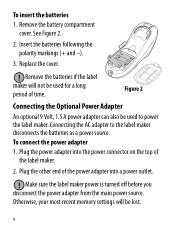
... cover. Connecting the AC adapter to power the label maker. Plug the power adapter into a power outlet. ! Make sure the label maker power is turned off before you disconnect the power adapter from the main power source. Remove the batteries if the label maker will be used to the label maker disconnects the batteries as a power source. Figure 2 Connecting...
User Guide 1 - Page 5

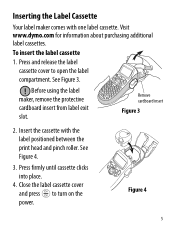
... turn on the power. Remove cardboard insert Figure 3 2. Before using the label maker, remove the protective cardboard insert from label exit slot. See Figure 4. 3. Insert the cassette with one label cassette. Inserting the Label Cassette Your label maker comes with the label positioned between the print head and pinch roller. Figure 4 5 See Figure 3. ! Visit www.dymo...
User Guide 1 - Page 6

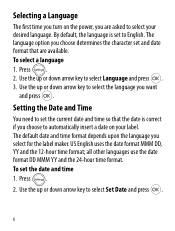
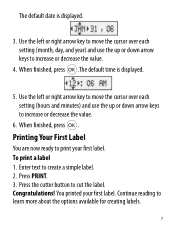
... date format DD MMM YY and the 24-hour time format. Use the up or down arrow key to select Set Date and press . 6 Use the up or down arrow key to select your label. Setting the Date and Time You need to set the current date and time so that ... format that the date is set the date and time 1. To set to automatically insert a date on the power, you select for the label maker.
User Guide 1 - Page 7

... (month, day, and year) and use the up or down arrow keys to increase or decrease the value. 4. Continue reading to cut the label. To print a label 1. Congratulations! When finished, press .The default time is displayed. 3. Printing Your First Label You are now ready to create a simple label. 2. You printed your first label. The default date is displayed. 5. Enter...
User Guide 1 - Page 8

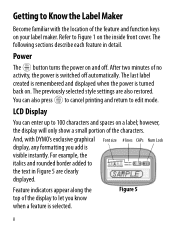
...along the top of no activity, the power is switched off . Getting to Know the Label Maker Become familiar with DYMO's exclusive graphical Font size # lines CAPs Num Lock display, any ...printing and return to edit mode. You can enter up to Figure 1 on . The following sections describe each feature in Figure 5 are also restored. Power The button turns the power on your label maker...
User Guide 1 - Page 9

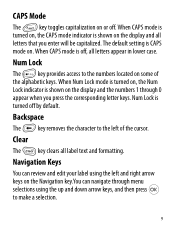
... access to the numbers located on the display and the numbers 1 through menu selections using the left of the alphabetic keys. When Num Lock mode is turned on, the Num...Mode The key toggles capitalization on . The default setting is off, all label text and formatting. Navigation Keys You can review and edit your label using the up and down arrow keys, and then press to the left and...
User Guide 1 - Page 10

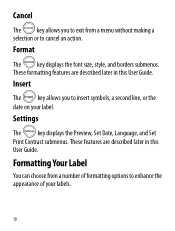
...displays the Preview, Set Date, Language, and Set Print Contrast submenus. These features are described later in this User Guide. Formatting Your Label You can choose from a menu without making a ... you to exit from a number of formatting options to enhance the appearance of your label. These formatting features are described later in this User Guide. Cancel The key allows you...
User Guide 1 - Page 11

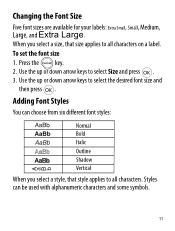
... the desired font size and then press . To set the font size 1. Use the up or down arrow keys to all characters. Use the up or down arrow keys to all characters on a label. Adding Font Styles You can be used with alphanumeric characters and some symbols. 11 Styles can choose from six different...
User Guide 1 - Page 12

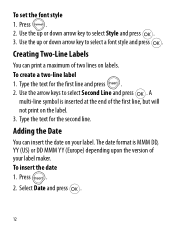
...Date You can print a maximum of the first line, but will not print on the label. 3. Use the arrow ...label. Press . 2. To set the font style 1. Creating Two-Line Labels You can insert the date on labels. Press . 2. Use the up or down arrow key to select Style and press . 3. To create a two-line label 1. The date format is inserted at the end of two lines on your label maker...
User Guide 1 - Page 13

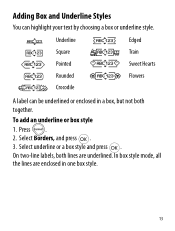
... together. To add an underline or box style 1. Select underline or a box style and press . Underline Square Pointed Rounded Crocodile Edged Train Sweet Hearts Flowers A label can highlight your text by choosing a box or underline style. Adding Box and Underline Styles You can be underlined or enclosed in a box, but not...
User Guide 1 - Page 14

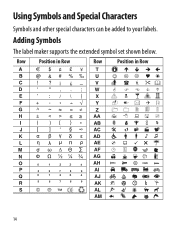
Adding Symbols The label maker supports the extended symbol set shown below. Using Symbols and Special Characters Symbols and other special characters can be added to your labels. Row Position in Row Row Position in Row 14
User Guide 1 - Page 15

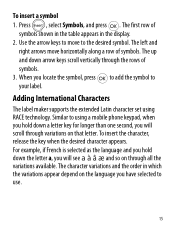
... horizontally along a row of symbols. When you have selected to the desired symbol. The left and right arrows move to use. 15 Adding International Characters The label maker supports the extended Latin character set using a mobile phone keypad, when you hold down a letter key for longer than one second, you will scroll through the...
User Guide 1 - Page 16

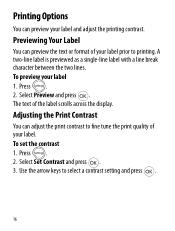
... the display. To set the contrast 1. To preview your label and adjust the printing contrast. Adjusting the Print Contrast You can preview your label 1. Press . 2. A two-line label is previewed as a single-line label with a line break character between the two lines. Select Set Contrast and press . 3. Use the arrow keys to select a contrast setting and press...
User Guide 1 - Page 17

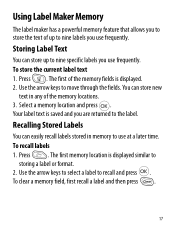
Using Label Maker Memory The label maker has a powerful memory feature that allows you to store the text of the memory fields is displayed. 2. To recall labels 1. Storing Label Text You can store up to nine labels you use frequently. The first of up to move through the fields. Select a memory location and press . Use the arrow keys to nine specific...
User Guide 1 - Page 18

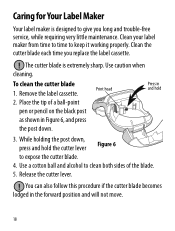
Caring for Your Label Maker Your label maker is extremely sharp. Remove the label cassette. Print head Press in and hold the cutter lever Figure 6 to give you replace the label cassette. ! Clean the cutter blade each time you long and trouble-free service, while requiring very little maintenance. Use caution when cleaning. Release the cutter lever. ! The cutter blade is ...
User Guide 1 - Page 19

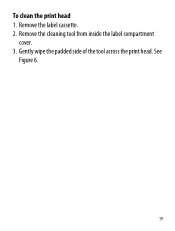
Remove the cleaning tool from inside the label compartment cover. 3. See Figure 6. 19 Remove the label cassette. 2. Gently wipe the padded side of the tool across the print head. To clean the print head 1.
User Guide 1 - Page 20

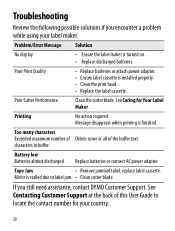
... for your label maker. Motor is installed properly. • Clean the print head. • Replace the label cassette. Poor Print Quality • Replace batteries or attach power adapter. • Ensure label cassette is stalled due to locate the contact number for Your Label Maker. Replace batteries or connect AC power adapter. If you encounter a problem while using your country...
User Guide 1 - Page 69

Contacting Customer Support The following table provides a list of telephone numbers for all countries where no specific support number is listed. Country Telephone Fax Internationala Mexico United States +32 (0) 205040566 +01 5368 2066 (203) 588-2500 a. Use the International number for DYMO Support departments. You can also reach DYMO at www.dymo.com.

Similar Questions

Ask a New Question
Use the box below to post a new question about this Dymo product .
Points & Prizes
  • You can earn points for nearly everything you do on HelpOwl.com
  • You can trade in those points for gift cards at leading retailers such as Amazon.com and Walmart
  • It's that simple!
See How it Works
Create a Free Account

Dymo Manuals

Find free Dymo LetraTag Plus LT-100H manuals and user guides available at ManualOwl.com. Try out our unique manual viewer allowing you to interact with manuals from directly within your browser!

Dymo Reviews

View thousands of Dymo user reviews and customer ratings available at ReviewOwl.com.

Contact Information

Complete Dymo customer service contact information including steps to reach representatives, hours of operation, customer support links and more from ContactHelp.com.

Scoreboard Ratings

See detailed Dymo customer service rankings, employee comments and much more from our sister site.

Dymo Recalls

Find comprehensive Dymo recall information updated hourly on RecallOwl.com.