
Dell PowerEdge 2950 Support Question
Dell PowerEdge 2950 Support Question
Find answers below for this question about Dell PowerEdge 2950.Need a Dell PowerEdge 2950 manual? We have 8 online manuals for this item!
Question posted by kauj on November 14th, 2013
How Can I Remove The Bezel In My Power Edge 2950
The person who posted this question about this Dell product did not include a detailed explanation. Please use the "Request More Information" button to the right if more details would help you to answer this question.
Current Answers
Related Dell PowerEdge 2950 Manual Pages
Installing a SATA Optical Drive - Page 3

See "Removing the Bezel" in your Hardware Owner's Manual.
3 Remove the system cover. See "Opening the System" in your Hardware Owner's Manual.
4 PowerEdge 1950 systems only: Disconnect and remove the SAS controller daughter card.
See your Hardware Owner's Manual.
5 Disconnect the data and power cables from the front of the bay.
7 For systems with the system. c Release...
Installing a SATA Optical Drive - Page 4

... of the drive.
4
Installing a SATA Optical Drive
On PowerEdge 1950 systems, the existing optical drive tray must remove the old drive and interposer card from the tray.
4 ... optical drive trays.
PowerEdge 2970, 2950, and 1950
For PowerEdge 2970 and 2950 systems, the optical drive tray that shipped with the SATA drive installation kit. Replacing a PowerEdge 2950 or 2970 Optical Drive...
Installing a SATA Optical Drive - Page 5

... drive tray and insert the back end of the drive. Replacing the Optical Drive in a PowerEdge 2950 or 2970 System
2 1
3
4
5
6
7
1 optical drive 3 interposer 5 SATA power cable 7 optical drive carrier
2 interposer release latch 4 SATA cable 6 carrier latch
Replacing a PowerEdge 1950 Optical Drive
NOTE: The replacement drive tray provided in the side of the SATA optical...
Installing a SATA Optical Drive - Page 7

Installing the SATA Optical Drive - PowerEdge 2970 or 2950
1 Insert the optical drive tray into the system until it is fully inserted and locked into position.
2 Connect the SATA cable (the end with the branching power cable) to the back of the optical drive.
3 Connect the branching power cable to power and turn on system board...
Installing a SATA Optical Drive - Page 8

... data cable
4 SATA power cable
5 optical drive
8
Installing a SATA Optical Drive SATA Cable Routing in the right wall of the system until the bracket detaches from the chassis slots.
6 Route the SATA cable in the cable channel in the PowerEdge 2950 and 2970
1
2
3 4 5
1 SATA_B connector on the system board. See "Removing the Cooling Shroud...
Information Update - Page 3
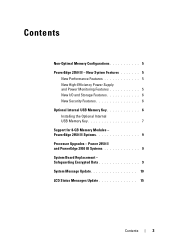
... Features 5 New High-Efficiency Power Supply and Power Monitoring Features 5 New I/O and Storage Features 6 New Security Features 6 Optional Internal USB Memory Key 6 Installing the Optional Internal USB Memory Key 7 Support for 8-GB Memory Modules - Contents
Non-Optimal Memory Configurations 5 PowerEdge 2950 III - Power 2950 II and PowerEdge 2950 III Systems 9 System Board Replacement...
Information Update - Page 5

.... • Baseboard Management Control (BMC) power monitoring monitors
current, voltage, and power utilization in the DIMM set for Setup
NOTE: Mixing DIMMs of different speeds renders the memory configuration non-optimal. The system clocks down the performance to continue or F2 for the channel.
Information Update
5 PowerEdge 2950 III -
New System Features
New Performance...
Information Update - Page 9

... "III", your system. Processor Upgrades -
PowerEdge 2950 III Systems
PowerEdge 2950 III systems have added support for 8-GB Memory Modules -
Power 2950 II and PowerEdge 2950 III Systems
• If the front of...operating system documentation that your system. Safeguarding Encrypted Data
On PowerEdge 2950 III systems using Windows Server® 2008, you can use encryption programs, such ...
Information Update - Page 10
... you restart your system before you can access the encrypted files on the screen to remove the system cover and access any of a possible problem with the system. WARNING: ...a
interleaving, or the
configuration that node
for additional information
interleaving cannot be
for the PowerEdge 2950 III system and the probable cause and corrective action when the message appears. System messages...
Information Update - Page 15
... the PowerEdge 2950 III system and the probable cause for each message. The SYSTEM NAME displays under the following conditions:
• The system is powered on.
• The power is unable...Using the System Setup Program" in the system event log (SEL).
The BMC is off power to determine the CPU(s) temperature status.
The LCD messages refer to maximum as a precautionary measure...
Information Update - Page 24

System Diagnostics Update
In the Customize window of operating systems on the Server OS Install tab. You cannot save the file to specify the ... Build and Update Utility, Microsoft® Windows® 2000 is supported by the PowerEdge 2950 and 2950 II systems, but not by the PowerEdge 2950 III system. System Support for Microsoft Windows 2000
If you to a hard drive.
24
Information...
Information Update - Page 46
Microsoft Windows 2000
System Build and Update Utility Microsoft® Windows® 2000 将位于 Server OS Install PowerEdge 2950 和 2950 II PowerEdge 2950 III
Customize Log output file pathname USB
46
信息更新
Information Update - Page 132
...; cat/sys/devices/system/cpu/cpuxx/cpufreq/scaling_ cur_freq
• RHEL 3 9 Intel Xeon 54xx proc/cpuinfo
RHEL 4
Microsoft Windows 2000
System Build and Update Utility Server OS Install OS OS Microsoft® Windows® 2000 PowerEdge 2950/2950 II OS PowerEdge 2950 III
Customize Log output file pathname USB
132
Information Update - Page 157
Microsoft Windows 2000
Microsoft® Windows® 2000 이 Server OS Install(서버 OS PowerEdge 2950 III 대신 PowerEdge 2950 및 2950 II
Customize Log output file pathname USB
157
Hardware Owner's Manual (PDF) - Page 4
... System Components 51
Recommended Tools 51
Inside the System 52
Front Bezel 53 Removing the Front Bezel 53 Replacing the Front Bezel 54
Opening and Closing the System 54 Opening the System 54 ... Into a SATAu Hard-Drive Carrier 61
Power Supplies 62 Removing a Power Supply 63 Replacing a Power Supply 64 Removing the Power Supply Blank 64 Installing the Power Supply Blank 65
4
Contents
Hardware Owner's Manual (PDF) - Page 63
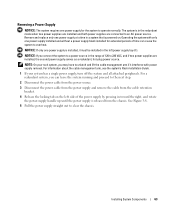
Operating the system with power supply removal.
Installing System Components
63 Removing a Power Supply
NOTICE: The system requires one power supply for extended periods of time can leave the system running and proceed to the next step.
2 Disconnect the power cable from the power source.
3 Disconnect the power cable from the power supply and remove the cable from the cable retention...
Hardware Owner's Manual (PDF) - Page 64

... for the system to clear the bay, and remove from the chassis. Removing the Power Supply Blank
Using a Phillips screwdriver, remove the screw on the unoccupied power supply bay in the extended position, slide the new power supply into a power outlet. The power supply status indicator will turn green to the power supply, and plug the cable into the...
Hardware Owner's Manual (PDF) - Page 81

... Align the front edge of the RAC card...system. b Connect the second cable to connector 2 on the RAC card and to their power sources, and turn them on the system
board. Reinstall the central riser board. NOTICE: ... on a tray that you do not damage the surrounding system board components. See "Removing the Front Bezel" on page 100.
When the front of the card is mounted on the system ...
Hardware Owner's Manual (PDF) - Page 107

... trained service technicians are hot to the touch for the DIMMs to the power source and turn on page 78 5 Remove the cooling shroud. See "Removing the Expansion-Card Cage" on the system and attached peripherals. 8 If applicable, install the bezel. See "Installing a RAC Card" on page 92. Handle the DIMMs by the card...
Hardware Owner's Manual (PDF) - Page 119
... a fan-related error message. • Front panel LCD indicates a problem with the fan. See "Removing a Power Supply" on page 64. Troubleshooting Your System
119 Remove and install only one power supply installed, without a power supply blank installed, can hot-plug the power supplies. See "Removing a Power Supply" on page 63. 3 Ensure that none of time with only one...
Similar Questions

How Do You Remove The System Board On A Dell Power Edge 2950
(Posted by dgeHoch 9 years ago)


Request For Dell Power Edge 2950
Dear, i have some problem in my Dell power edge 2950 mechine, when i start it i always see the messa...
Dear, i have some problem in my Dell power edge 2950 mechine, when i start it i always see the messa...
(Posted by HAFIZUMAIR 10 years ago)


How Migrate Dell Power Edge 2950 Red Hat Linux Server To Window Server 2008 R2
My dell power edge 2950 was intalled red hat linux i have tried to migrate from linux to windows ser...
My dell power edge 2950 was intalled red hat linux i have tried to migrate from linux to windows ser...
(Posted by mozammelhoq 12 years ago)