
Dell Inspiron One 2320 Support Question
Dell Inspiron One 2320 Support Question
Find answers below for this question about Dell Inspiron One 2320.Need a Dell Inspiron One 2320 manual? We have 3 online manuals for this item!
Question posted by jec8515 on August 9th, 2012
Inspiron One 2320 All-in-one Computer. My Hp Photosmart 5510 Wireless Won't Wor
My hotosmart 5510 was connected but I relocated apartments. Have connection codes and all else and printer was working but stopped. Best Buy tried reconnecting but could not be certain of wireless function.
Would "adding a printer" and starting over work?
Is it possibe to purchase an actual manual for my All-in-One.
Due to brain surgery/aneurism/memory loss cannot use
downloaded items--comprehension problem.
Current Answers
Answer #1: Posted by DellJesse1 on August 9th, 2012 10:23 AM
DellJesse1

Member since:
April 19th, 2012 Points: 1,551,500

Member since:
April 19th, 2012 Points: 1,551,500
jec8515,
Sorry to hear about your printer setup issues. Unfortunately, Dell does not have any printed manuals to send out to customers. They are only available through download. I have included some steps and information to setup your HP Photosmart 5510 wireless printer. I hope this helps you resolve your issue. If needed you can also contact HP to help you setup your printer if needed.
Follow these steps to reset your HP product and your wireless router, and then restart your computer.
- Press the Power button ( ) on the HP product to turn it off.
- Disconnect the power cord from the rear of the HP product.
- Wait 30 seconds.
- Reconnect the power cord to the rear of the HP product.
- Disconnect the power cord from the wireless router.
- Wait 30 seconds.
- Reconnect the power cord to the wireless router.
- Restart your computer.
Refer to the network configuration page or the wireless network test report that you printed in Step one, and locate the IP address of the HP product.
- Open a new Internet browser window, and type the IP address of the HP product in the browser's address bar, and then press Enter . A web page displays, showing the internal settings of the HP product.
- Click the Networking tab, click the Wireless tab, and then click the IPv4 tab. (Your menu path might be slightly different, depending on your HP product model.) A new settings page displays.
-
On the page that displays, make the following changes:
- Set a Manual IP : Your wireless router automatically sets an IP address within a specific range (called the DHCP range). If you know what the DHCP range is, set an IP address in which the last set of numbers is outside that range, but no higher than 254. Keep the first three sets of numbers the same. If you do not know the DHCP range, select a fairly high IP address, like 250 (again, for the last set of numbers). To learn about your router's DHCP range, contact your Internet Service Provider (ISP) or wireless router manufacturer.
- Set subnet address : Use 255.255.255.0, unless you know that it is different, in which case you should use that number.
- Set the gateway address and Google public DNS servers: Enter your router's IP or gateway IP Address (can be found on the network configuration page or the wireless network test report). and on the DNS enter 8.8.8.8 and 8.8.4.4 as the alternate.
Thank You,
Dell-Jesse1
Dell Social Media and Communities
email:[email protected]
Dell Community Forum.
www.en.community.dell.com
Dell Twitter Support
@dellcares
Dell Facebook Support
www.facebook.com/dell
#iwork4dell
Related Dell Inspiron One 2320 Manual Pages
Quick Start Guide (PDF) - Page 1
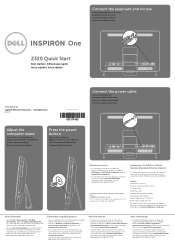
...Verenigde Staten kunnen 800-WWW-DELL (800-999-3355) bellen. Connect the keyboard and mouse
Sluit het toetsenbord en de muis aan ... teclado y el mouse Conecte o teclado e o mouse
One
2320 Quick Start
Snel starten | Démarrage rapide Inicio rá...Inspiron™ are trademarks of ga naar support.dell.com/manuals als u meer wilt weten over de functies en geavanceerde opties die voor uw desktop...
Owners Manual - Page 2
... the entities claiming the marks and names or their products. A00
Reproduction of Microsoft Corporation in this text: Dell™, the DELL™ logo, and Inspiron™ are either potential damage to hardware or loss of your computer. Trademarks used in the United States and/or other than its own.
2011...
Owners Manual - Page 3
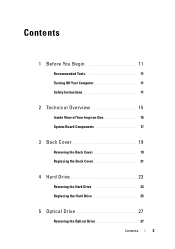
Contents
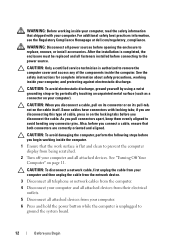
1 Before You Begin 11
Recommended Tools 11 Turning Off Your Computer 11 Safety Instructions 11
2 Technical Overview 15
Inside View of Your Inspiron One 15 System Board Components 17
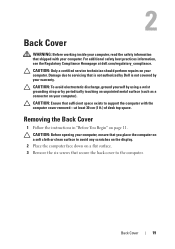
3 Back Cover 19
Removing the Back Cover 19 Replacing the Back Cover 21
4 Hard Drive 23
Removing the Hard ...
Owners Manual - Page 5
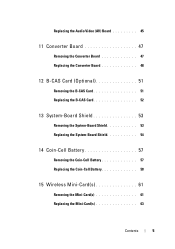
... 53 Replacing the System-Board Shield 54
14 Coin-Cell Battery 57
Removing the Coin-Cell Battery 57 Replacing the Coin-Cell Battery 58
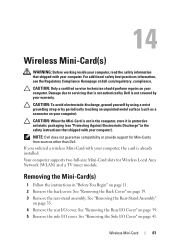
15 Wireless Mini-Card(s 61
Removing the Mini-Card(s 61 Replacing the Mini-Card(s 63
Contents
5
Owners Manual - Page 12
... best practices...computer). Some cables have connectors with your computer. if you pull connectors apart, keep them evenly aligned to avoid bending any of cable, press in ...connect a cable, ensure that shipped with locking tabs;
Also, before connecting to replace, remove, or install accessories. CAUTION: To avoid damaging the computer, perform the following steps before you begin working...
Owners Manual - Page 13
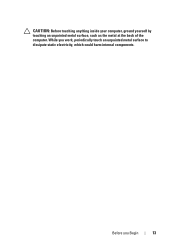
While you Begin
13 Before you work, periodically touch an unpainted metal surface to dissipate static electricity, which could harm internal components. CAUTION: Before touching anything inside your computer, ground yourself by touching an unpainted metal surface, such as the metal at the back of the computer.
Owners Manual - Page 15
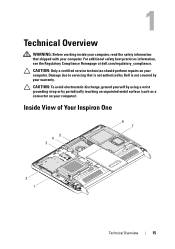
... safety best practices information, see the Regulatory Compliance Homepage at dell.com/regulatory_compliance. Inside View of Your Inspiron One
45... 3
6 7
2 1
Technical Overview
15 CAUTION: Only a certified service technician should perform repairs on your computer). Damage due to servicing that shipped with your computer.
1
Technical Overview
WARNING: Before working...
Owners Manual - Page 19
... servicing that sufficient space exists to support the computer with your computer. For additional safety best practices information, see the Regulatory Compliance Homepage at least 30 cm (1 ft.) of desk top space. 2
Back Cover
WARNING: Before working inside your computer, read the safety information that secure the back cover to the computer...
Owners Manual - Page 21
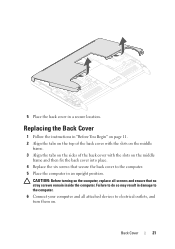
... the back cover into place. 4 Replace the six screws that secure the back cover to the computer. 5 Place the computer in damage to the computer. 6 Connect your computer and all screws and ensure that no stray screws remain inside the computer. CAUTION: Before turning on . Failure to electrical outlets, and turn...
Owners Manual - Page 23
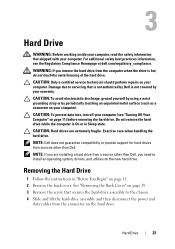
.../regulatory_compliance. CAUTION: Only a certified service technician should perform repairs on the new hard drive. 3
Hard Drive
WARNING: Before working inside your computer, read the safety information that shipped with your warranty. For additional safety best practices information, see "Turning Off Your Computer" on page 11. 2 Remove the back cover. CAUTION: To prevent...
Owners Manual - Page 25
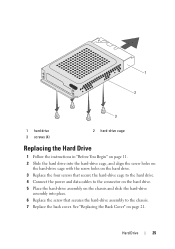
... "Before You Begin" on page 11. 2 Slide the hard drive into place. 6 Replace the screw that secure the hard-drive cage to the hard drive. 4 Connect the power and data cables to the chassis. 7 Replace the back cover. See "Replacing the Back Cover" on the chassis and slide the hard-drive...
Owners Manual - Page 26
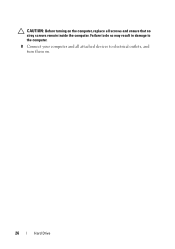
Failure to do so may result in damage to the computer.
8 Connect your computer and all attached devices to electrical outlets, and turn them on the computer, replace all screws and ensure that no stray screws remain inside the computer. CAUTION: Before turning on .
26
Hard Drive
Owners Manual - Page 27
For additional safety best practices information, see the Regulatory Compliance Homepage at dell.com/regulatory_compliance. CAUTION:...computer. CAUTION: Only a certified service technician should perform repairs on your computer.
4
Optical Drive
WARNING: Before working inside your computer, read the safety information that is not authorized by Dell is not covered by periodically touching an...
Owners Manual - Page 29
....
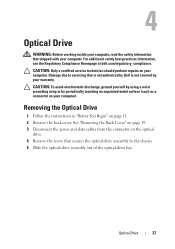
1 screws (2) 3 optical drive
2 optical-drive bracket
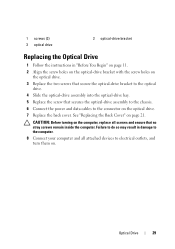
Replacing the Optical Drive
1 Follow the instructions in damage to the computer. 8 Connect your computer and all screws and ensure that secures the optical-drive assembly to the chassis. 6 Connect the power and data cables to the connector on the optical drive. 7 Replace the back cover.
Owners Manual - Page 31
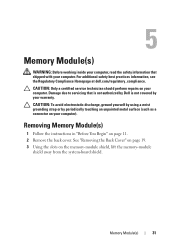
5
Memory Module(s)
WARNING: Before working inside your computer, read the safety information that is not authorized by Dell is not covered by periodically touching an unpainted metal surface (such as a connector on your computer). For additional safety best practices information, see the Regulatory Compliance Homepage at dell.com/regulatory_compliance. Damage due to servicing...
Owners Manual - Page 32
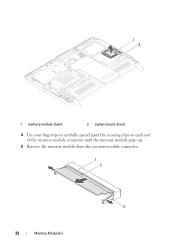
1 2
1 memory-module shield
2 system-board shield
4 Use your fingertips to carefully spread apart the securing clips on each end of the memory-module connector until the memory module pops up.
5 Remove the memory module from the memory-module connector.
1 2
3
32
Memory Module(s)
Owners Manual - Page 61
...I /O cover.
For additional safety best practices information, see "Protecting Against Electrostatic Discharge" in protective antistatic packaging (see the Regulatory Compliance Homepage at dell.com/regulatory_compliance.
Wireless Mini-Card
61
If you ordered a wireless Mini-Card with your computer. 14
Wireless Mini-Card(s)
WARNING: Before working inside your computer, read the...
Owners Manual - Page 62
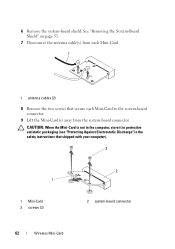
... safety instructions that secure each Mini-Card.
1
1 antenna cables (2)
8 Remove the two screws that shipped with your computer).
3
1
1 Mini-Card 3 screws (2)
2 2 system-board connector
62
Wireless Mini-Card 6 Remove the system-board shield.
Owners Manual - Page 63

See "Replacing the Side I /O cover. Wireless Mini-Card
63 The following table provides the antenna cable color scheme for the Mini-Card(s) supported by...Use of the Mini-Card down and replace the two screws that secure the Mini-Card to the system-board connector. 5 Connect the appropriate antenna cable(s) to the Mini-Card you are keyed to the Mini-Card, ensure that no cables or antenna ...
Owners Manual - Page 64

11 Connect your computer and all attached devices to electrical outlets, and turn them on.
64
Wireless Mini-Card
Similar Questions

Inspiron One How To Connect Wireless Keyboard
(Posted by NDISOmartin 9 years ago)

Dell Inspiron One 2320 Why Don't My Volume Up/down Button Work
(Posted by eugVAZDE 10 years ago)

Dell Inspiron 620s Will Not Connect To Wireless Internet
(Posted by edBauman 10 years ago)

Is It Possible To Purchase A Manual For My Dell Inspiron 2320 All-in-one
printer from your company? If so, please advise price and how to get it. If not. do you know where I...
printer from your company? If so, please advise price and how to get it. If not. do you know where I...
(Posted by jec8515 11 years ago)