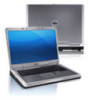
Dell Inspiron N7110 Support Question
Dell Inspiron N7110 Support Question
Find answers below for this question about Dell Inspiron N7110.Need a Dell Inspiron N7110 manual? We have 2 online manuals for this item!
Question posted by danweja on July 28th, 2014
How To Install N7110 Hinge Covers
The person who posted this question about this Dell product did not include a detailed explanation. Please use the "Request More Information" button to the right if more details would help you to answer this question.
Current Answers
Related Dell Inspiron N7110 Manual Pages
Setup Guide - Page 5
... (Optional 12 Set Up Wireless Display (Optional 14 Connect to the Internet (Optional 16
Using Your Inspiron Laptop 18 Right View Features 18 Left View Features 20 Back View Features 24
Front View Features...40 Touch Screen Gestures (Optional 42 Removing and Replacing the Top Cover (Optional 44 Removing and Replacing the Battery 48 Software Features 50 Dell DataSafe Online Backup 51 Dell...
Setup Guide - Page 11
... Up Ubuntu
To set up an Internet connection. NOTE: For more operating system specific information.
9 Setting Up Your Inspiron Laptop
Set Up the Operating System
Your Dell computer is recommended that you download and install the latest BIOS and drivers for your computer available at the time of purchase. See the Ubuntu documentation...
Setup Guide - Page 17
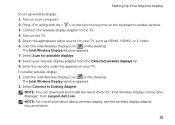
Setting Up Your Inspiron Laptop
To set up wireless display: 1. To enable wireless display: 1. Connect the wireless display ...appears. 7. Enter the security code that appears on your TV.
Turn on the desktop. NOTE: You can download and install the latest driver for "Intel Wireless Display Connection Manager" from the Detected wireless displays list. 9.
Select Scan for your...
Setup Guide - Page 25
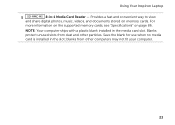
... memory cards, see "Specifications" on memory cards. Save the blank for use when no media card is installed in -1 Media Card Reader -
Using Your Inspiron Laptop
5
8-in the slot; NOTE: Your computer ships with a plastic blank installed in the media card slot. Provides a fast and convenient way to view
and share digital photos, music...
Setup Guide - Page 46
... that shipped with your computer. Using Your Inspiron Laptop
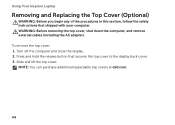
Removing and Replacing the Top Cover (Optional)
WARNING: Before you begin any of the procedures in this section, follow the safety instructions that secures the top cover to the display back cover. 3. NOTE: You can purchase additional replaceable top covers at dell.com.
44 Slide and lift...
Setup Guide - Page 47
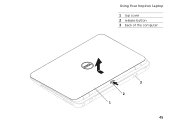
Using Your Inspiron Laptop 1 top cover 2 release button 3 back of the computer
3 2 1
45
Setup Guide - Page 48
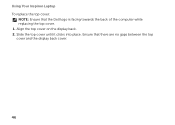
Using Your Inspiron Laptop To replace the top cover:
NOTE: Ensure that there are no gaps between the top cover and the display back cover.
46 Slide the top cover until it clicks into place. Align the top cover on the display back. 2. Ensure that the Dell logo is facing towards the back of the computer while replacing the top cover. 1.
Setup Guide - Page 52

..., click Start → All Programs→ FastAccess.
Using Your Inspiron Laptop
Software Features
FastAccess Facial Recognition
Your computer may have the FastAccess facial...files that can download or copy pictures and video files from portable devices, such as for software installed on connected TVs, projectors, and home theater equipment.
50 Check your purchase order for logging on ...
Setup Guide - Page 54

Select the settings icon and then choose the desired option. Using Your Inspiron Laptop
Dell Stage
The Dell Stage software installed on your computer provides access to your computer.
52 NOTE: Some of the applications on Dell Stage.
• Minimize - Play touch-enabled games.
• Documents -
...
Service Manual - Page 7
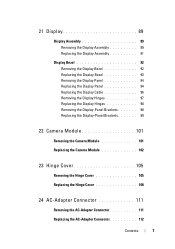
... Display-Panel Brackets 98 Replacing the Display-Panel Brackets 99
22 Camera Module 101
Removing the Camera Module 101 Replacing the Camera Module 102
23 Hinge Cover 105
Removing the Hinge Cover 105 Replacing the Hinge Cover 108
24 AC-Adapter Connector 111
Removing the AC-Adapter Connector 111 Replacing the AC-Adapter Connector 112
Contents
7
Service Manual - Page 79
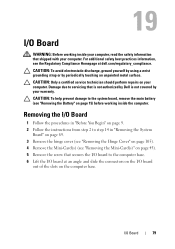
Damage due to servicing that is not authorized by Dell is not covered by periodically touching an unpainted metal surface.
I /O board at dell.com... Removing the I/O Board
1 Follow the procedures in "Removing the System
Board" on page 69. 3 Remove the hinge cover (see "Removing the Hinge Cover" on page 105). 4 Remove the Mini-Card(s) (see "Removing the Battery" on the computer base. CAUTION:...
Service Manual - Page 80

... and ensure that secures the I/O board to the computer base. 3 Replace the Mini-Card(s) (see "Replacing the Mini-Card(s)" on page 47). 4 Replace the hinge cover (see "Replacing the Hinge Cover" on page 108). 5 Follow the instructions from step 6 to the computer.
80
I /O board on page 72. 1 2
1 screw
2 I/O board
Replacing the I/O Board
1 Slide the...
Service Manual - Page 105

..." on page 15). 3 Follow the instructions from step 3 to step 4 in "Removing the Optical
Drive" on page 17. 4 Remove the four screws that secure the hinge cover to the computer base. 5 Remove the keyboard (see "Removing the Keyboard" on page 27). 6 Remove the palm-rest assembly (see "Removing the Palm-Rest Assembly...
Service Manual - Page 106

8 Push the two tabs that secure the hinge cover to the computer base.
106
Hinge Cover
Service Manual - Page 107

Hinge Cover
107 1
1 tabs (2) 9 Lift the hinge cover off the computer base.
Service Manual - Page 108

...You Begin" on page 9. 2 Align the two tabs on the hinge cover with the slots on the computer base
and snap the hinge cover into place. 3 Replace the display assembly (see "Replacing the Display... the keyboard (see "Replacing the Keyboard" on page 29). 6 Replace the four screws that secure the hinge cover to the computer base. 7 Follow the instructions from step 4 to step 5 in "Replacing the Optical
...
Service Manual - Page 109

Failure to do so may result in damage to the computer.
Hinge Cover
109 CAUTION: Before turning on the computer, replace all screws and ensure that no stray screws remain inside the computer.
Service Manual - Page 110

110
Hinge Cover
Service Manual - Page 111
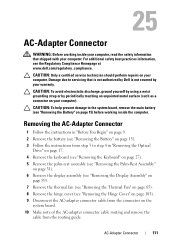
...the thermal fan (see "Removing the Thermal Fan" on page 65). 8 Remove the hinge cover (see "Removing the Hinge Cover" on page 105). 9 Disconnect the AC-adapter connector cable from the connector on page...inside your computer, read the safety information that is not authorized by Dell is not covered by periodically touching an unpainted metal surface (such as a connector on your computer). ...
Service Manual - Page 113

CAUTION: Before turning on page 16). AC-Adapter Connector
113 7 Replace the hinge cover (see "Replacing the Hinge Cover" on page 108). 8 Replace the palm-rest assembly (see "Replacing the Palm-Rest Assembly"
on page 35). 9 Replace the keyboard (see "Replacing the Battery" on ...
Similar Questions

How To Download And Install Drivers Softwares For Laptop Inspiron Dell N5110
free of cost
free of cost
(Posted by jimmtetl 10 years ago)

How To Install Wireless Network Adapter Dell Inspiron N7110
(Posted by awuebade 10 years ago)

How To Install Wireless Driver Dell Laptop Inspiron 5010
(Posted by chrisjatn 10 years ago)

How To Install Faster Hard Drive To Inspiron Dell N7110
(Posted by asRg 10 years ago)

How To Install External Speaker To Dell Inspiron N7110 Laptop
(Posted by Jrtorben 10 years ago)