Dell Dimension E510 Support Question
Dell Dimension E510 Support Question
Find answers below for this question about Dell Dimension E510.Need a Dell Dimension E510 manual? We have 3 online manuals for this item!
Question posted by mreye on July 3rd, 2011
Remove & Replace Power Button
How do I remove and replace the power button on the front of the Dell Dimension E510?
Current Answers
Related Dell Dimension E510 Manual Pages
Owner's Manual - Page 1
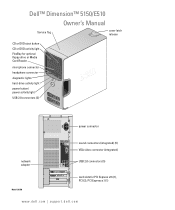
Dell™ Dimension™ 5150/E510
Owner's Manual
Service Tag
cover latch release
CD or DVD eject button CD or DVD activity light FlexBay for optional floppy drive or Media Card Reader
microphone connector headphone connector diagnostic lights hard-drive activity light power button/ power activity light
USB 2.0 connectors (2)
power connector
sound connectors (integrated) (5) VGA video ...
Owner's Manual - Page 25
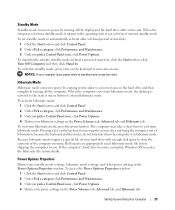
...computer memory, Dell creates an ...power by . When the computer exits from hibernate mode, the desktop...Power Options. 4 Define your computer loses power while in hibernate mode. To immediately activate standby mode without a period of hibernation, because the keyboard and the mouse do not function when the computer is restored to exit from hibernate mode, press the power button...
Owner's Manual - Page 40

... 53.
See "Resolving Software and Hardware Incompatibilities" on page 106.
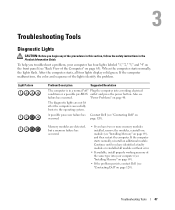
I F T H E P O W E R L I G H T I S G R E E N A N D T H E C O M P U T E R I S N O T R E S P O N D I G H T S O N T H E B A C K O F T H E C O M P U T E R - Replace the network cable.
Press a key on the keyboard, move the mouse, or press the power button to verify that your network to resume normal operation.
40...
Owner's Manual - Page 47
... 120).
A possible processor failure has Contact Dell (see
failure has occurred. To help you have two or more memory modules installed, remove the modules, reinstall one module (see "Back View of the same type into a working electrical
condition or a possible pre-BIOS outlet and press the power button. When the computer starts normally, the...
Owner's Manual - Page 59
...off your operating system, press and hold the power button for removing and installing the components in reverse order.
Removing and Installing Parts
Before You Begin
This chapter ...the safety information in your Dell™ Product Information Guide. • A component can be replaced or-if purchased separately-installed by performing the removal
procedure in your computer. Unless...
Owner's Manual - Page 60
...Removing and Installing Parts NOTICE: To avoid damaging the computer, perform the following safety guidelines to help protect your computer from potential damage and to help ensure your computer and all attached devices from their electrical outlets, and then press the power button...you connect a cable, ensure that is not authorized by Dell is not covered by your computer, ground yourself by ...
Owner's Manual - Page 62
... inches of space between all vents and any of this button indicates power state.
Press the power button to turn off the computer. NOTICE: Ensure that you ...power button to turn on the diagnostic code.
NOTICE: To avoid losing data, do not block any object near these vents.
Use only a dry cloth to clean the vent area to avoid water damage to the computer.
62
Removing...
Owner's Manual - Page 116
... 101). 7 Disconnect the computer power cable from the electrical outlet, and press the power button to ground the system board.
8 Open the computer cover (see "Replacing the Computer Cover" on page ...reenable the password feature. 10 Close the computer cover (see "Replacing the Computer Cover" on .
b Remove the jumper plug from the electrical outlet. Cleaning Your Computer
CAUTION: ...
Owner's Manual - Page 139
... Express, 76 removing PCI, 75 removing PCI Express, 79 slots, 72 types supported, 72
CD/DVD drive activity light, 61 eject button, 61 installing, 98 problems, 32 removing, 96
CD-...helpful tips, 20 how to, 18
cover removing, 65 replacing, 101
D
Dell contacting, 120 Dell Diagnostics, 50 support policy, 118 support site, 10
diagnostic lights, 47
diagnostics Dell, 50 lights, 47, 62
documentation End...
Owner's Manual - Page 141
..., 23 extended desktop mode, 23...removing, 75
PCI Express cards installing, 76 removing, 79
playing CDs and DVDs, 16
power button...power light conditions, 40
Power Options Properties, 25
printer cable, 13 connecting, 13 problems, 41 setting up, 13 USB, 13
problems battery, 31 blue screen, 37 CD drive, 32 CD-RW drive, 33 computer crashes, 36-37 computer stops responding, 36-37
problems (continued) Dell...
Service Manual - Page 2
... You Begin
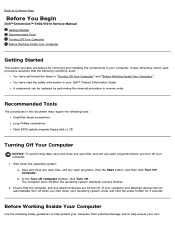
Dell™ Dimension™ 5150/E510 Service Manual Getting Started Recommended Tools Turning Off Your Computer Before Working Inside Your Computer
Getting Started
This section provides procedures for 4 seconds. Ensure that the following conditions exist:
You have read the safety information in your operating system, press and hold the power button for removing and...
Service Manual - Page 3
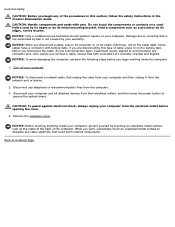
...keep them evenly aligned to servicing that is not authorized by Dell is not covered by touching an unpainted metal surface, such as...telecommunication lines from their electrical outlets, and then press the power button to Contents Page
CAUTION: Before you begin working inside ...devices from the computer.
3. Remove the computer cover. NOTICE: Only a certified service technician should perform repairs on ...
Service Manual - Page 17
... in the Product Information Guide. NOTICE: Ensure that you are working on a level, protected surface to Contents Page
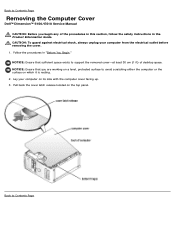
Removing the Computer Cover
Dell™ Dimension™ 5150/E510 Service Manual CAUTION: Before you begin any of desktop space. CAUTION: To guard against electrical shock, always unplug your computer on the top panel. Pull back the...
Service Manual - Page 18
...Back to Contents Page
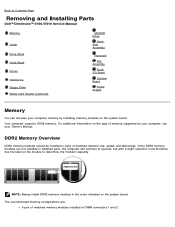
Removing and Installing Parts
Dell™ Dimension™ 5150/E510 Service Manual
Memory
Cards ...Drive Panel Front Panel Drives Hard Drive Floppy Drive Media Card Reader (Optional)
CD/DVD Drive
Heat Sink Assembly
Processor
Fan Assembly
Front I/O Panel
System Board
Power...
Service Manual - Page 51
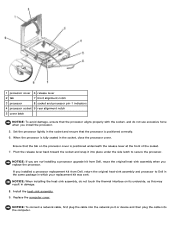
...the processor lightly in the socket and ensure that the processor is fully seated in which your replacement kit was sent. When the processor is positioned correctly.
6.
NOTICE: To connect a network ...into the network port or device and then plug the cable into place under the side latch to Dell in the same package in the socket, close the processor cover. 1 processor cover 6 release lever...
Service Manual - Page 55

...all attached devices from the computer.
4.
If your computer from the system board. Removing the System Board
CAUTION: To guard against electrical shock, always unplug your computer and ...at the back of the computer. Remove any telephone or telecommunication lines from their electrical outlets, and then press the power button to dissipate any static electricity that could harm internal ...
Service Manual - Page 57

... properly when you replace them to components inside your computer, discharge static electricity from your body before you remove them from the system board and drives.
Remove the computer cover. 3. Slide the power supply approximately 1 inch closer to the back of the computer. Press the release button located on the computer chassis. Remove the four screws...
Service Manual - Page 62

...Dell for running the test.
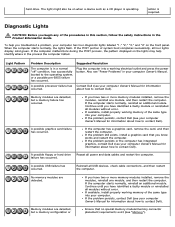
Solid green power light and no video during POST incorrectly installed. Power Light
Problem Description
Suggested Resolution
Solid green
Power is identified. Blinking green
The computer is required. Press the power button...the Drivers and Utilities CD, remove the CD.
5. Also, check the diagnostic lights to contact Dell).
Check the diagnostic lights ...
Service Manual - Page 63
... the computer.
If available, install properly working electrical outlet and press the power button. If the problem persists, contact Dell (see "Memory").
If the problem still exists, install a graphics card ...displayed on the lights may help you have two or more memory modules installed, remove the modules, reinstall one module, and then restart the computer. Light Pattern
Problem...
Service Manual - Page 72

...desktop appears on your computer and devices to reenable the password feature. 10. Locate the 3-pin password jumper (PSWD) on the system board (see Removing...RTCRST) on the system board (see Replacing the Computer Cover). b. Replace the jumper plug on pins 1 and...the electrical outlet. 7.
Remove the jumper plug from the electrical outlet, and press the power button to electrical outlets, ...
Similar Questions


How To Remove The Power Button In Dell Dimension 4550
(Posted by dragalntin 9 years ago)

How To Remove The Front Panel On A Dell Dimension E510
(Posted by Dobercass 10 years ago)


Replace Power Button
power button fell out of its front panel housing and can not turn computer on. how do yu remove the ...
power button fell out of its front panel housing and can not turn computer on. how do yu remove the ...
(Posted by jo64150 11 years ago)