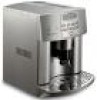
DeLonghi ESAM3500 Support Question
DeLonghi ESAM3500 Support Question
Find answers below for this question about DeLonghi ESAM3500.Need a DeLonghi ESAM3500 manual? We have 1 online manual for this item!
Question posted by annpowter on January 16th, 2019
I Am Unable To Take Out The Infuser
I have followed the instructions but it will not come out. it fills like it is gamed in. Can I take it apart to get it out. the message came up General alarm. This is why I need to remove it
Current Answers
Answer #1: Posted by waelsaidani1 on January 21st, 2019 7:10 AM
waelsaidani1

Member since:
May 12th, 2013 Points: 19,501,797

Member since:
May 12th, 2013 Points: 19,501,797
To best resolve this, check the following:
- -Make sure your drip tray and grounds bin are in place.
- -If you have tried to remove the infuser, make sure the red buttons on the infuser are not slightly pressed in. Push the infuser backwards. This will click it back into place if need be.
- -Unplug the machine from the wall for 30 seconds, and then turn it back on to reset the machine.
If you have managed to remove your drip tray and cannot get it back in to do the above reset, follow the process above, but instead:
- -Open the front door and remove the grounds container from the drip tray.
- -Put the grounds container back into the machine (minus the drip tray) and close the door holding the grounds tray into place as it will not sit at the correct height without the drip tray. You may need to lift it ever so slightly as you close the door.
- -Turn the machine power on. This should reset the infuser and it will go back into its correct position.
If the infuser does not go back into position after these attempts, you will need to bring it into Crema Coffee Garage, a DeLonghi approved service centre, for assistance.
Related DeLonghi ESAM3500 Manual Pages
Owner Manual - Page 7

...PREPARING COFFEE (USING COFFEE BEANS 10 7 CHANGING THE QUANTITY OF COFFEE IN THE CUP 12 8 REGULATING THE COFFEE MILL 12 9 PREPARING ESPRESSO/COFFEE WITH PRE-GROUND COFFEE
(...COFFEE 14 13 PREPARING FROTHED MILK (WITHOUT COFFEE 15 14 CHANGING THE QUANTITY OF COFFEE AND MILK FOR CAPPUCCINOS . . . .15 15 CLEANING AND MAINTENANCE 15
15.1 CLEANING THE COFFEE MAKER 15 15.2 CLEANING THE INFUSER...
Owner Manual - Page 8
... remove the...followed, including the following: • Read all instructions...INSTRUCTIONS
- aged in their use only. Any other liquid. • Never allow the appliance to insert the plug fully into the wall outlet. WIRE CORD.
A short power cord is exercised in any control to replace your obsolete outlet. Longer, detachable power supply cords or extension cords are unable...
Owner Manual - Page 9

... cannot be used. Ground coffee funnel H. Milk container lid with the wording "FRO- Milk spouts J . Power cable O. Display 2. Button to "make espresso coffee" and "hot drinks"....the wording "FROTHED
MILK -
Drip tray (removable) R. Coffee grounds container (removable) U. Latte button
2 SAFETY WARNINGS
READ THESE INSTRUCTIONS CAREFULLY AND KEEP FOR FUTURE CONSULTATION! •...
Owner Manual - Page 10

... water. The first time you select the wrong language by mistake, follow the step-by-step instructions described in the following the instructions in place, INSERT WATER SPOUT is complete and undamaged. After 5 seconds, the appliance displays:
FILL TANK
To fill, remove the tank (fig. 2), rinse and fill with a suitable
type by a qualified professional. • The power cable...
Owner Manual - Page 11
..., the appliance automatically stops delivering the coffee and
ejects the grounds into the cup, follow the instructions in the drip tray below). to make it hotter, fill the cup with this hot rinsing water first. The appliance now displays the ready message:
READY regular TASTE
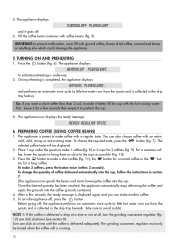
6 PREPARING COFFEE (USING COFFEE BEANS)
1.
To make another coffee.
5. To turn the grinding...
Owner Manual - Page 12

... (this water to fill (and then empty) the
cup to be emptied, even if it .
• Unless preheated, do not use the hot rinse- NOTE 2: If the coffee is delivered too fast and is delivering coffee, never remove the water tank.
If 2 to preheat it is full and must preheat
the infuser by pulling the...
Owner Manual - Page 13

...as follows:
- The problem can be traces of coffee have been delivered. normal coffee (2.7 oz) (when the
button is factory preset to automatically deliver the following the instructions indicated ... by following quantities of coffee need to the coffee.
When using the appliance for at least 8
seconds then release until the message "PROGRAM QUANTITY" is displayed and coffee is delivered...
Owner Manual - Page 14

... knife to push the coffee down (fig. 18), then remove and clean the infuser and appliance as described in section 6.
The appliance displays:
HOT WATER
and hot water is attached to select the ground coffee function. The appliance displays:
READY PRE-GROUND
• Lift the lid in drips and the message "GROUND TOO FINE ADJUST...
Owner Manual - Page 15

... delivers the coffee and displays the "ready" message again. • The cappuccino is complete, remove the milk ...Remove the frothed milk lid from the milk container.
• Fill the container with about 3.5 ounces of milk while delivering the milk, remove...the milk tube as follows: • Attach the water spout (fig. 4). • Position a container under the coffee and
milk spouts (...
Owner Manual - Page 16

...of coffee or milk delivered automatically into the cup, follow the instructions in section 14.
13 PREPARING FROTHED MILK (WITHOUT COFFEE)
• Remove the lid of the milk container.
• Fill the... on
the milk container. The infuser, grounds container, water tank and drip tray must be washed in the dishwasher. 15.1 Cleaning the coffee maker Clean the grounds container (as ...
Owner Manual - Page 17

...parts inside of coffee encrustations which could cause malfunction. To remove the coffee stuck to avoid the build-up all the residues using detergents.
NOTE 1: If the infuser is not inserted.... Clean the nozzle regularly with a sponge as follows: • turn the appliance off ; • open the service door (Fig. 14); • remove the drip tray and the grounds container (Fig....
Owner Manual - Page 18
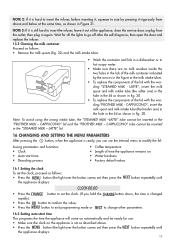
...16.2 Setting auto-start time • Descaling process
• Coffee temperature • Length of time the appliance remains on •...comes on) then press the
button repeatedly until
the appliance displays:
17 Wait for use the internal menu to go off after the self-diagnosis, then open the door and replace the infuser. 15.3 Cleaning the milk container Proceed as follows: • Remove...
Owner Manual - Page 19
...8226; Press
once and the appliance displays the message:
button down, the time is ready.
• press the
button (the light over the button comes on the unlit display.
• Press ...thorougly to eliminate residues of descaling solution from inside the coffee maker.
• After about 30 minutes, the appliance displays:
RINSING FILL TANK
The appliance must now be purchased from the ...
Owner Manual - Page 20

...coffee temperature
To change the temperature of the coffee, proceed as follows:
• Press the
button (the light over the button comes...follows:
• remove the "Total Hardness Test" strip (enclosed on page 2) from its packaging then dip it back under the hot water spout. • Press the OK button. The coffee maker...empty, the appliance displays the message:
RINSING COMPLETE PRESS OK
...
Owner Manual - Page 21

...language, follow the instructions in section
4.1.
18 TROUBLESHOOTING
MESSAGE
MEANING
WHAT TO DO
FILL TANK
...COFFEE
FILL BEANS CONTAINER
DESCALE
• With the function selected, the pre- • Add the ground coffee as follows:
• Press the
button (the light over the button comes on) then press
repeatedly until the appliance displays the
installation message in
ground coffee...
Owner Manual - Page 22

... the appliance, then follow
the instructions displayed. CLOSE DOOR INSERT INFUSER ASSEMBLY
• The service door is open.
• If the service door cannot be identified and resolved by referring to rest for espresso coffee makers. ground coffee has been added.
ning, contact a service center.
19 PROBLEMS THAT CAN BE RESOLVED BEFORE CALLING THE SERVICE CENTER
If...
Owner Manual - Page 23

... pressed, the the funnel. pressed, the appliance
does not come • The holes in section 15.3.
appliance, as described in the spouts are free to remove the infuser with the
appliance on will risk causing damage.
• Too much ground coffee has been • Remove the infuser and thoroughly clean the inside
the
service
•
Thoroughly...
Owner Manual - Page 24
... the appliance, which accompany it any appliance, which vary from defects in connection with the sale or use of Mexico: Please refer to Super Automatic Espresso Machines with De'Longhi.
If repairs become necessary, see contact information below:
U.S. This warranty shall apply only if the appliance is not covered by the warranty...
Similar Questions


General Alarm
machine shows "general alarm" I have tried cleaning per the manual and I have tried switching the ma...
machine shows "general alarm" I have tried cleaning per the manual and I have tried switching the ma...
(Posted by cborg 9 years ago)

Messy Coffee Grounds
my esam digital espresso/capucino/latte makes is throwing coffee grounds all over the inside of the ...
my esam digital espresso/capucino/latte makes is throwing coffee grounds all over the inside of the ...
(Posted by mdellinger 10 years ago)

Leaking Seal On My 14 Cup Glass Decanter On My Dc514t Delonghi Coffee Maker,
We are enjoying our DC514T DeLonghi coffee maker. Lately the 14 cup glass coffee pot leaks and makes...
We are enjoying our DC514T DeLonghi coffee maker. Lately the 14 cup glass coffee pot leaks and makes...
(Posted by EDDUNAY 10 years ago)

My Coffee Maker Is Not Making Coffee. The Expresso Part Is Still Working
lights and power are going into the coffee maker, the expresso sections seem to work ok just not cof...
lights and power are going into the coffee maker, the expresso sections seem to work ok just not cof...
(Posted by pjmoore86380 10 years ago)