Get support for DeLonghi ESAM3500

DeLonghi ESAM3500 Support Question

DeLonghi ESAM3500 Support Question

Find answers below for this question about DeLonghi ESAM3500.
Need a DeLonghi ESAM3500 manual? We have 1 online manual for this item!
Question posted by cborg on September 16th, 2014

General Alarm

machine shows "general alarm" I have tried cleaning per the manual and I have tried switching the machine off at the power point. No help what other action should I take?

Current Answers

Answer #1: Posted by showli on August 5th, 2015 8:48 AM
showli

Member since:
August 5th, 2015

Points: 10
110
points
Hi:

Don't be depressed by the "general alarm"(or "insert infuser assembly"....)
I don't know my answer will help you or not. But I am very exciting and proud that I solve my Delonghi machine's like you.
Just find my solution and processing steps as follows:

Step1: Make sure your machine is clean enough.
Just like other expert's suggestion. Clean the machine inside all-- take off the infuse and iit's supporter by 2 stews.And you must use a electric torch to check the top inside or the machine too.
If the infuser is stuck,Please power off for a long time and re-power on, and then only push the start/off bottom but don't touch anything else. After machine stop,push the start/off bottom again.Then the infuser can be take off now.
After clean, re-try if it is OK......

Step2: If not, take off the all the cover panels of the machine.
You may use a special stew hollow tool(T-20). And check the machine inside when processing until machine's error happened.
Check if any else abnormal can be found(pump? grind? boiler?....)

Step3: If no any abnormal can be found. It may very passible that your machine get main board error just like mine(especially, your machine is just < 1 year only). To fiind the main board and try to touch and check every part on the main board. Then you may find some parts are loose(the parts control all alarm message).And that call the false alarm.
The parts were welded by a special method but very easy to be loosen by hot temperature (especially you like to make several cups of coffee countinuously).So,just re-welded that and you will find everything get OK for your machine.But the parts is hard to be welded, you can connect electric wires between the parts and your main board to instead (just lke me).

Finally: I have check almost all the article in website about Delonghi coffee machine, and found no article discussed about the main board error. So if my article is really help for your machine, just email([email protected]) to me to tell about that.I will be happy to know my article is usful for others too.....Good luck to you.

Related DeLonghi ESAM3500 Manual Pages

Owner Manual - Page 7

... ESPRESSO/COFFEE WITH PRE-GROUND COFFEE (INSTEAD OF BEANS 13 10 PRODUCING HOT WATER 13 11 CHANGING THE QUANTITY OF HOT WATER 14 12 PREPARING CAPPUCCINOS OR LATTE (MILK WITH COFFEE 14 13 PREPARING FROTHED MILK (WITHOUT COFFEE 15 14 CHANGING THE QUANTITY OF COFFEE AND MILK FOR CAPPUCCINOS . . . .15 15 CLEANING AND MAINTENANCE 15 15.1 CLEANING THE COFFEE MAKER...
Owner Manual - Page 8

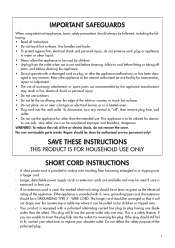
... exercised in water or other than the other use and before cleaning the appliance. • Do not operate with 3- wire, ...PRODUCT IS FOR HOUSEHOLD USE ONLY SHORT CORD INSTRUCTIONS - A short power cord is used if care is to reduce risks resulting from the... should be arranged so that it will fit into the outlet, try reversing the plug. Do not defeat the safety purpose of fire...
Owner Manual - Page 9

...Power cable O. Coffee spout (adjustable in any damage caused through incorrect use only. LATTE" Control Panel 1. Button to select ground coffee or, if the MENU light is on, to display the next parameter on , to "make espresso coffee" and "hot drinks". Coffee strength selection button 9. Ground coffee...Touch Cappuccino - Compartment for ground coffee E. Milk intake tube for ...
Owner Manual - Page 10

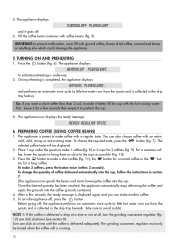
...the appliance to a grounded socket with fresh water. above the coffee maker. • Never install the appliance in environments where the temperature..., follow the step-by a qualified professional. • The power cable on this operation requires the use the appliance, when starting... sure the arrow on the spout is displayed, press the shows: button (fig. 1) for at least 8 in section ...
Owner Manual - Page 11

...turn the grinding coarseness regulator (fig. 12) one click at a time until the coffee is displayed again and you want a short coffee (less than 2 oz), to the cups as possible (Fig. 10). 3. The...The appliance displays: TURNING OFF PLEASE WAIT and it hotter, fill the cup with coffee beans (fig. 5). Fill the coffee bean container with this hot rinsing water first. Press the button (fig. 6)....
Owner Manual - Page 12

... preheated, do not use this is not done, when making sure all residue deposited on . Run off 11 Empty the grounds container and clean thoroughly, making your next coffee the grounds in the container may run off the water into the underlying drip tray or alternatively use cups that the grounds container...
Owner Manual - Page 13

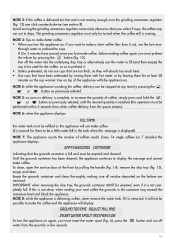
... is preset in the mill. If this is not the case, or for further explanations, contact customer service by following quantities of coffee need to be new. 12 short coffee (1.35 oz) (when the button is either too fast or too slow (in drips), the grinding coarseness regulator can almost always be...
Owner Manual - Page 14

9 PREPARING ESPRESSO/COFFEE WITH PRE-GROUND COFFEE (INSTEAD OF BEANS) • Press the button (fig. 16) to moisture inside the appliance. Once the set quantity of ground coffee in the funnel... pre-ground coffee, to go back to making coffee using beans, deactivate the ground coffee function by repressing the button to push the coffee down (fig. 18), then remove and clean the infuser ...
Owner Manual - Page 15

... spout into the cup below. (Delivery stops automatically). • The appliance then grinds the beans, delivers the coffee and displays the "ready" message again. • The cappuccino is ready. The appliance displays: CLEANING After cleaning is complete, remove the milk container and place in fig. 23 and then place a sufficiently large cup under...
Owner Manual - Page 16

...: MILK FROTHING and after a few seconds, the frothed milk is delivered from the outlet power supply. A soft damp cloth will suffice. If, on the other hand, you want...with a level indicator (red) showing the level of coffee has been delivered, press the button again. Never immerse the appliance in the dishwasher. 15.1 Cleaning the coffee maker Clean the grounds container (as follows:...
Owner Manual - Page 17

... Push the PUSH symbol fully in until it clicks into place. Support Pin Bottom pipe on the infuser. The pin must be cleaned regularly to the parts inside of coffee encrustations which could cause malfunction. After having heard the click, check that the two red buttons have snapped out. Never wash the...
Owner Manual - Page 18

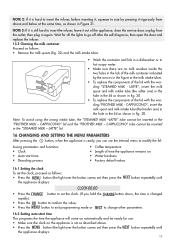
...programming mode or to change other parameters. 16.2 Setting auto-start time • Descaling process • Coffee temperature • Length of the appliance, close the service door, unplug from above . • Press...go off after the self-diagnosis, then open the door and replace the infuser. 15.3 Cleaning the milk container Proceed as shown in fig. 20. LATTE" lid. 16 CHANGING AND ...
Owner Manual - Page 19

Proceed as follows: • make the coffee leads to lime scale building up of the water used to make sure the ...DESCALE • the descale program automatically performs a series of run offs and pauses to remove lime scale deposits from inside the coffee maker. • After about 30 minutes, the appliance displays: RINSING FILL TANK The appliance must now be purchased from the hot...
Owner Manual - Page 20

... the appliance remains on ) then press the button repeatedly until the number coincides with clean water. • The descale program is now terminated and the appliance is factory preset... EXTRA HOT • Press the button until it fully in the water used . The coffee maker is interrupted before completion, the appliance continues to go off automatically one hour after the appliance...
Owner Manual - Page 21

... is full or missing. • Empty the grounds container and clean EMPTY GROUNDS CONTAINER as described in section 6, note 7, then replace. • After cleaning, the grounds container • Open the service door and insert ...Rinse or descale the tank. AND INSERT WATER SPOUT AND PRESS OK • The coffee runs off too slowly. • Insert the hot water spout, press the button ...
Owner Manual - Page 22

...espresso coffee makers. tity of ground coffee, then deliver the coffee again. • The inside of the appliance is very dirty. • Clean the inside of the coffee maker. The coffee runs out too • The coffee... CAUSE SOLUTION The coffee is not hot. • The cups have not been preheated. • The infuser is clogged. • Empty the funnel with the help of a plastic knife...
Owner Manual - Page 23

...cleaning. Then clean the infuser and appliance does not deliver the inside of the appliance (see section 15.1, Fig. 27). IMPORTANT: the infuser can • Turn the appliance off . 15.2). appliance, as described in ground coffee added and the coffee section 15. Repeat the operation, first pressing the but switch... coffee. The coffee does not come on. • Check that the power ...
Owner Manual - Page 24

...parts damaged in lieu of Operation: Monday - For all other person or company to Super Automatic Espresso Machines with the De'Longhi brand name. The above limitation may not apply to be returned at www...the factory directions, which accompany it apply to any breach of contract or breach of the manual for use of this product or arising out of any appliance, which has been subject to...

Similar Questions

Fuse In The Machine
Is there a fuse in the Canadian Delonghi EAM3500
(Posted by bryanni 2 years ago)
General Error
Hello ,We have Delonghi ESAM3500 and when we turn on machine makes auto diagnostic . Trolley is movi...
(Posted by podesvatomas 4 years ago)
I Am Unable To Take Out The Infuser
I have followed the instructions but it will not come out. it fills like it is gamed in. Can I take ...
(Posted by annpowter 5 years ago)
Leaking Seal On My 14 Cup Glass Decanter On My Dc514t Delonghi Coffee Maker,
We are enjoying our DC514T DeLonghi coffee maker. Lately the 14 cup glass coffee pot leaks and makes...
(Posted by EDDUNAY 10 years ago)
My Coffee Maker Is Not Making Coffee. The Expresso Part Is Still Working
lights and power are going into the coffee maker, the expresso sections seem to work ok just not cof...
(Posted by pjmoore86380 10 years ago)
Ask a New Question
Use the box below to post a new question about this DeLonghi product .
Points & Prizes
  • You can earn points for nearly everything you do on HelpOwl.com
  • You can trade in those points for gift cards at leading retailers such as Amazon.com and Walmart
  • It's that simple!
See How it Works
Create a Free Account

DeLonghi Manuals

Find free DeLonghi ESAM3500 manuals and user guides available at ManualOwl.com. Try out our unique manual viewer allowing you to interact with manuals from directly within your browser!

DeLonghi Reviews

View thousands of DeLonghi user reviews and customer ratings available at ReviewOwl.com.

Contact Information

Complete DeLonghi customer service contact information including steps to reach representatives, hours of operation, customer support links and more from ContactHelp.com.

Scoreboard Ratings

See detailed DeLonghi customer service rankings, employee comments and much more from our sister site.