D-Link DNS-726-4 Support Question
D-Link DNS-726-4 Support Question
Find answers below for this question about D-Link DNS-726-4 - Network Video Recorder Standalone DVR.Need a D-Link DNS-726-4 manual? We have 1 online manual for this item!
Question posted by robert38155 on July 21st, 2014
Dns-722-4 Nvr
Can I use DNS-722-4 as a normal; NAS device. What is default IP address
Current Answers
Answer #1: Posted by recomended on July 21st, 2014 2:59 AM
recomended

Member since:
July 8th, 2014 Points: 19,000

Member since:
July 8th, 2014 Points: 19,000
Related D-Link DNS-726-4 Manual Pages
Product Manual - Page 3

... Setup 33 Recording Schedule 34 Event Setup (DNS-726-4 Only 37 E-mail Setup 38 Dynamic DNS 39 Time and Date Setup 40
Maintenance 41 User Management 41 RAID 43 Backup and Restore 45 Firmware Update 46
Status 47 Camera Status 47 Device Info 48 System Log 49 NVR Log 50 Help 51
Live Video 52
D-Link DNS-722-4/DNS-726-4 User...
Product Manual - Page 5

...-4 User Manual
Product Overview
Product Overview
Package Contents
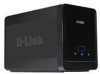
D-Link DNS-722-4/ DNS-726-4 Network Video Recorder (NVR) CAT5 Ethernet Cable Power Adapter Cable Holder Keys Manual and Software on CD Quick Install Guide
Note: Using a power supply with a different voltage than the one included with your reseller. Section 1 -
Product Manual - Page 7
Product Overview
Introduction
DNS-722-4/DNS-726-4 is a standalone wired NVR (Network Video Recorder) which supports multi-channel network cameras with reliable network functionality.
D-Link DNS-722-4/DNS-726-4 User Manual
Section 1 - DNS-722-4 supports D-Link network cameras only. The bundled 16-channel (DNS-726-4 only) recording software can record video directly sent from local and...
Product Manual - Page 8
...playback, and configuration.
• Centralized Interface for vivid video with high clarity. D-Link DNS-722-4/DNS-726-4 User Manual
Product Overview
Features
Comprehensive IP Surveillance Solution
• Total Solution: The D-Link NVR is a standalone SATA RAID network video recorder capable of digital over Ethernet.
• DDNS Support: Dynamic DNS is its higher resolution support. The...
Product Manual - Page 9

.... The UPS uses a USB interface to notify the NVR to an external device such as emergency power supply for continuous recording or recording during specifically allotted time frames. This recorded data can specify the number of days the recording should be sent via E-mail or to perform a proper shutdown before battery power runs out. 7. D-Link DNS-722-4/DNS-726-4 User Manual...
Product Manual - Page 18

...use with the NVR, you may connect it before powering the unit on. 1. Connect the UPS (Optional) If you would like to the Ethernet port.
Connect one end of the Ethernet cable to the port on the NVR... Connect the opposite end of this cable to a Gigabit Ethernet LAN port of the NVR. 2. D-Link DNS-722-4/DNS-726-4 User Manual
14 Connect the power cable to the UPS. (Ensure that you have...
Product Manual - Page 19

.... Supported Cameras DNS-722-4: Supports all D-Link network cameras. Installation
Turn on the NVR will begin to default settings. When you have a proper connection, wait about 60 seconds, the NVR power LED will stay steady and the Hard Disk and network LEDs will initialize the Hard Disk to blink. D-Link DNS-722-4/DNS-726-4 User Manual
15 The NVR will begin to...
Product Manual - Page 22

... Apply to save and activate changes to locate the device on your network and make any necessary changes. Network Video The NVR Search Utility displays the Recorder: available NVR devices on the name or IP of 192.168.0.32.
D-Link DNS-722-4/DNS-726-4 User Manual
18 If it does not receive a DHCP assigned IP address, by default it will also open a web browser for the...
Product Manual - Page 23

... the IP address of your admin account.
To access the configuration utility, click the NVR name or IP on how to choose a drive configuration type and format the drives. Standard configures each disk as a separate volume, while JBOD combines both disks into the NVR for more details on using the Web-based Configuration Utility. D-Link DNS-722-4/DNS-726-4 User...
Product Manual - Page 29
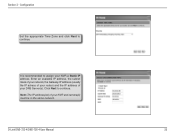
.... Configuration
Set the appropriate Time Zone and click Next to continue. Note: The IP address(es) of your DNS Server(s). Enter an available IP address, the subnet mask of your network, the Gateway IP address (usually the IP adress of your router) and the IP address of your NVR a Static IP address.
Section 3 - D-Link DNS-722-4/DNS-726-4 User Manual
25 Click Next to continue.
Product Manual - Page 32

...the features of your NVR using UPnP and add it to the NVR camera list. Search for your NVR. Step 2: Recording Schedule - Step 3: Dynamic DNS -
Step 2: Event Setup -
Configure the E-mail address and messages for recording and create a detailed schedule. Configure event options with various combinations.
Section 3 - D-Link DNS-722-4/DNS-726-4 User Manual
28 There...
Product Manual - Page 33

... default value "255.255.255.0" is used to your ISP (DSL service) is in the same subnet.
Invalid gateway settings may already have a DHCP server running on this connection if you may need to destinations in the future.
You may cause the failure of transmissions to your NVR.
D-Link DNS-722-4/DNS-726-4 User Manual
29
A static IP address...
Product Manual - Page 34

...the UPnP function, please go to the Camera
Setup menu and enter the IP address manually. • You may
take a moment for UPnP cameras. Click... list.
Please click Search again if cameras are not immediately displayed.
D-Link DNS-722-4/DNS-726-4 User Manual
30 Step 3: Enter the camera name, user name, and password...devices to respond to add other cameras into your first search.
Product Manual - Page 37

... this list can Users: access playback functions at the same time. Blocked List: IP addresses in Live Streaming Server settings, 1 connection means that 1 user can connect to 4 cameras, then the maximum number of users for remote Connections: access.
D-Link DNS-722-4/DNS-726-4 User Manual
33
The maximum number of connected users is 16 and if...
Product Manual - Page 42

... Contacts Step 1: Insert the name of this new contact. Server Address: SMTP (Simple Mail Transport Protocol) server IP address. Step 3: Click the Add Contact button.
User Name: Input the SMTP server login user name. Password: Input the SMTP server login user password. D-Link DNS-722-4/DNS-726-4 User Manual
38 Configuration
E-mail Setup
This section allows you...
Product Manual - Page 73

... a particular channel. Remote I/O: Users can remotely adjust the external I/O device. D-Link DNS-722-4/DNS-726-4 User Manual
69 Step 3: Run "Live View" application from CD.
Configuration
Multi-NVR Viewer Application
Step 1: Please insert the product CD. Information Display video information including server name, Display video current status, and bit rate for a selected
Window: channel.
Product Manual - Page 74

Step 3: Input the IP address. Step 6: Input the password. Site Setup
Set Groups for Cameras Step 1: Click the Group tab. Step 3: Click the Insert button to test the connection between ...
Product Manual - Page 77

...Step 5: Input the user name. The Search, Playback, Smart Search, Video Enhancement, Print Image, Save Video, Save Image, Backup functions are the same as the steps in /.... Step 10: Click the OK button. D-Link DNS-722-4/DNS-726-4 User Manual
73 Click to pause the playback and move to set the time period for Save Video. Step 3: Input the IP address of your unit. Step 9: Click the Add button...
Product Manual - Page 78

...Playback" application from CD. Step 6: Select the record date. D-Link DNS-722-4/DNS-726-4 User Manual
74 Step 1: Input the IP address of your files. Step 4: Click the OK ...the Backup application from the Start -> Programs -> D-Link -> Backup and File Manager
Backup the Recorded Video through Application In addition to the ways mentioned in the previous chapters, you would like to backup...
Product Manual - Page 79

... Recorded Video Step 1: Explorer (insert "\\" plus the IP address of the day in which you would like to delete. Step 2: Use the administrator's ID and password to keep the system stable, do not delete the recorded data of your unit). Caution In order to login. Step 3: Open the "videodata" folder. Step 5: Delete the entire folder. D-Link DNS-722-4/DNS-726...
Similar Questions

What Is The Default Ip Address Dlink Dcs-930l Network Camera
(Posted by kaskbodhi0 10 years ago)

Dns 320
I Cannot Find The Weblogin
For Example Http://192.168.1.1x/web/login
I have check my internet, with regrard to all the ip address i tried to sub the ip address inside th...
I have check my internet, with regrard to all the ip address i tried to sub the ip address inside th...
(Posted by nessakhoo 11 years ago)

Iget Ip Address Bit Not Dns On My Wifi Toshiba 40ux600u,so Youtube,and Vudu Acti
(Posted by Laudershane49sl 11 years ago)

