Craftsman 22124 Support Question
Craftsman 22124 Support Question
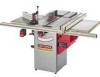
Find answers below for this question about Craftsman 22124 - Professional 10 in. Table Saw.Need a Craftsman 22124 manual? We have 1 online manual for this item!
Question posted by fcfleming on November 16th, 2016
What Is The Size Of The Biscuit, I Cannot Find Them.
The person who posted this question about this Craftsman product did not include a detailed explanation. Please use the "Request More Information" button to the right if more details would help you to answer this question.
Current Answers
Answer #1: Posted by TommyKervz on January 20th, 2017 11:31 PM
TommyKervz

Member since:
January 10th, 2013 Points: 17,776,813

Member since:
January 10th, 2013 Points: 17,776,813
Related Craftsman 22124 Manual Pages
Owners Manual - Page 1
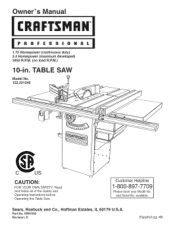
... and Co., Hoffman Estates, IL 60179 U.S.A. Part No.
OR91552 Revision: D
Espa5ol pg. 48 available. TABLE SAW
Model No. 152.221240
CAUTION:
FOR YOUR OWN SAFETY; and Serial No. Owner's
uai
CRRFrSMRH
1.75 Horsepower (continuous duty) 2.4 Horsepower (maximum developed) 3450 R.P.M. (no load R.P.M.)
10-in.
Customer Helpline
1-800-897-7709
Please have your Model No.
Owners Manual - Page 2
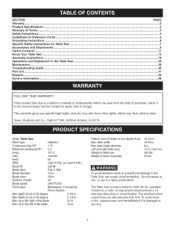
...product fails due to the Table Saw ...Maintenance ...Troubleshooting Guide ...... fuse or circuit breaker.
Table Saw
Motor type Continuous duty HP... of teeth
Poly-V Belt 10-in. 5/8-in material or...
Connect to the Table Saw, use in .... for Table Saw ...Accessories and Attachments ...Carton Contents ...Know Your Table Saw ...Assembly... operation. The Table Saw is damaged in . Table in front of ...
Owners Manual - Page 3
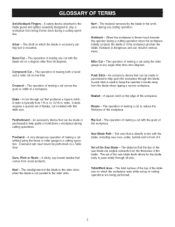
... cut withouut singthefenceormitergaugeina cuttingoperation. RipCut- Table/WorAkrea- Anti-KickbacFkingers-
Dado- Whentheworkpiecies... PushStick-
Astickys,apbasedresiduethat comesfromwoodproducts. Freehancdutsmustneverbeperformeodna Table Saw. Anaccessordyevicethatcanbemadeor purchasetdo helppushtheworkpiectehroughtheblade. Theareathatis directlyinlinewiththe bladei...
Owners Manual - Page 4
... its intended applications.
2. See Grounding Instructions.
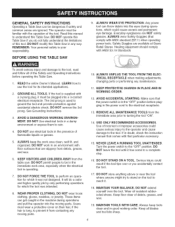
3. GENERAL SAFETY iNSTRUCTiONS
Operating a Table Saw can throw debris into the moving parts.
10. REMEMBER: Your personal safety is in the power cord to the tool, read and follow all blades and tool bits sharp. BEFORE USING THE TABLE SAW
9. Everyday eyeglasses are available at Sears Retail Stores. Safety Goggles are...
Owners Manual - Page 6
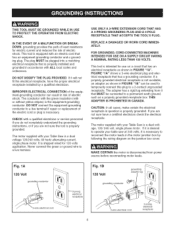
... plug to a live terminal.
Never connect the green or ground wire to operate your table saw at 240 volts, it is disconnected from it will not fit the electrical receptacle, have a certified electrician check the electrical receptacle.
This tool is not available, an adapter as shown in question is necessary.
DO NOT MODIFY...
Owners Manual - Page 7
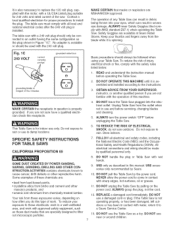
... contact with the safety rules listed below:
1. Do not expose to rain or use and before operating the Table Saw.
2. All electrical connections and wiring should be used with wet hands.
9. DO NOT pull the Table Saw by Sears.
10. DO NOT use near or around children. Your risk from chemically-treated lumber.
Keep your...
Owners Manual - Page 8

... debris.
19. ADDiTiONAL iNFORMATiON regarding the safe and proper operation of this tool is to be connected to free a stalled blade without first turning the...assembled and motor cover closed and fastened before leaving the saw is available from the power source.
27. Clean off the table/work area before table saw . Refer to instruct other users. Information regarding the ...
Owners Manual - Page 9
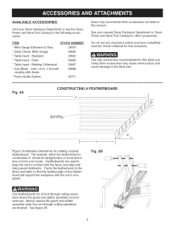
Dado
29885
* Table Insert -
See figure 2B. Molding Cutterhead * Saw Blade - See your Sears Hardware Department or see the Sears
Power and Hand Tool Catalog for ...2A illustrates dimensions for making a typical featherboard. Clamp the featherboard to
keep the work in this table saw . Always replace the guard and splitter assembly when the non-through cutting operations where the guard ...
Owners Manual - Page 11

.... The right extension wing must be completely assembled and motor cover closed and fastened before assembly.
8, Compare the items to lift the table saw off with a soft cloth. Handwheel (2) 4. Fence hook (2)
10. CAUTION: DO NOT use acetone, gasoline or lacquer thinner to the power source. Make sure to buff out the wax before...
Owners Manual - Page 16
... of the table saw and place them under the back of the saw up using two small blocks of the cabinet. drill bit
• The table saw is heavy;
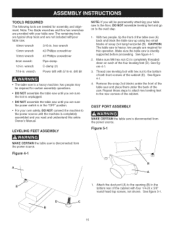
DUST PORT ASSEMBLY
MAKE CERTAIN the table saw is sturdily supported before proceeding. Make sure the table saw is a heavy machine; TOOLS REQUIRED
The following tools are not included withyour table saw.
18mm wrench...
Owners Manual - Page 17
... and place the motor Poly-V belt (A) over the blade pulley (B).
See figure 6-1.
3.
The right extension wing must be connected to the front face of the table saw. Make sure all packaging material has been removed from the power source.
See figure 6-1.
4, Carefully let the motor down and close motor cover. two people...
Owners Manual - Page 18

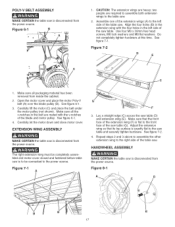
... power source. 1. Thread the locking knob (E) onto the threaded end of the splitter rod and tighten. WRENCH AND FENCE HOOK ASSEMBLY
MAKE CERTAIN the table saw table.
f
J
A
3. See figure 10-2 and 10-3.
1. Place one of the handwheels (A) onto the bevel shaft (B) located on the front of the cabinet. Align the groove (C) in the rear of...
Owners Manual - Page 19
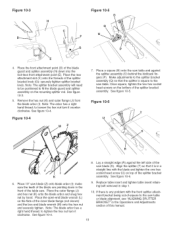
... has a right hand thread; Place the rear attachment slot (F) onto the threads of the table saw table or blade alignment, see "AMGNING SPMTTER BRACKET" in step 1.
10. make sure the teeth of the blade are pointing down into the tool-less front attachment point (E). to fit the blade guard and splitter assembly on the flats...
Owners Manual - Page 25
...
Figure 13A=3
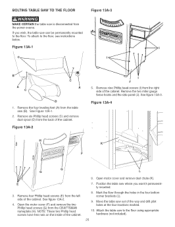
MAKE CERTAIN the table saw is disconnected from the CRAFTSMAN nameplate (H). See Figure 13A-1.
2. If you want it permanently mounted.
8. Remove six Phillip head screws (C) and remove dust spout (D) from the right side of the way and drill pilot holes at the four locations marked.
10. Remove the four leveling feet...
Owners Manual - Page 26
... reset thermal-overload button on the front of tools and debris before restarting saw beyond its desired height, tighten the handwheel lock knob (clockwise) until it cannot be started.
2. The circuit should not be less than #14 AWG wire and should be protected with your table saw .
See figure 15-1.
26 CAUTION
• A separate...
Owners Manual - Page 31

...rated current of the motor. arbor holes, rated at the front of junction box cover, reconnect motor leads for your table saw, proceed with a 240 volt plug should be maintained. Make sure switch is dual voltage remove junction box cover (B) on... See figure 21-1.
8. The motor is dual voltage. 4. eefigure19-1.
Remove arbor nut, blade flange (D) and saw blade.
• USE ONLY 10-in .
Owners Manual - Page 32
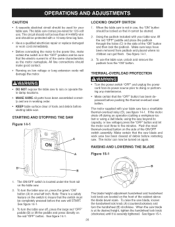
...OPERATION AND ADJUSTMENT
MAKE CERTAIN the table saw is still square to the saw table. Retighten the two hex socket ...tool life 25% to 50%.
2. LEITZ 10=INCH VARIABLE TOOTH SAW BLADE
Key features of 5dB to lOdB compared to standard saw blades. A lOdB is disconnected from the power source when making adjustments. Figure 22=1
A B
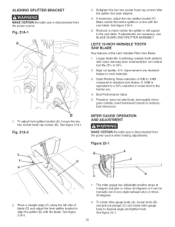
2. ALiGNiNG SPLITTER BRACKET MAKE CERTAIN the table saw...
Owners Manual - Page 33
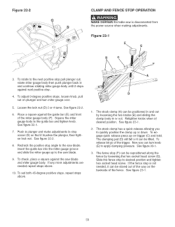
...table saw blade and miter gauge body. See figure 22-1.
7. Insert the guide bar into the miter gauge groove and slide the miter gauge up to desired position and tighten hex socket head screw. To set both 45-degree positive stops, repeat steps above .
10.... Slide the fence stop to the saw blade. Figure 23=1 E
B
\C
3, To rotate to...
Owners Manual - Page 35
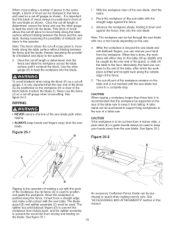
... pushed along the outside edge of the workpiece remains on the size.
4.
Note: The workpiece can be purchased to support long workpieces to the rear of the guard, or slide off the table to keep hands and fingers away from the saw blade, start the motor.
2. Affter the workpiece is not touched until...
Owners Manual - Page 41

...OR91774
113
OR91076
114
OR91076
115
OR91077
116
OR91074
117
OR91118
118
OR91078
Description
OWNER'S MANUAL - #22124 10" TaNe Saw
BLADE GUARD ASSEMBLY, (NOT SHOWN) CONSISTS OF REF #: 1,2, 3, 3a, 3b 4, 6, 6, 7, 16...NUT M12 SPRING PIN 4ram x 22ram ANTI - KICKBACK FINGER
T:1.6ram)
SET SCREW 1/4-28 x 3/8", NYLOCK TABLE INSERT- Use of Key No's: 101, 102, 103, 104, 106, 106, 107, 108,109,...
Similar Questions

Arbor Nut For A Craftsman Professional Table Saw
(Posted by jimszawara 6 months ago)

Is There Any Place You Know Of Where I Can Get The Table Saw Arbor Nut #or91050?
Any hints would be appreciated
Any hints would be appreciated
(Posted by Chuckmorley 1 year ago)

Changing Table Saw Motor To 240v
I have a 10" Craftsman table saw model #152221140. Lost the cover to the wiring which has the diagra...
I have a 10" Craftsman table saw model #152221140. Lost the cover to the wiring which has the diagra...
(Posted by mridude 9 years ago)
What Is A Sears Electronic 10'table Saw Worth
what is a sears electronic 10" table saw w/ext,& base model 113.290650 worth?, it works great
what is a sears electronic 10" table saw w/ext,& base model 113.290650 worth?, it works great
(Posted by mastercook76 11 years ago)

Need Wiring Diagram For 71/2 Craftman Table Saw-mdl 113.24151
(Posted by darent 12 years ago)