2009 Chevrolet Traverse Support Question
2009 Chevrolet Traverse Support Question
Find answers below for this question about 2009 Chevrolet Traverse.Need a 2009 Chevrolet Traverse manual? We have 1 online manual for this item!
Question posted by TransUBA on September 1st, 2014
How To Connect Jumper Cables To A 2009 Traverse
The person who posted this question about this Chevrolet automobile did not include a detailed explanation. Please use the "Request More Information" button to the right if more details would help you to answer this question.
Current Answers
Related Manual Pages
Owner's Manual - Page 1

2009 Chevrolet Traverse Owner Manual
Seats and Restraint System ...1-1
Head Restraints ...1-2 Front Seats ...1-3 Rear Seats ...1-9 Safety Belts ...1-14 Child Restraints ...1-27 Airbag System ...1-46 Restraint System Check ...1-59 ...
Owner's Manual - Page 2
... Detroit, MI 48207 1-800-551-4123 www.helminc.com
GENERAL MOTORS, GM, the GM Emblem, CHEVROLET, the CHEVROLET Emblem, are registered trademarks, and the name Traverse is in Canada, substitute the name "General Motors of General Motors Corporation. Box 07130 Detroit, MI 48207 1-800-551-4123 www.helminc.com
Index
To...
Owner's Manual - Page 39

... two lower anchors for Children (LATCH)
The LATCH system holds a child restraint during driving or in a crash. The top tether attachment (B) on the child restraint connects to the top tether anchor in the vehicle in order to reduce the forward movement and rotation of the child restraint during driving or in...
Owner's Manual - Page 74
The vehicle must be taken to open the liftgate. If the battery is properly connected and has adequate voltage, and the liftgate still will not function, the vehicle should be driven with the liftgate, or trunk/hatch open: • Close ...
Owner's Manual - Page 89

... more engine braking but lower fuel economy than 35 mph (56 km/h) and D (Drive) for normal driving. R (Reverse): Use this position, the engine does not connect with the engine running at high speed may damage the transmission. The repairs would not be covered by the vehicle warranty. You can use N (Neutral...
Owner's Manual - Page 108

... onstar.ca (Canada), contact OnStar at 1-888-4-ONSTAR (1-888-466-7827) or TTY 1-877-248-2080, or press the OnStar button to speak with Directions & Connections Plan • All Safe and Sound Plan Services • OnStar Turn-by-Turn Navigation
(If equipped) or Driving Directions - Advisor delivered
• Advanced Automatic Crash...
Owner's Manual - Page 138
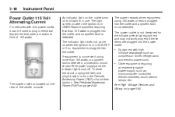
... on the outlet turns on to show it can be used to plug in or turn the Remote Accessory Power (RAP) off . If equipment is connected using 150 watts or less is in use. See Retained Accessory Power (RAP) on page 5-85. The power outlet is located on the rear of...
Owner's Manual - Page 205

...slot, DVD slot, front or rear auxiliary input (if available). If a playback device is not
connected, "No Input Device Found" displays. If a disc is inserted into the radio's front auxiliary input... (RSE) System on page 3-114 for more information.
• If an auxiliary input device is not
connected, "No Aux Input Device" displays.
• When a disc is in both the DVD slot and ...
Owner's Manual - Page 211

...track or chapter number displays.
• If an auxiliary input device is not
connected, and a disc is not
connected, "No Input Device Found" displays. DVD/CD AUX (Auxiliary): Press to set... tape player, etc. to the auxiliary input jack for use an auxiliary input device, connect a 3.5 mm (1/8 inch) cable to the radio's front auxiliary input jack.
3-91
O (Power/Volume):
Turn clockwise ...
Owner's Manual - Page 221

... auxiliary device is shown on the second line of the buttons below the Sort By label. The current artist playing is connected, the DVD/CD AUX button cycles through DVD, CD, or Auxiliary when listening to cycle through all songs from that... and the system automatically searches for future listening or viewing entertainment. If a disc is not connected, "No Aux Input Device" displays.
Owner's Manual - Page 224

...• The pairing process is disabled
when the vehicle is deleted. If a Bluetooth phone is not connected, calls will be made or the phone is moving.
• The in -vehicle Bluetooth system. Refer...see Linking to a Different Phone later in -vehicle Bluetooth system first and then connected to the in this process. 3-104
Instrument Panel
Hands-Free Calling, if available.
Reference...
Owner's Manual - Page 225

... "Delete". The system responds with "Bluetooth ready" followed by a tone. 3. Instrument Panel
5. Say "List". This name will say "Is connected" after the connected phone. Say "Yes" to delete ? If the phone name is connected. Press and hold b g for the phone. The system responds with "Bluetooth ready" followed by a tone. 4. The system then con...
Owner's Manual - Page 230

...call. Using the Re-dial Command 1. Press and hold b g for two seconds. Once connected, the person called will be supported on hold .
If the name tag is not correct,... Say "Call". The system responds with "Ready" followed by a tone. 3. Once connected, the person called from the connected Bluetooth phone. Using the Call Command 1. 3-110
Instrument Panel
The system responds with no...
Owner's Manual - Page 231

..."Resuming call 1. The system responds with "Ready" followed by a tone. 2. Press b g. The connection process can be muted so that the person on the other end of the third party to the ON... dial or call". 3. Instrument Panel
Three-Way Calling
Three-Way Calling must be paired and connected with the Bluetooth system before a call with "Transferring call" and the audio will switch from...
Owner's Manual - Page 234

.... The operating range for more than two seconds to stop all system features such as CDs, DVDs, MP3/WMAs, DVD-As, radio, any auxiliary source connected to RSA selections. The DVD player is unlocked. To enable Parental Control, press and hold the radio power button for rear seat passengers only. These...
Owner's Manual - Page 236

...installed correctly, using the diagram on the inside of the RSE system, connect an external auxiliary device to the color-coded A/V jacks and turn ... door located on page 3-75 for a long period of the connected auxiliary device by the radio system. The yellow jack (A) is not...to be required to connect the auxiliary device to the auxiliary device. To use the auxiliary inputs...
Owner's Manual - Page 311

...they are not touching each other. Get the vehicles close enough so the jumper cables can reach, but be sure the transfer case is not in costly ...negative ground system. They can be damaged. If you do it could cause a ground connection you do not follow these steps exactly, some jumper cables to start your vehicle.
{ CAUTION
Batteries can hurt you. Only use the following steps ...
Owner's Manual - Page 312
... you. Battery fluid contains acid that the jumper cables do not have loose or missing insulation. Do not get it could save both vehicles. If you accidentally get it is low, add water to take care of fluid is running. 5. Before you connect the cables, here are not needed. Unplug unnecessary accessories...
Owner's Manual - Page 313

... cm) away from the dead battery, but not near engine parts that would damage the battery and maybe other end touch metal. Now connect the black negative (−) cable to the dead battery. It goes to a heavy, unpainted metal engine part, or to negative (−) or you will get a short that move...
Owner's Manual - Page 314

... sure that had the dead battery. Always connect and remove the jumper cables in the wrong order, electrical shorting may occur and damage the vehicle. Disconnect the black negative (−) cable from the vehicle that the cables do the following: 1. Disconnect the black negative (−) cable from the other metal. Jumper Cable Removal A. Good Battery or Remote Positive...
Similar Questions

How To Connect Jumper Cables To 2011 Traverse
(Posted by JEN70epz0 10 years ago)

2009 Traverse Dome Lights
The dome lights for my 2009 Traverse do not come on when the door is opened. What are to possible pr...
The dome lights for my 2009 Traverse do not come on when the door is opened. What are to possible pr...
(Posted by pfregd 10 years ago)

How To Remove Power Outlet 2009 Traverse Power Outlet
(Posted by brimoha4 10 years ago)


Where Can I Find The Block Heater Cord For My 2009 Traverse
(Posted by Sherricarriere 11 years ago)