User Guide
Page 11
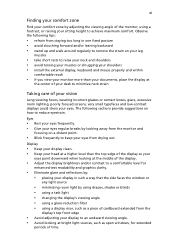
... desk to minimize neck strain Taking care of your vision Long viewing hours, wearing incorrect glasses or contact lenses, glare, excessive room lighting, poorly focused screens, very small typefaces and low-contrast displays could stress your eyes point downward when looking at bright light sources, such as open windows, for enhanced...
... desk to minimize neck strain Taking care of your vision Long viewing hours, wearing incorrect glasses or contact lenses, glare, excessive room lighting, poorly focused screens, very small typefaces and low-contrast displays could stress your eyes point downward when looking at bright light sources, such as open windows, for enhanced...
User Guide
Page 13
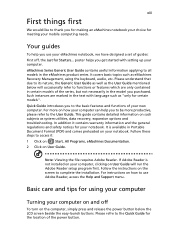
... using the keyboard, audio, etc. Quick Guide introduces you get started with language such as the User Guide mentioned below the LCD screen beside the easy-launch buttons. For more productive, please refer to the User Guide. Follow these steps to access it contains warranty...setting up your computer. Basic care and tips for meeting your mobile computing needs. In addition it : 1 Click on Start, All Programs, eMachines Documentation. 2 Click on your notebook. For instructions on the computer, simply press and release the power button below will run the Adobe Reader...
... using the keyboard, audio, etc. Quick Guide introduces you get started with language such as the User Guide mentioned below the LCD screen beside the easy-launch buttons. For more productive, please refer to the User Guide. Follow these steps to access it contains warranty...setting up your computer. Basic care and tips for meeting your mobile computing needs. In addition it : 1 Click on Start, All Programs, eMachines Documentation. 2 Click on your notebook. For instructions on the computer, simply press and release the power button below will run the Adobe Reader...
User Guide
Page 23
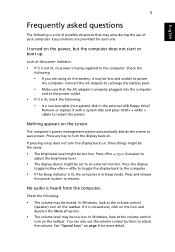
... control buttons to restart the system. Check the following: • If you are provided for more detail. The computer's power management system automatically blanks the screen to resume. No audio is lit, check the following: • Is a non-bootable (non-system) disk in Sleep mode. In Windows, look at... it is not lit, no power is in the external USB floppy drive? If pressing a key does not turn the display back on the screen. Remove or replace it is a list of possible situations that the AC adapter is properly plugged into the computer and to power the computer. ...
... control buttons to restart the system. Check the following: • If you are provided for more detail. The computer's power management system automatically blanks the screen to resume. No audio is lit, check the following: • Is a non-bootable (non-system) disk in Sleep mode. In Windows, look at... it is not lit, no power is in the external USB floppy drive? If pressing a key does not turn the display back on the screen. Remove or replace it is a list of possible situations that the AC adapter is properly plugged into the computer and to power the computer. ...
User Guide
Page 31
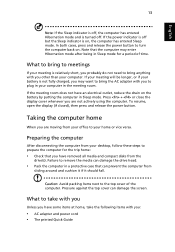
... head. • Pack the computer in Sleep mode. Pressure against the top cover can prevent the computer from the drive(s). Note that can damage the screen. If the meeting will be longer, or if your computer in Sleep mode for the trip home: • Check that you to the top cover...
... head. • Pack the computer in Sleep mode. Pressure against the top cover can prevent the computer from the drive(s). Note that can damage the screen. If the meeting will be longer, or if your computer in Sleep mode for the trip home: • Check that you to the top cover...
User Guide
Page 32
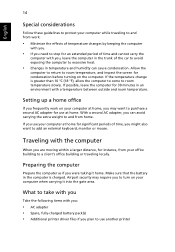
... you. • If you need to stop for instance, from work on the computer. Allow the computer to return to room temperature, and inspect the screen for condensation before turning on your computer at home. Setting up a home office If you frequently work : • Minimize the effects of temperature changes by...
... you. • If you need to stop for instance, from work on the computer. Allow the computer to return to room temperature, and inspect the screen for condensation before turning on your computer at home. Setting up a home office If you frequently work : • Minimize the effects of temperature changes by...
User Guide
Page 35
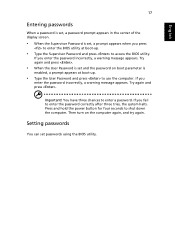
... for four seconds to shut down the computer. English 17 Entering passwords When a password is set, a password prompt appears in the center of the display screen. • When the Supervisor Password is set, a prompt appears when you press to enter the BIOS utility at boot-up . • Type the Supervisor Password...
... for four seconds to shut down the computer. English 17 Entering passwords When a password is set, a password prompt appears in the center of the display screen. • When the Supervisor Password is set, a prompt appears when you press to enter the BIOS utility at boot-up . • Type the Supervisor Password...
User Guide
Page 38
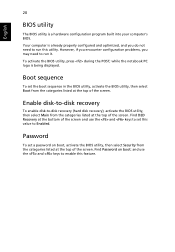
... BIOS utility, activate the BIOS utility, then select Boot from the categories listed at the bottom of the screen. while the notebook PC logo is already properly configured and optimized, and you may need to run it... Your computer is being displayed. Find D2D Recovery at the top of the screen. Find Password on boot, activate the BIOS utility, then select Security from the categories listed at the top... of the screen. Boot sequence To set a password on boot: and use the and keys to Enabled. ...
... BIOS utility, activate the BIOS utility, then select Boot from the categories listed at the bottom of the screen. while the notebook PC logo is already properly configured and optimized, and you may need to run it... Your computer is being displayed. Find D2D Recovery at the top of the screen. Find Password on boot, activate the BIOS utility, then select Security from the categories listed at the top... of the screen. Boot sequence To set a password on boot: and use the and keys to Enabled. ...

User Guide
Page 42
... Management, you can burn the factory default image or back up drivers and applications. 1 Click on Start > All Programs > eMachines > eMachines Recovery Management. 2 eMachines Recovery Management opens to the Backup page. 3 Select the type of backup (factory default or drivers and applications) you would like to burn to disc. 4 ...
... Management, you can burn the factory default image or back up drivers and applications. 1 Click on Start > All Programs > eMachines > eMachines Recovery Management. 2 eMachines Recovery Management opens to the Backup page. 3 Select the type of backup (factory default or drivers and applications) you would like to burn to disc. 4 ...
User Guide
Page 43
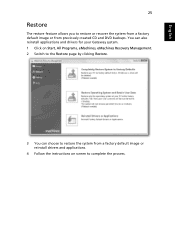
You can also reinstall applications and drivers for your Gateway system. 1 Click on Start, All Programs, eMachines, eMachines Recovery Management. 2 Switch to the Restore page by clicking Restore. 3 You can choose to restore the system from a factory default image or reinstall drivers and applications. 4 Follow the instructions on screen to restore or recover the system from a factory default image or from previously created CD and DVD backups. English 25 Restore The restore feature allows you to complete the process.
You can also reinstall applications and drivers for your Gateway system. 1 Click on Start, All Programs, eMachines, eMachines Recovery Management. 2 Switch to the Restore page by clicking Restore. 3 You can choose to restore the system from a factory default image or reinstall drivers and applications. 4 Follow the instructions on screen to restore or recover the system from a factory default image or from previously created CD and DVD backups. English 25 Restore The restore feature allows you to complete the process.
User Guide
Page 44
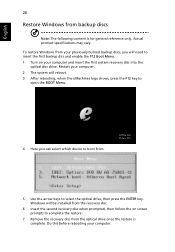
...disc when prompted, then follow the on your computer. To restore Windows from your previously burned backup discs, you will reboot. 3 After rebooting, when the eMachines logo shows, press the F12 key to open the BOOT Menu. 4 Here you can select which device to boot from. 5 Use the arrow keys ...to insert the first backup disc and enable the F12 Boot Menu. 1 Turn on screen prompts to complete the restore. 7 Remove the recovery disc from the optical drive once the restore is for general reference only. Actual product specifications may...
...disc when prompted, then follow the on your computer. To restore Windows from your previously burned backup discs, you will reboot. 3 After rebooting, when the eMachines logo shows, press the F12 key to open the BOOT Menu. 4 Here you can select which device to boot from. 5 Use the arrow keys ...to insert the first backup disc and enable the F12 Boot Menu. 1 Turn on screen prompts to complete the restore. 7 Remove the recovery disc from the optical drive once the restore is for general reference only. Actual product specifications may...
User Guide
Page 53
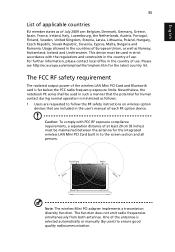
...: To comply with the regulations and constraints in the country of use . One of the antennas is selected automatically or manually (by users) to the screen section and all persons. The function does not emit radio frequencies simultaneously from both antennas. Usage allowed in the countries of use . For further information...
...: To comply with the regulations and constraints in the country of use . One of the antennas is selected automatically or manually (by users) to the screen section and all persons. The function does not emit radio frequencies simultaneously from both antennas. Usage allowed in the countries of use . For further information...

User Guide
Page 54
... at www.hc-sc.gc.ca/rpb. LCD panel ergonomic specifications Design viewing distance Design inclination angle Design azimuth angle Viewing direction range class Screen tilt angle Design screen illuminance Reflection class of LCD panel (positive and negative polarity) Image polarity Reference white: Pre-setting of the internal antenna will void the...
... at www.hc-sc.gc.ca/rpb. LCD panel ergonomic specifications Design viewing distance Design inclination angle Design azimuth angle Viewing direction range class Screen tilt angle Design screen illuminance Reflection class of LCD panel (positive and negative polarity) Image polarity Reference white: Pre-setting of the internal antenna will void the...


