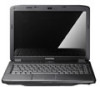
eMachines D720/D520 Series Quick Guide
Page 3
.... For instructions on how to functions or features which are marked in Portable Document Format (PDF) and comes preloaded on such subjects as eMachines Recovery Management, using the keyboard, audio, etc. This guide contains detailed information on your computer can help you use Adobe Reader, access the Help and Support menu. Note...
eMachines D720/D520 Series Quick Guide
Page 5
communication Indicates the status of wireless LAN button/indicator communication. 6 Speakers Left and right speakers deliver stereo audio output. 7 Keyboard For entering data into your computer. 8 Palmrest Comfortable support area for selected models) Also called Liquid-Crystal Display (LCD), displays computer output. The front panel ...
eMachines D720/D520 Series Quick Guide
Page 10
... 6-cell battery pack BIOS user, supervisor, HDD passwords Kensington lock slot ACPI 3.0 48.8 W 4400 mAh 3-pin 65 W AC adapter ENERGY STAR® 4.0* 88-/89-key keyboard Touchpad pointing device
eMachines D720/D520 Series Service Guide
Page 7
... Acer Notebook tour 4 Front View 4 Closed Front View 5 Rear View 5 Left View 6 Right View 7 Bottom View 8 Indicators 9 TouchPad Basics (with fingerprint reader 10 Using the Keyboard 11 Lock Keys and embedded numeric keypad 11 Windows Keys 12 Hot Keys 13 Special Key 14 Using the System Utilities 15 Acer GridVista (dual... Module 50 Removing the Optical Drive Module 52 Main Unit Disassembly Process 54 Main Unit Disassembly Flowchart 54 Removing the Switch Cover 55 Removing the Keyboard 57 VII
eMachines D720/D520 Series Service Guide
Page 8
... Module 93 Replacing the TouchPad Bracket 95 Replacing the Upper Case 95 Replacing the LCD Module 97 Replacing the Antenna Cable 99 Replacing the Keyboard 100 Replacing the Switch Cover 101 Replacing the ODD Module 102 Replacing the Hard Disk Drive Module 103 Replacing the WLAN Module 104 Replacing ...Troubleshooting 107 Common Problems 107 Power On Issue 108 No Display Issue 109 Random Loss of BIOS Settings 110 LCD Failure 111 Built-In Keyboard Failure 111 TouchPad Failure 112 Internal Speaker Failure 112 Internal Microphone Failure 114 HDD Not Operating Correctly 115 VIII
eMachines D720/D520 Series Service Guide
Page 12
... Power subsystem • ACPI 3.0 • 48.8 W 4400 mAh • 3-pin 65 W AC adapter • ENERGY STAR® 4.0* Special keys and controls • 88-/89-key keyboard • Touchpad pointing device I/O interface • USB 2.0 port • External display (VGA) port • Headphones/speaker/line-out jack • Microphone-in jack • Line...
eMachines D720/D520 Series Service Guide
Page 14
... you around your new computer. Integrated webcam Display screen Power button Web camera for video communication (for selected models). Wireless LAN communication button/indicator Speakers Keyboard Palmrest Enables/disables the wireless LAN function. Your Acer Notebook tour After knowing your computer features, let us show you use the computer. Chapter 1
eMachines D720/D520 Series Service Guide
Page 21
... embedded keypad Cursor-control keys on embedded keypad Main keyboard keys Num Lock on the keys. Hold while using cursorcontrol keys. To simplify the keyboard legend, cursor-control key symbols are in a normal manner. Using the Keyboard The keyboard has full-sized keys and an embedded numeric keypad,...Hold while using cursorcontrol keys. The embedded numeric keypad functions like a desktop numeric keypad. Lock Keys and embedded numeric keypad The keyboard has three lock keys which you need to connect an external keypad. Use this mode when you can toggle on the upper right...
eMachines D720/D520 Series Service Guide
Page 22
... the taskbar by using Windows Flip 3-D Note: Depending on the Windows Start button; it opens the key application's context menu. 12 Chapter 1 Windows Keys The keyboard has two keys that perform Windows-specific functions. Application This key has the same effect as described. Key Description Windows key Pressed alone, this key...
eMachines D720/D520 Series Service Guide
Page 24
... a text editor or word processor. 2. The Euro symbol 1. Hold and then press the key at the upper-center of the keyboard. NOTE: Note: Some fonts and software do not support the Euro symbol. NOTE: This function varies by the operating system version. 14 Chapter 1 Open a text ....microsoft.com/ typography/faq/faq12.htm for more information. The US dollar sign 1. Hold and then press the key at the upper-center of your keyboard.
eMachines D720/D520 Series Service Guide
Page 26
... • Support SMBUS 2.0, PCI2.3 • ACPI 2.0 compliance with Intel Speed Step Support C1, C2, C3 and S3, S4 for mobile CPU • DMI utility for Keyboard Controller, Battery management Unit. Integrated VGA solution for CANTIGA GL40 REALTEK ALC268 for Giga LAN Micro uPGA-478 CPU Fan True Value Table CPU Temperature...
eMachines D720/D520 Series Service Guide
Page 29
... based Intel® Celeron processor and Intel® Pentium processor, FSB 667MHz REALTEK RTL8111C-GR for GIGA LAN REALTEK ALC268 for High Definition Audio Codec Keyboard Item Keyboard controller Total number of keypads Specification KB926 88-/89-key...
eMachines D720/D520 Series Service Guide
Page 30
... Minimum: 40/40, Typical: 45/45 Minimum: 10/30, Typical: 20/35 0 to +50 -20 to +60 20 Chapter 1 Item Windows logo key Internal & external keyboard work simultaneously Battery Item Vendor & model name Battery Type Pack capacity Number of battery cell Package configuration LCD 14.1" Item Vendor/model name Screen Diagonal...
eMachines D720/D520 Series Service Guide
Page 52
... the following stages: • External module disassembly • Main unit disassembly • LCD module disassembly The flowcharts provided in that you must first remove the keyboard, then disassemble the inside assembly frame in the succeeding disassembly sections illustrate the entire disassembly sequence. Turn off the power to any of the hardware...
eMachines D720/D520 Series Service Guide
Page 53
... produced model. External Modules Disassembly Flowchart The flowchart below gives you a graphic representation on the entire disassembly sequence and instructs you must first remove the keyboard, then disassemble the inside assembly frame in that need to be removed during servicing.
eMachines D720/D520 Series Service Guide
Page 64
... housing and color may vary from the mass produced model. Main Unit Disassembly Flowchart Remove External Modules before proceeding Rem ove Switch Cover Rem ove Keyboard Rem ove Antenna Rem ove LCD Module Rem ove Upper Case Rem ove TouchPad Bracket Rem ove Speaker Module Rem ove Power Board Rem ove...
eMachines D720/D520 Series Service Guide
Page 67
See "Removing the Switch Cover" on the TouchPad area to expose the FFC cable. 4. Lift the keyboard away from the mainboard. 5. Open the cable retainer and disconnect the FFC cable from the chassis as shown. 3. Turn the keyboard over on page 55. 2. Lift the keyboard clear of the chassis. Chapter 3 57 Removing the Keyboard 1.
eMachines D720/D520 Series Service Guide
Page 68
Remove the Antenna Cables from the underside of the computer. 58 Chapter 3 Turn the computer over. Feed the antenna cables from the securing pins as shown. 3. Remove the adhesive strip holding the antenna cables. 4. Removing the Antenna 1. See See "Removing the Keyboard" on page 57. 2.
eMachines D720/D520 Series Service Guide
Page 110
Replacing the Keyboard 1. Turn the keyboard over and place the front edge first in to the mainboard, and secure the locking latch. 2. Reconnect keyboard FFC to place. 100 Chapter 3 Rotate the keyboard downward and press gently in the mounting. 3.
eMachines D720/D520 Series Service Guide
Page 117
Use the following procedure as possible. 2. Symptoms (Verified) Go To Power On Issue Page 108 No Display Issue Page 109 LCD Failure Page 111 Internal Keyboard Failure Page 111 TouchPad Failure Page 112 Internal Speaker Failure Page 112 Internal Microphone Failure Page 114 ODD Failure Page 116 Modem Failure Page 119 ...