Zanussi ZOHCX3W2 Support and Manuals
Get Help and Manuals for this Zanussi item
View All Support Options Below
Free Zanussi ZOHCX3W2 manuals!
Problems with Zanussi ZOHCX3W2?
Ask a Question
Free Zanussi ZOHCX3W2 manuals!
Problems with Zanussi ZOHCX3W2?
Ask a Question
Popular Zanussi ZOHCX3W2 Manual Pages
User Manual - Page 2

..., carefully read the supplied instructions. GENERAL SAFETY • Only a qualified person must install this appliance and replace the cable.
2 The manufacturer is not responsible for future reference. VISIT OUR WEBSITE FOR:
Get usage advice, brochures, trouble shooter, service and repair information: www.zanussi.com/support
SAFETY INFORMATION Before the installation and use of the appliance...
User Manual - Page 3

...; Do not pull the appliance by the manufacturer, its accessible parts become hot during use a damaged appliance. • Follow the installation instructions supplied with
the appliance. • Always take care when moving the appliance as
it must be replaced by the handle. • Install the appliance in a safe and suitable place that the appliance is...
User Manual - Page 4

... mixture of fire and electric shock. Cable types applicable for installation or replacement for household use only. • Do not change the specification of this must be removed without a main plug and a ...8226; Deactivate the appliance after the installation. • If the mains socket is hot. • The shock protection of live and insulated parts must be carried out by a qualified...
User Manual - Page 7

... Button
Description
To set a clock function. To set the time.
To set the time. Timer
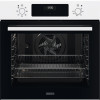
C. PRODUCT DESCRIPTION
GENERAL OVERVIEW
12 3
45 6
1 Control panel 2 Knob for the heating functions
3 Power lamp / symbol
4 Display
7
5 Control knob (for the temperature)
5 4
11 3
2
8
6 Temperature indicator / symbol
9
7 Heating element
8 Lamp
1
9 Fan
10 Shelf support, removable
11...
User Manual - Page 8

... temperature.
4. WARNING!
Turn the knob for the
heating functions to "Clock functions" chapter.
To set temperature. INITIAL CLEANING Remove all accessories and removable shelf supports from the set the Time of food in the room is off position.
Set the maximum temperature.
2. Turn off the oven, turn on up to three shelf positions at...
User Manual - Page 9

...To make gratins and to "Energy Efficiency" chapter, Energy Saving.
To set the time. HOW TO SET: CLOCK FUNCTIONS
How to set how long the oven works. starts to EN 60350-1. Clock function
... closed during cooking so that the function is off .
Step 1
- For the cooking instructions refer to EU 65/2014 and EU 66/2014. Oven function
Application
Turbo Grilling
To roast...
User Manual - Page 11

... 1 Step 2
- Step 1 Step 2
Step 3 Step 4
How to flash. , - starts to set time ends, the signal sounds. press repeatedly. -
When the set : Minute Minder
- Refer to the off after 5 sec. Deep pan: Push the deep pan between the guide bars of the shelf support and make sure that the feet point down. Turn the knob...
User Manual - Page 16

...
- Chicken breast, 4 pieces
0.4
Burgers, 6
0.6
Fish fillet, 4 pieces
0.4
Toasted sandwiches, 4 - 6
-
TURBO GRILLING
Preheat the empty oven. Set the temperature to 175 °C.
Use the first or the second shelf position. Grill with the maximum temperature setting.
Use the fourth shelf position. GRILL
Preheat the empty oven.
FISH
Trout / Sea bream, 3 - 4 fish Tuna / Salmon...
User Manual - Page 19

... listed in the table below. VEGETABLES
FRUIT
(°C)
Beans Peppers Vegetables for soup Mushrooms Herbs
60 - 70 60 - 70 60 - 70 50 - 60 40 - 50
Set the temperature to 60 - 70 °C.
They have better heat absorption than the light colour and reflective dishes.
User Manual - Page 22

... after each use .
Clean the cavity after each use .
To decrease the condensation, let the oven work for 3 minutes.
HOW TO REMOVE: SHELF SUPPORTS Remove the shelf supports to Safety chapters.
Cleaning Agents
Clean stains with warm water and a mild detergent. Accessories
Clean all accessories after each use and let them dry...
User Manual - Page 23

... the front of the shelf support away from the side wall and remove it is cold. Step 3 Step 4
Pull the rear end of the shelf support away from its seat.
2. Do not use the oven without the internal glass panel.
1.
Read the whole "Removing and installing door" instruction before you remove the glass panels...
User Manual - Page 24

...TROUBLESHOOTING
WARNING! Make sure the glass slides out of the door.
A
HOW TO REPLACE: LAMP WARNING! The lamp can be hot.
Wait until the
oven is completed, install the glass panel and the oven door. Before you install... inner side of the supports completely.
8.
Install the glass cover. 4. Put the door on a soft cloth on the lamp. When installed correctly the door trim ...
User Manual - Page 25

...- 20 minutes after the cooking process ends. SERVICE DATA
If you write the data here
25 Model (MOD.)
We recommend that the settings are not set .
The rating plate is on or does ...the oven for too long.
Set the clock.
Make sure that you cannot find a solution to the problem yourself, contact your dealer or an Authorised Service Centre. Remedy
Replace the lamp. Do not leave ...
User Manual - Page 26

Energy efficiency class is closed properly when the oven operates. Part 1: Ranges, ovens, steam ovens and grills - Make sure that you write the data here:
Product number (PNC) Serial number (S.N.)
ENERGY EFFICIENCY
PRODUCT INFORMATION AND PRODUCT INFORMATION SHEET*
Supplier's name
Zanussi
Model identification
ZOHCX3K2 949496299 ZOHCX3W2 949496298 ZOHCX3X2 949496297
Energy Efficiency ...
User Manual - Page 27

... municipal office.
27
* Recycle materials with the household waste. Do not dispose of electrical and electronic appliances. Keep food warm Choose the lowest possible temperature setting to save energy during cooking. ENVIRONMENTAL CONCERNS
Moist Fan Baking Function designed to use residual heat and keep a meal warm.
Zanussi ZOHCX3W2 Reviews
We have not received any reviews for Zanussi yet.