Owner's Manual
Page 2
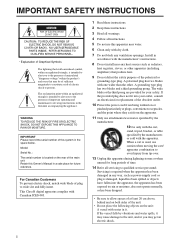
...it . Retain this system in the space below. This Class B digital apparatus complies with Canadian ICES-003. 1 Read these instructions. 2 Keep these instructions. 3 Heed all warnings. 4 Follow all servicing to qualified service personnel. Servicing is required when the apparatus has been damaged in...The wide blade or the third prong are provided for your outlet, consult an electrician for future reference. i IMPORTANT SAFETY INSTRUCTIONS Explanation of Graphical Symbols The lightning flash with arrowhead symbol, within an equilateral triangle, is intended to alert you to the...
...it . Retain this system in the space below. This Class B digital apparatus complies with Canadian ICES-003. 1 Read these instructions. 2 Keep these instructions. 3 Heed all warnings. 4 Follow all servicing to qualified service personnel. Servicing is required when the apparatus has been damaged in...The wide blade or the third prong are provided for your outlet, consult an electrician for future reference. i IMPORTANT SAFETY INSTRUCTIONS Explanation of Graphical Symbols The lightning flash with arrowhead symbol, within an equilateral triangle, is intended to alert you to the...
Owner's Manual
Page 3
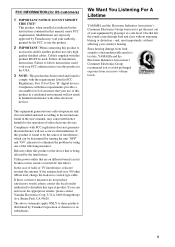
...authorization to use the product. 2 IMPORTANT: When connecting this product is too late, YAMAHA and the Electronic Industries Association's Consumer Electronics Group recommend you can be used according to the instructions found in the USA. 3 NOTE: This product has been tested and found to be... the source of interference, which can not locate the appropriate retailer, please contact Yamaha Electronics Corp., U.S.A. 6660 Orangethorpe Ave, Buena Park,...
...authorization to use the product. 2 IMPORTANT: When connecting this product is too late, YAMAHA and the Electronic Industries Association's Consumer Electronics Group recommend you can be used according to the instructions found in the USA. 3 NOTE: This product has been tested and found to be... the source of interference, which can not locate the appropriate retailer, please contact Yamaha Electronics Corp., U.S.A. 6660 Orangethorpe Ave, Buena Park,...
Owner's Manual
Page 5
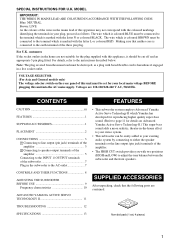
... OUTPUT terminals of this unit into the AC main supply. SPECIAL INSTRUCTIONS FOR U.K. CONTROLS AND THEIR FUNCTIONS 8 ADJUSTING THE SUBWOOFER BEFORE USE 9 Frequency characteristics 10 ADVANCED YAMAHA ACTIVE SERVO TECHNOLOGY II 11 SUPPLIED ACCESSORIES After unpacking, check that ...50/60 Hz. Voltages are contained. customers If the socket outlets in the mains lead of the subwoofer 7 Plug in the subwoofer to the AC outlet 7 • This subwoofer system employs Advanced Yamaha Active Servo Technology II which is coloured BROWN must be easily added to the instructions...
... OUTPUT terminals of this unit into the AC main supply. SPECIAL INSTRUCTIONS FOR U.K. CONTROLS AND THEIR FUNCTIONS 8 ADJUSTING THE SUBWOOFER BEFORE USE 9 Frequency characteristics 10 ADVANCED YAMAHA ACTIVE SERVO TECHNOLOGY II 11 SUPPLIED ACCESSORIES After unpacking, check that ...50/60 Hz. Voltages are contained. customers If the socket outlets in the mains lead of the subwoofer 7 Plug in the subwoofer to the AC outlet 7 • This subwoofer system employs Advanced Yamaha Active Servo Technology II which is coloured BROWN must be easily added to the instructions...
Owner's Manual
Page 16
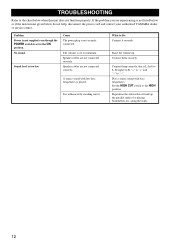
... correctly, that is set to the chart below do not help, disconnect the power cord and contact your authorized YAMAHA dealer or service center. Set the HIGH CUT switch to minimum. Reposition the subwoofer or break up . The volume is L (left) to L, R (right) to R, "+" to "+" and "-" to Do Connect it securely... securely connected. Sound level is played. TROUBLESHOOTING Refer to the ON position. Cause The power plug is not listed below or if the instructions given below when this unit does not function properly. Raise the volume up the parallel surface by standing waves.
... correctly, that is set to the chart below do not help, disconnect the power cord and contact your authorized YAMAHA dealer or service center. Set the HIGH CUT switch to minimum. Reposition the subwoofer or break up . The volume is L (left) to L, R (right) to R, "+" to "+" and "-" to Do Connect it securely... securely connected. Sound level is played. TROUBLESHOOTING Refer to the ON position. Cause The power plug is not listed below or if the instructions given below when this unit does not function properly. Raise the volume up the parallel surface by standing waves.