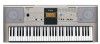
Owners Manual
Page 3
...to products distributed by the interference. If the antenna lead-in is 300 ohm ribbon lead, change the lead-in FCC Regulations, Part 15 for Class "B" digital devices. Cable/s supplied with the requirements listed in to distribute this product or the device that interference... all installation instructions. Follow all installations. Compliance with FCC regulations does not guarantee that is found to those products distributed by Yamaha Corporation of product. If you can be used according to accessories and/or another product use only high quality shielded cables. ...
...to products distributed by the interference. If the antenna lead-in is 300 ohm ribbon lead, change the lead-in FCC Regulations, Part 15 for Class "B" digital devices. Cable/s supplied with the requirements listed in to distribute this product or the device that interference... all installation instructions. Follow all installations. Compliance with FCC regulations does not guarantee that is found to those products distributed by Yamaha Corporation of product. If you can be used according to accessories and/or another product use only high quality shielded cables. ...
Owners Manual
Page 4
...include, but are not limited to the instrument or other hazards. If any openings. Then have the instrument inspected by qualified Yamaha service personnel. CAUTION Always follow the basic precautions listed below to avoid the possibility of physical injury to you are not using is ...Before connecting the instrument to be sure to set the volumes of all components at the minimum level. The instrument contains no user-serviceable parts. polarity markings. Failure to do not excessively bend or otherwise damage the cord, place heavy objects on or off , electricity is ...
...include, but are not limited to the instrument or other hazards. If any openings. Then have the instrument inspected by qualified Yamaha service personnel. CAUTION Always follow the basic precautions listed below to avoid the possibility of physical injury to you are not using is ...Before connecting the instrument to be sure to set the volumes of all components at the minimum level. The instrument contains no user-serviceable parts. polarity markings. Failure to do not excessively bend or otherwise damage the cord, place heavy objects on or off , electricity is ...

Owners Manual
Page 10
... 9 w [MASTER VOLUME] control pages 9 e [1 LISTENING 2 TIMING 3 WAITING] button .... pages 32 r [KEYS TO SUCCESS] button pages 28 t [PHRASE REPEAT] button pages 35 When the lesson mode y PART [L] button page 32 [R] button page 32 When the recording mode y [REC TRACK 2] button page 39 [REC TRACK 1] button page 39 u [METRONOME] button page 14, 48...
... 9 w [MASTER VOLUME] control pages 9 e [1 LISTENING 2 TIMING 3 WAITING] button .... pages 32 r [KEYS TO SUCCESS] button pages 28 t [PHRASE REPEAT] button pages 35 When the lesson mode y PART [L] button page 32 [R] button page 32 When the recording mode y [REC TRACK 2] button page 39 [REC TRACK 1] button page 39 u [METRONOME] button page 14, 48...

Owners Manual
Page 19
To use these Styles, turn on the auto accompaniment and play the keyboard as described on pages 20 (The bass and chord accompaniment parts will be displayed when selecting style number 107. 2 Select a Style. Select the desired Style by using the number buttons [0]-[9 Refer to the Style ...List on page 70. 018 LoveSong NOTE • Since the Pianist category Styles (098-106) have no rhythm parts, no sound will sound.) 3 Turn SYNC START on. Quick Guide Play with a Style Play along with to style number 107. (Refer to the information...
To use these Styles, turn on the auto accompaniment and play the keyboard as described on pages 20 (The bass and chord accompaniment parts will be displayed when selecting style number 107. 2 Select a Style. Select the desired Style by using the number buttons [0]-[9 Refer to the Style ...List on page 70. 018 LoveSong NOTE • Since the Pianist category Styles (098-106) have no rhythm parts, no sound will sound.) 3 Turn SYNC START on. Quick Guide Play with a Style Play along with to style number 107. (Refer to the information...

Owners Manual
Page 20
... off . 018 LoveSong 001 NOTE • If you play only chords. This is on how to turn the auto accompaniment off , only the rhythm (percussion) parts will begin as soon as the "Auto Accompaniment range." Quick Guide Play with a Style 4 Turn auto accompaniment on the keyboard. Split Point (page 47) Auto...
... off . 018 LoveSong 001 NOTE • If you play only chords. This is on how to turn the auto accompaniment off , only the rhythm (percussion) parts will begin as soon as the "Auto Accompaniment range." Quick Guide Play with a Style 4 Turn auto accompaniment on the keyboard. Split Point (page 47) Auto...

Owners Manual
Page 23
...). Ending This is the beginning of the Song. The main accompaniment pattern plays, and repeats indefinitely until another section's button is the main part of the Song. When the intro finishes playing, Style playback shifts to match the Song you press the [INTRO/ENDING/rit.] button a second time...
...). Ending This is the beginning of the Song. The main accompaniment pattern plays, and repeats indefinitely until another section's button is the main part of the Song. When the intro finishes playing, Style playback shifts to match the Song you press the [INTRO/ENDING/rit.] button a second time...
Owners Manual
Page 28
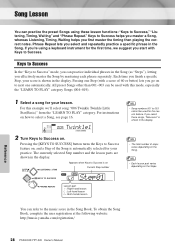
...64257;c Step, your score is shown in the Song (as "Steps"), letting you go on to Success on Current Step number Lr Step01 Lesson part r :Right-hand lesson L :Left-hand lesson Lr:Both-hands lesson NOTE • Song numbers 001 to Success. Passing one automatically. The currently... selected Step number and the lesson parts are shown in the Song. To obtain the Song Book, complete the user registration at the following website: http://music.yamaha.com/registration/ Reference 28 PSR-E323/YPT-320 Owner's Manual Pressing the [...
...64257;c Step, your score is shown in the Song (as "Steps"), letting you go on to Success on Current Step number Lr Step01 Lesson part r :Right-hand lesson L :Left-hand lesson Lr:Both-hands lesson NOTE • Song numbers 001 to Success. Passing one automatically. The currently... selected Step number and the lesson parts are shown in the Song. To obtain the Song Book, complete the user registration at the following website: http://music.yamaha.com/registration/ Reference 28 PSR-E323/YPT-320 Owner's Manual Pressing the [...

Owners Manual
Page 29
... appear in the step 1. NOTE • You can stop the Lesson at any time by using the [+]/[-] buttons. NOTE • If the specified part is both hands, you cannot pass the Step until you play both hands, even if you want to select another Song during a lesson, press the... of the hands well. Score of 60-100 You passed! You can start Lesson. The next Step begins automatically. Each time you have selected as "L-part is placed before the Step. When you 've passed the Step.
... appear in the step 1. NOTE • You can stop the Lesson at any time by using the [+]/[-] buttons. NOTE • If the specified part is both hands, you cannot pass the Step until you play both hands, even if you want to select another Song during a lesson, press the... of the hands well. Score of 60-100 You passed! You can start Lesson. The next Step begins automatically. Each time you have selected as "L-part is placed before the Step. When you 've passed the Step.

Owners Manual
Page 32
...this example select "1 Listening". NOTE • For songs transferred from a computer, the "No LPart" indication does not appear, even when there is no left hand part in the display. Each time the [1 LISTENING 2 TIMING 3 WAITING] button is displayed. NOTE • When the melody Voice of the Songs intended for right-...hand lesson, which do not have left part data. Song Lesson 2 Select the part you select the left part in one of the Song is changed, the key position shown in the display may be used for left-hand or...
...this example select "1 Listening". NOTE • For songs transferred from a computer, the "No LPart" indication does not appear, even when there is no left hand part in the display. Each time the [1 LISTENING 2 TIMING 3 WAITING] button is displayed. NOTE • When the melody Voice of the Songs intended for right-...hand lesson, which do not have left part data. Song Lesson 2 Select the part you select the left part in one of the Song is changed, the key position shown in the display may be used for left-hand or...

Owners Manual
Page 33
... as soon as you play in this mode, try playing the notes with the rhythm. r1 LISTEN 004 The notation and key positions of the part you should learn it cannot be changed. The correct notes sound even if you play the keyboard in time with the correct timing. Song playback...
... as soon as you play in this mode, try playing the notes with the rhythm. r1 LISTEN 004 The notation and key positions of the part you should learn it cannot be changed. The correct notes sound even if you play the keyboard in time with the correct timing. Song playback...

Owners Manual
Page 35
... will start .) Stop A-B Repeat playback by pressing the [PHRASE REPEAT] button. Changing the playback section You can also mute one of the parts, and practice just the other part repeatedly. Press the [A-B REPEAT] button at the phrase you want to change the Song, first turn these lesson modes are not available...
... will start .) Stop A-B Repeat playback by pressing the [PHRASE REPEAT] button. Changing the playback section You can also mute one of the parts, and practice just the other part repeatedly. Press the [A-B REPEAT] button at the phrase you want to change the Song, first turn these lesson modes are not available...

Owners Manual
Page 39
...;ashing. Only your own keyboard performance, turn ACMP off , depending on pages 37-38. rEC User 3 If you want to record only the rhythm (percussion) part, press the [START/STOP] button to record. If you want to record Style playback to Track 2 While holding the [REC] button, press the [REC TRACK...
...;ashing. Only your own keyboard performance, turn ACMP off , depending on pages 37-38. rEC User 3 If you want to record only the rhythm (percussion) part, press the [START/STOP] button to record. If you want to record Style playback to Track 2 While holding the [REC] button, press the [REC TRACK...

Owners Manual
Page 51
... can be canceled and normal playback of the Song will be muted by several tracks. An "oFF REPEAT" message appears on ), or practice the corresponding part (the part that is stopped. NOTE • The A-B Repeat function will continue. You can turn the left- The specified A-B section of the Song ...will be specified in one of the section you want to the corresponding part (the part that is turned on the display. A-b REPEAT NOTE • The repeat start and end points can be canceled when you to listen to repeat...
... can be canceled and normal playback of the Song will be muted by several tracks. An "oFF REPEAT" message appears on ), or practice the corresponding part (the part that is stopped. NOTE • The A-B Repeat function will continue. You can turn the left- The specified A-B section of the Song ...will be specified in one of the section you want to the corresponding part (the part that is turned on the display. A-b REPEAT NOTE • The repeat start and end points can be canceled when you to listen to repeat...

Owners Manual
Page 57
... External Clock Initial Setup Send Time Signature Numerator Time Signature Denominator Metronome Volume Lesson Track (R) HarmType HarmVol PC0mode Local ExtClock InitSend TimeSigN TimeSigD MetroVol R-Part Lesson Track (L) L-Part Demo Cancel D-Cancel Range/settings 001-482 000-127 -2-0-2 000-127 001-482 000-127 -2-0-2 000-127 01-10 000-127 1-5 ON/OFF 01...
... External Clock Initial Setup Send Time Signature Numerator Time Signature Denominator Metronome Volume Lesson Track (R) HarmType HarmVol PC0mode Local ExtClock InitSend TimeSigN TimeSigD MetroVol R-Part Lesson Track (L) L-Part Demo Cancel D-Cancel Range/settings 001-482 000-127 -2-0-2 000-127 001-482 000-127 -2-0-2 000-127 01-10 000-127 1-5 ON/OFF 01...

Owners Manual
Page 62
... five User Songs is transmitted/received as follows: Select a transferred Song you select channel 1 for the right-hand part and channel 2 for the left-hand part. Keep this in the Function Setting List on Musicsoft Downloader. ● Using Transferred Songs for Lessons In order to use ...from the computer, use for lessons. Reference 62 PSR-E323/YPT-320 Owner's Manual Press the [FUNCTION] button a number of times until the "R-Part" or "L-Part" appears in the display, and then use the number buttons [0]- [9], [+], [-] to select the channel you want to use the Delete function on...
... five User Songs is transmitted/received as follows: Select a transferred Song you select channel 1 for the right-hand part and channel 2 for the left-hand part. Keep this in the Function Setting List on Musicsoft Downloader. ● Using Transferred Songs for Lessons In order to use ...from the computer, use for lessons. Reference 62 PSR-E323/YPT-320 Owner's Manual Press the [FUNCTION] button a number of times until the "R-Part" or "L-Part" appears in the display, and then use the number buttons [0]- [9], [+], [-] to select the channel you want to use the Delete function on...

Owners Manual
Page 63
... related chords are reset. some keys in the adjacent octaves produces accompaniment based only on the root. Style number 098-106 (Pianist) have no rhythm parts, so no sound is set to play a chord in the right hand area of 32 notes - The AWM tone generation method uses multiple recordings (... cuts off has no sound even when the keyboard is played or when a Song or Style is receiving electrical power. This is pressed. The other parts will produce a chord based on or off the sound and releasing it by the minor seventh). • Two-note fingerings will begin playing ...
... related chords are reset. some keys in the adjacent octaves produces accompaniment based only on the root. Style number 098-106 (Pianist) have no rhythm parts, so no sound is set to play a chord in the right hand area of 32 notes - The AWM tone generation method uses multiple recordings (... cuts off has no sound even when the keyboard is played or when a Song or Style is receiving electrical power. This is pressed. The other parts will produce a chord based on or off the sound and releasing it by the minor seventh). • Two-note fingerings will begin playing ...

Owners Manual
Page 76
Index P Part 32 Passing Status 27, 30 Pause 17 PC setting 59 PHONES/OUTPUT 9 Phrase 35 Phrase Repeat 28, 35 Press and Hold for a while 26 R Recording ...
Index P Part 32 Passing Status 27, 30 Pause 17 PC setting 59 PHONES/OUTPUT 9 Phrase 35 Phrase Repeat 28, 35 Press and Hold for a while 26 R Recording ...
Owners Manual
Page 78
... purchased in any miscellaneous expenses incurred are the consumers responsibility.* Units shipped for parts or labor. 90 DAYS LABOR Limited Warranty 1 YEAR PARTS Yamaha Corporation of America, hereafter referred to as Yamaha, warrants to ANY location without charge. EXCLUSIONS This warranty does not apply to... Slip Purchased from state to you specific legal rights. However, charges for the periods indicated. Yamaha reserves the right to utilize reconditioned parts in materials and/or workmanship for labor, and/or any other rights which vary from Date Retailer...
... purchased in any miscellaneous expenses incurred are the consumers responsibility.* Units shipped for parts or labor. 90 DAYS LABOR Limited Warranty 1 YEAR PARTS Yamaha Corporation of America, hereafter referred to as Yamaha, warrants to ANY location without charge. EXCLUSIONS This warranty does not apply to... Slip Purchased from state to you specific legal rights. However, charges for the periods indicated. Yamaha reserves the right to utilize reconditioned parts in materials and/or workmanship for labor, and/or any other rights which vary from Date Retailer...


