
Owners Manual
Page 10
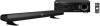
... procedure is any other components. • Keep enough ventilation space on the front, rear, and bottom side (that suits your TV Example 2: Mounting the speaker on the wall 2 2 1 1 1 Subwoofer integrated receiver (SR-300) 2 Speaker (NS-BR300) Notes • Do not place this system on/under any...holes in Example 1. • If you temporarily place and arrange all components in order to decide which to attach the stands to a wall. Example 1: Placing the speaker beneath your environment. ■ Placing the speaker beneath/under the speaker, use the supplied stands as shown...
... procedure is any other components. • Keep enough ventilation space on the front, rear, and bottom side (that suits your TV Example 2: Mounting the speaker on the wall 2 2 1 1 1 Subwoofer integrated receiver (SR-300) 2 Speaker (NS-BR300) Notes • Do not place this system on/under any...holes in Example 1. • If you temporarily place and arrange all components in order to decide which to attach the stands to a wall. Example 1: Placing the speaker beneath your environment. ■ Placing the speaker beneath/under the speaker, use the supplied stands as shown...

Owners Manual
Page 11
... 37 mm (1-7/16") 256 mm (10-1/16") 1 Attach the supplied mounting template on a wall and mark the holes of the installation. • Make sure you use the screw holes on a wall, all installation work . Using clamps other than specified screws, such as ...plaster or veneered woods. Tapes or thumbtacks Mark Screw holes Hole depth: 14 mm (9/16") Diameter: 6 mm (1/4") Pitch: 256 mm (10-1/16") 2 Remove the mounting template and then install the commercially available screws at the marks. Yamaha...
... 37 mm (1-7/16") 256 mm (10-1/16") 1 Attach the supplied mounting template on a wall and mark the holes of the installation. • Make sure you use the screw holes on a wall, all installation work . Using clamps other than specified screws, such as ...plaster or veneered woods. Tapes or thumbtacks Mark Screw holes Hole depth: 14 mm (9/16") Diameter: 6 mm (1/4") Pitch: 256 mm (10-1/16") 2 Remove the mounting template and then install the commercially available screws at the marks. Yamaha...
