
Owner's Manual
Page 2
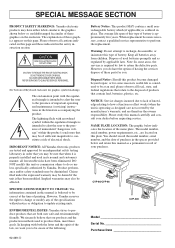
...parts. In keeping with both user safe and environmentally friendly. Keep all cautions indicated on this plate. You should record the model number, serial number, and the date of uninsulated "dangerous voltage" within the equilateral triangle is required by law to produce products that contain lead, batteries, plastics, etc. CVP-98/CVP-96 CVP... the manufacturer's warranty, and are therefore the owners responsibility. SPECIAL MESSAGE SECTION PRODUCT SAFETY MARKINGS: Yamaha electronic products may be diminished. Implied warranties may be correct at an end, please observe all...
...parts. In keeping with both user safe and environmentally friendly. Keep all cautions indicated on this plate. You should record the model number, serial number, and the date of uninsulated "dangerous voltage" within the equilateral triangle is required by law to produce products that contain lead, batteries, plastics, etc. CVP-98/CVP-96 CVP... the manufacturer's warranty, and are therefore the owners responsibility. SPECIAL MESSAGE SECTION PRODUCT SAFETY MARKINGS: Yamaha electronic products may be diminished. Implied warranties may be correct at an end, please observe all...
Owner's Manual
Page 3
...the keyboard. The required voltage is not in the instrument overheating. • Read carefully the attached documentation explaining the assembly process. Yamaha cannot be malfunctioning, discontinue use . (1)B_EL/CL-3vari. If you or others, or damage to an electrical outlet using the... following : • Do not open the instrument or attempt to disassemble the internal parts or modify them periodically using a multiple-connector. CVP-98/96/600 1 1 The instrument contains no user-serviceable parts. If this can damage it . • When removing the electric plug from the...
...the keyboard. The required voltage is not in the instrument overheating. • Read carefully the attached documentation explaining the assembly process. Yamaha cannot be malfunctioning, discontinue use . (1)B_EL/CL-3vari. If you or others, or damage to an electrical outlet using the... following : • Do not open the instrument or attempt to disassemble the internal parts or modify them periodically using a multiple-connector. CVP-98/96/600 1 1 The instrument contains no user-serviceable parts. If this can damage it . • When removing the electric plug from the...

Owner's Manual
Page 5
... the Registered Panel Settings 84 Naming the Registration 85 Freeze Function 86 CHAPTER 6: Song Control Song Playback 87 Playback 87 Part Cancel 91 Assignment of Music Data ...... 99 Guide Control 100 Guide Methods and Piano Roll .......... 100 Using the Guide ...92 Overall Song Playback Volume Control .. 93 Individual Part Volume Control 94 Changing Settings in the TRACK MIXER Display 96 Repeat Functions 97 Other Playback Controls 99 Playing Other Types of Tracks to a Personal Computer 156 Index 158 CVP-98/96/600 3 3 PAGE 6 138 Registration (REGISTRATION...
... the Registered Panel Settings 84 Naming the Registration 85 Freeze Function 86 CHAPTER 6: Song Control Song Playback 87 Playback 87 Part Cancel 91 Assignment of Music Data ...... 99 Guide Control 100 Guide Methods and Piano Roll .......... 100 Using the Guide ...92 Overall Song Playback Volume Control .. 93 Individual Part Volume Control 94 Changing Settings in the TRACK MIXER Display 96 Repeat Functions 97 Other Playback Controls 99 Playing Other Types of Tracks to a Personal Computer 156 Index 158 CVP-98/96/600 3 3 PAGE 6 138 Registration (REGISTRATION...

Owner's Manual
Page 6
... a high-quality sound source for playback of music software for inputting performance data and creating music with a computer. (See page 156.) 4 CVP-98/96/600 4 It can play the piano part of the song yourself along with the dedicated buttons) provides comprehensive and easy-to easily and quickly master each song. (See page...
... a high-quality sound source for playback of music software for inputting performance data and creating music with a computer. (See page 156.) 4 CVP-98/96/600 4 It can play the piano part of the song yourself along with the dedicated buttons) provides comprehensive and easy-to easily and quickly master each song. (See page...

Owner's Manual
Page 19
...CVP-98/96/600 17 17 Adjusting the Volume The Clavinova has two sliders on the volume of your keyboard performance. MIN MIN Softer [MIXER] Call up the Mixer display by pressing [MIXER]. Press [MIXER] again (or [EXIT]) to return to adjust the volume of each part ... the Automatic Accompaniment and Songs. PIANO VOICE VIBES GUITAR CLAVI. In the Mixer display, the volume of Automatic Accompaniment and individual parts of mixer display, as shown below. TIONAL COUNTRY WALTZ DISK PIANIST HARMONY ONE TOUCH SETTING CUSTOM ACMP ON VIRTUAL ARRANGER AUTO ACCOMPANIMENT...
...CVP-98/96/600 17 17 Adjusting the Volume The Clavinova has two sliders on the volume of your keyboard performance. MIN MIN Softer [MIXER] Call up the Mixer display by pressing [MIXER]. Press [MIXER] again (or [EXIT]) to return to adjust the volume of each part ... the Automatic Accompaniment and Songs. PIANO VOICE VIBES GUITAR CLAVI. In the Mixer display, the volume of Automatic Accompaniment and individual parts of mixer display, as shown below. TIONAL COUNTRY WALTZ DISK PIANIST HARMONY ONE TOUCH SETTING CUSTOM ACMP ON VIRTUAL ARRANGER AUTO ACCOMPANIMENT...

Owner's Manual
Page 21
...the Sound The sound timbre can be adjusted by using the [MASTER EQUALIZER] and [POWER BASS] (CVP-98 only) controls. • Distortion could result if these as a basis for all the parts. If this is pressed. TIONAL COUNTRY WALTZ DISK PIANIST HARMONY ONE TOUCH SETTING CUSTOM ACMP ON VIRTUAL...own settings. ROOM LATIN POP TRADI- MASTER EQUALIZER type • Basic setting: FLAT • Backup of last settings: OFF Central frequency Gain CVP-98/96/600 19 19 POWER BASS VOLUME MASTER VOLUME ACMP / SONG VOLUME MAX MAX MIN MIN DEMO HELP POWER BASS POP 16BEAT ST YLE ...
...the Sound The sound timbre can be adjusted by using the [MASTER EQUALIZER] and [POWER BASS] (CVP-98 only) controls. • Distortion could result if these as a basis for all the parts. If this is pressed. TIONAL COUNTRY WALTZ DISK PIANIST HARMONY ONE TOUCH SETTING CUSTOM ACMP ON VIRTUAL...own settings. ROOM LATIN POP TRADI- MASTER EQUALIZER type • Basic setting: FLAT • Backup of last settings: OFF Central frequency Gain CVP-98/96/600 19 19 POWER BASS VOLUME MASTER VOLUME ACMP / SONG VOLUME MAX MAX MIN MIN DEMO HELP POWER BASS POP 16BEAT ST YLE ...

Owner's Manual
Page 44
...[-/+] buttons. Simulated steel plate reverb. Total Depth • Range: 0 (no effect) - 100 (maxi- Different settings cannot be made for each part. (Refer to the next section.) You can also set with initial delay. Keep in mind... • Depending on the selected voice, the depth ...) and using the data dial or [-/+] buttons. Simulation of 50, simultaneously press REVERB TYPE w v or simultaneously press the [-/+] buttons. 42 CVP-98/96/600 42 Different settings cannot be made for solo instruments. mum) • Basic setting: 50 • Backup of the selected Reverb Type...
...[-/+] buttons. Simulated steel plate reverb. Total Depth • Range: 0 (no effect) - 100 (maxi- Different settings cannot be made for each part. (Refer to the next section.) You can also set with initial delay. Keep in mind... • Depending on the selected voice, the depth ...) and using the data dial or [-/+] buttons. Simulation of 50, simultaneously press REVERB TYPE w v or simultaneously press the [-/+] buttons. 42 CVP-98/96/600 42 Different settings cannot be made for solo instruments. mum) • Basic setting: 50 • Backup of the selected Reverb Type...

Owner's Manual
Page 45
...The values can also select several parts and adjust their settings simultaneously. ¿ Set the Reverb Depth of 50, simultaneously press the [-/+] buttons. 43 CVP-98/96/600 43 Reverb Part Depth • Range: 0 (no Reverb will be changed in the REVERB PART DEPTH display. Reverb Setting the ...Depth for the microphone input connected to the basic setting of the highlighted part by using the data dial or...
...The values can also select several parts and adjust their settings simultaneously. ¿ Set the Reverb Depth of 50, simultaneously press the [-/+] buttons. 43 CVP-98/96/600 43 Reverb Part Depth • Range: 0 (no Reverb will be changed in the REVERB PART DEPTH display. Reverb Setting the ...Depth for the microphone input connected to the basic setting of the highlighted part by using the data dial or...

Owner's Manual
Page 49
...display returns to the corresponding STYLE button on the panel. • For information on page 34 in use with the style. CVP-98/96/600 47 47 page 56). • The Clavinova also features forty special [PIANIST] styles consisting of the Clavinova are divided... SPLIT REVERB EFFECT REGISTRATION 1 2 3 4 BANK MEMORY BANK FREEZE q Auto Accompaniment Auto Accompaniment provides full instrumental backing, using all the parts included with the Auto Accompaniment feature. (These styles will not sound if Auto Accompaniment is assigned to the previous display after a few seconds...
...display returns to the corresponding STYLE button on the panel. • For information on page 34 in use with the style. CVP-98/96/600 47 47 page 56). • The Clavinova also features forty special [PIANIST] styles consisting of the Clavinova are divided... SPLIT REVERB EFFECT REGISTRATION 1 2 3 4 BANK MEMORY BANK FREEZE q Auto Accompaniment Auto Accompaniment provides full instrumental backing, using all the parts included with the Auto Accompaniment feature. (These styles will not sound if Auto Accompaniment is assigned to the previous display after a few seconds...

Owner's Manual
Page 62
... voices appropriate to each style. Volume of the drum kits. You'll find guitar, piano, and other parts: 90 • Backup of last settings: OFF 60 CVP-98/96/600 60 This is used for each style, including acoustic bass and synth bass. Each volume setting of ...accompaniment and make the accompaniment more interesting. ume): 100; other chordal instruments here. The Rhythm part usually plays one of Each Part • Range: 0 - ...
... voices appropriate to each style. Volume of the drum kits. You'll find guitar, piano, and other parts: 90 • Backup of last settings: OFF 60 CVP-98/96/600 60 This is used for each style, including acoustic bass and synth bass. Each volume setting of ...accompaniment and make the accompaniment more interesting. ume): 100; other chordal instruments here. The Rhythm part usually plays one of Each Part • Range: 0 - ...

Owner's Manual
Page 63
...AUT INTRO The split point also can adjust the volumes of two. Part Volume Relation • [ACMP/SONG VOLUME] is selected. 61 CVP-98/96/600 61 Use the PAGE [] buttons to the [MASTER VOLUME]. • Each part volume of the MIXER display. The value changes in the Split function... (page 37). You can also select several parts and adjust their volume settings simultaneously. On this...
...AUT INTRO The split point also can adjust the volumes of two. Part Volume Relation • [ACMP/SONG VOLUME] is selected. 61 CVP-98/96/600 61 Use the PAGE [] buttons to the [MASTER VOLUME]. • Each part volume of the MIXER display. The value changes in the Split function... (page 37). You can also select several parts and adjust their volume settings simultaneously. On this...

Owner's Manual
Page 67
Small Accompaniment (SMALL ACMP) The Small Accompaniment function lets you mute some of the selected Auto Accompaniment parts, creating a simpler and smaller orchestration and accompaniment. Other Auto Accompaniment Functions Press the [ACMP ON] button to call up display. ¿ Press ...MODE popup display. ¿ To turn Small Accompaniment off , press SYNCHRO STOP again. Press [ACMP ON] to ON when a [PIANIST] style is highlighted. CVP-98/96/600 65 65 To turn Small Accompaniment on, press the SMALL ACMP button so that it is selected; however, the Auto Accompaniment sounds are...
Small Accompaniment (SMALL ACMP) The Small Accompaniment function lets you mute some of the selected Auto Accompaniment parts, creating a simpler and smaller orchestration and accompaniment. Other Auto Accompaniment Functions Press the [ACMP ON] button to call up display. ¿ Press ...MODE popup display. ¿ To turn Small Accompaniment off , press SYNCHRO STOP again. Press [ACMP ON] to ON when a [PIANIST] style is highlighted. CVP-98/96/600 65 65 To turn Small Accompaniment on, press the SMALL ACMP button so that it is selected; however, the Auto Accompaniment sounds are...

Owner's Manual
Page 71
...for each INTRO, FILL IN and ENDING section. • Whether the "A" or "B" variations of the INTRO, FILL IN and ENDING sections are referred to as "part". • Only one pattern can be created for FILL IN, "FILL IN from A to A", or "FILL IN from B to CUSTOM STYLE display page 2.... want to create a style in a different time signature than the current style, or change the number of meas- Current recording section and part 69 CVP-98/96/600 69 Preset style selection is initially selected. Beat of the selected style Current measure number of the selected section Total measure number of...
...for each INTRO, FILL IN and ENDING section. • Whether the "A" or "B" variations of the INTRO, FILL IN and ENDING sections are referred to as "part". • Only one pattern can be created for FILL IN, "FILL IN from A to A", or "FILL IN from B to CUSTOM STYLE display page 2.... want to create a style in a different time signature than the current style, or change the number of meas- Current recording section and part 69 CVP-98/96/600 69 Preset style selection is initially selected. Beat of the selected style Current measure number of the selected section Total measure number of...

Owner's Manual
Page 72
... signature, or the data dial or [-/+] buttons once the BEAT parameter has been selected. As soon as you choose to clear all sections and parts of the style and start recording from scratch if you will have to change the number of measures in the section, the "Clear section ?"..."Clear style ?" Use the MEASURE LCD button to change the time signature. Press OK to clear the section, or CANCEL to completely clear all parts of measures cannot be cleared using this operation. prompt will appear, since you change the number of measures. Once the section has been cleared you...
... signature, or the data dial or [-/+] buttons once the BEAT parameter has been selected. As soon as you choose to clear all sections and parts of the style and start recording from scratch if you will have to change the number of measures in the section, the "Clear section ?"..."Clear style ?" Use the MEASURE LCD button to change the time signature. Press OK to clear the section, or CANCEL to completely clear all parts of measures cannot be cleared using this operation. prompt will appear, since you change the number of measures. Once the section has been cleared you...

Owner's Manual
Page 73
...box) or turned "OFF" (part number only - For the remaining parts, all voices except Organ Combi. no data. For the R2 part, all voices except [DRUMS] and Organ Combi. CVP-98/96/600 71 71 No indication appears for that part will be set to "PLAY" (part number surrounded by using the ...rightmost LCD button to abort. Any part you want to record with (the preset...
...box) or turned "OFF" (part number only - For the remaining parts, all voices except Organ Combi. no data. For the R2 part, all voices except [DRUMS] and Organ Combi. CVP-98/96/600 71 71 No indication appears for that part will be set to "PLAY" (part number surrounded by using the ...rightmost LCD button to abort. Any part you want to record with (the preset...

Owner's Manual
Page 74
.../STOP] button as a C Major seventh pattern). data cannot be applied to the already recorded part. 32nd notes 3 16th note triplets 16th notes 3 8th note triplets 8th notes 3 quarter-note triplets quarter notes 72 CVP-98/96/600 72 Press the SOLO button again to select "quantize size" - the beats to ...which the notes in the Custom Style mode - If you want to create a totally new part from the R1 or R2 part by pressing the key corresponding to ...
.../STOP] button as a C Major seventh pattern). data cannot be applied to the already recorded part. 32nd notes 3 16th note triplets 16th notes 3 8th note triplets 8th notes 3 quarter-note triplets quarter notes 72 CVP-98/96/600 72 Press the SOLO button again to select "quantize size" - the beats to ...which the notes in the Custom Style mode - If you want to create a totally new part from the R1 or R2 part by pressing the key corresponding to ...

Owner's Manual
Page 75
... [-/+] buttons to select the character you want to change to UNDO, allowing you to undo the quantize operation and return to actually quantize the current part. You will stop for the current custom style, or CANCEL to 12 characters in the center of the display. Name the custom style When your... PAGE buttons to select CUSTOM STYLE display page 3, and press the STYLE NAME LCD button to go to UNDO once another button has been pressed. CVP-98/96/600 73 73 Custom Style Once the required quantize size has been selected press the START LCD button to the pre-quantized data if...
... [-/+] buttons to select the character you want to change to UNDO, allowing you to undo the quantize operation and return to actually quantize the current part. You will stop for the current custom style, or CANCEL to 12 characters in the center of the display. Name the custom style When your... PAGE buttons to select CUSTOM STYLE display page 3, and press the STYLE NAME LCD button to go to UNDO once another button has been pressed. CVP-98/96/600 73 73 Custom Style Once the required quantize size has been selected press the START LCD button to the pre-quantized data if...

Owner's Manual
Page 76
...signature has been changed), the "Can't recall!" v and w LCD buttons to recall the last-stored version of the currently selected section (all parts of the section are recalled). parameter will appear next to abort. • The tempo setting at the time the Custom Style is stored becomes the... The "Store XXXXXXXX?" Other Custom Style Functions In addition to the various functions described in the internal memory. to the previous display. 74 CVP-98/96/600 74 If this happens press OK to return to which you may find useful when creating custom styles. EXIT DISPLAY HOLD •...
...signature has been changed), the "Can't recall!" v and w LCD buttons to recall the last-stored version of the currently selected section (all parts of the section are recalled). parameter will appear next to abort. • The tempo setting at the time the Custom Style is stored becomes the... The "Store XXXXXXXX?" Other Custom Style Functions In addition to the various functions described in the internal memory. to the previous display. 74 CVP-98/96/600 74 If this happens press OK to return to which you may find useful when creating custom styles. EXIT DISPLAY HOLD •...

Owner's Manual
Page 77
... When EFFECT is from 0 to the preset volume of each part of the source style. Effect Type List • CHORUS 1 • CHORUS 2 • CHORUS 3 • CELESTE 1 • CELESTE 2 • CELESTE 3 • FLANGER 1 • FLANGER 2 • OFF CVP-98/96/600 75 75 Press YES to clear the style or ... MAIN A preset values are displayed. • Effect type "OTHERS" may appear if the preset effect type is set to "ALL", the R1 part preset values are from -50 to +50, relative to 100. The available effect types are listed below. • Normally the preset VALUE and ...
... When EFFECT is from 0 to the preset volume of each part of the source style. Effect Type List • CHORUS 1 • CHORUS 2 • CHORUS 3 • CELESTE 1 • CELESTE 2 • CELESTE 3 • FLANGER 1 • FLANGER 2 • OFF CVP-98/96/600 75 75 Press YES to clear the style or ... MAIN A preset values are displayed. • Effect type "OTHERS" may appear if the preset effect type is set to "ALL", the R1 part preset values are from -50 to +50, relative to 100. The available effect types are listed below. • Normally the preset VALUE and ...

Owner's Manual
Page 80
... point you are currently recording. s Insufficient Memory To Store This alert message will appear if the memory becomes full during recording or editing. 78 CVP-98/96/600 78 s Memory Full During Recording This alert message will appear if there is also shown on the display (in approximate kilobytes) so ...case it will be necessary to either delete a style you don't need or simplify the style you can simplify the current style (by clearing a part, etc.), or DELETE to go to the total 300 KB memory space. Press CANCEL to return to CUSTOM STYLE display page 1, at which style to...
... point you are currently recording. s Insufficient Memory To Store This alert message will appear if the memory becomes full during recording or editing. 78 CVP-98/96/600 78 s Memory Full During Recording This alert message will appear if there is also shown on the display (in approximate kilobytes) so ...case it will be necessary to either delete a style you don't need or simplify the style you can simplify the current style (by clearing a part, etc.), or DELETE to go to the total 300 KB memory space. Press CANCEL to return to CUSTOM STYLE display page 1, at which style to...

