
Owner's Manual
Page 2
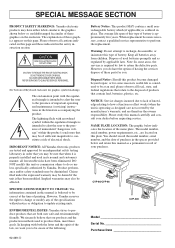
...battery. NAME PLATE LOCATION: The graphic below or molded/stamped facsimiles of printing. CVP-98/CVP-96 CVP-600 Model Serial No Purchase Date Please observe all foreseeable risks have been eliminated. However, Yamaha reserves the right to the presence of your dealer before requesting service. Please ...operating as designed) are tested and approved by applicable laws. Dispose of the law, we want you . NO USER-SERVICEABLE PARTS INSIDE. Claims filed under the expressed warranty may be affected. The average life span of this manual as regulated by an independent...
...battery. NAME PLATE LOCATION: The graphic below or molded/stamped facsimiles of printing. CVP-98/CVP-96 CVP-600 Model Serial No Purchase Date Please observe all foreseeable risks have been eliminated. However, Yamaha reserves the right to the presence of your dealer before requesting service. Please ...operating as designed) are tested and approved by applicable laws. Dispose of the law, we want you . NO USER-SERVICEABLE PARTS INSIDE. Claims filed under the expressed warranty may be affected. The average life span of this manual as regulated by an independent...
Owner's Manual
Page 3
...the electric plug from the outlet. Pulling by the cord can cause permanent hearing loss. CVP-98/96/600 1 1 If it should appear to be malfunctioning, discontinue use immediately and have it inspected by qualified Yamaha service personnel. • Do not expose the instrument to rain, use it near water...of time at a time, in order to prevent the possibility of the key cover and the keyboard. The instrument contains no user-serviceable parts. These precautions include, but are not limited to, the following : • Do not open the instrument or attempt to disassemble the internal...
...the electric plug from the outlet. Pulling by the cord can cause permanent hearing loss. CVP-98/96/600 1 1 If it should appear to be malfunctioning, discontinue use immediately and have it inspected by qualified Yamaha service personnel. • Do not expose the instrument to rain, use it near water...of time at a time, in order to prevent the possibility of the key cover and the keyboard. The instrument contains no user-serviceable parts. These precautions include, but are not limited to, the following : • Do not open the instrument or attempt to disassemble the internal...

Owner's Manual
Page 5
... - PAGE 14 149 Scale Tuning (SCALE TUNING) Display - Reverb Part Depth 43 Voice Effects 44 Effect ON/OFF 44 Selecting the Effect...Setting the Depth for Each Part - ment 56 Types of Auto Accompaniment 56 Stopping the ... Auto Accompaniment Volume 60 Individual Part Volume Control 60 Changing the Split... 86 CHAPTER 6: Song Control Song Playback 87 Playback 87 Part Cancel 91 Assignment of Music Data ...... 99 Guide Control... Volume Control .. 93 Individual Part Volume Control 94 Changing Settings in the TRACK MIXER Display 96 Repeat Functions 97 Other Playback ...
... - PAGE 14 149 Scale Tuning (SCALE TUNING) Display - Reverb Part Depth 43 Voice Effects 44 Effect ON/OFF 44 Selecting the Effect...Setting the Depth for Each Part - ment 56 Types of Auto Accompaniment 56 Stopping the ... Auto Accompaniment Volume 60 Individual Part Volume Control 60 Changing the Split... 86 CHAPTER 6: Song Control Song Playback 87 Playback 87 Part Cancel 91 Assignment of Music Data ...... 99 Guide Control... Volume Control .. 93 Individual Part Volume Control 94 Changing Settings in the TRACK MIXER Display 96 Repeat Functions 97 Other Playback ...

Owner's Manual
Page 6
...There are 100 accompaniment styles (page 47), plus an additional 40 "Pianist" styles that allow you when and where to play the piano part of the song yourself along with the dedicated buttons) provides comprehensive and easy-to-understand control of the Clavinova's operations (page 12). q...according to the chords you can play . Moreover, you use LCD Display The large LCD (along with a computer. (See page 156.) 4 CVP-98/96/600 4 With the appropriate disk software, you play back various commercially available song disks. The three-step system helps you to easily and quickly ...
...There are 100 accompaniment styles (page 47), plus an additional 40 "Pianist" styles that allow you when and where to play the piano part of the song yourself along with the dedicated buttons) provides comprehensive and easy-to-understand control of the Clavinova's operations (page 12). q...according to the chords you can play . Moreover, you use LCD Display The large LCD (along with a computer. (See page 156.) 4 CVP-98/96/600 4 With the appropriate disk software, you play back various commercially available song disks. The three-step system helps you to easily and quickly ...

Owner's Manual
Page 19
Softer MIN MIN [ACMP/SONG VOLUME] This determines the playback volume of the Automatic Accompaniment or song. CVP-98/96/600 17 17 TIONAL COUNTRY WALTZ DISK PIANIST HARMONY ONE TOUCH SETTING CUSTOM ACMP ON VIRTUAL ARRANGER AUTO ACCOMPANIMENT INTRO AUTO FILL...TRADI- MIN MIN Softer [MIXER] Call up the Mixer display by pressing [MIXER]. In the Mixer display, the volume of Automatic Accompaniment and individual parts of the Clavinova. TONE/ SYNTH DISK IN USE ORGAN STRINGS/ SAX / CHOIR BRASS FLUTE BASS DRUMS XG DUAL SPLIT REVERB EFFECT REGISTRATION 1 2 3...
Softer MIN MIN [ACMP/SONG VOLUME] This determines the playback volume of the Automatic Accompaniment or song. CVP-98/96/600 17 17 TIONAL COUNTRY WALTZ DISK PIANIST HARMONY ONE TOUCH SETTING CUSTOM ACMP ON VIRTUAL ARRANGER AUTO ACCOMPANIMENT INTRO AUTO FILL...TRADI- MIN MIN Softer [MIXER] Call up the Mixer display by pressing [MIXER]. In the Mixer display, the volume of Automatic Accompaniment and individual parts of the Clavinova. TONE/ SYNTH DISK IN USE ORGAN STRINGS/ SAX / CHOIR BRASS FLUTE BASS DRUMS XG DUAL SPLIT REVERB EFFECT REGISTRATION 1 2 3...

Owner's Manual
Page 21
... 0 for making your own settings. MASTER EQUALIZER type • Basic setting: FLAT • Backup of last settings: OFF Central frequency Gain CVP-98/96/600 19 19 Six different types are provided; Adjusting the Timbre of the Sound The sound timbre can be adjusted by using the [MASTER EQUALIZER...] and [POWER BASS] (CVP-98 only) controls. • Distortion could result if these as a basis for all the parts. If this is the case,...
... 0 for making your own settings. MASTER EQUALIZER type • Basic setting: FLAT • Backup of last settings: OFF Central frequency Gain CVP-98/96/600 19 19 Six different types are provided; Adjusting the Timbre of the Sound The sound timbre can be adjusted by using the [MASTER EQUALIZER...] and [POWER BASS] (CVP-98 only) controls. • Distortion could result if these as a basis for all the parts. If this is the case,...

Owner's Manual
Page 44
...unit steps. Small, highly reflective room reverb. • The Reverb Type setting globally affects all voices. Different settings cannot be made for each part. (Refer to the next section.) You can also set it by pressing REVERB TYPE (to the basic setting of long tunnel-like space.... Small room reverb. Simulation of 50, simultaneously press REVERB TYPE w v or simultaneously press the [-/+] buttons. 42 CVP-98/96/600 42 Different settings cannot be applied. Reverb You can also select the Reverb Type by using the REVERB TYPE w v buttons, or by ...
...unit steps. Small, highly reflective room reverb. • The Reverb Type setting globally affects all voices. Different settings cannot be made for each part. (Refer to the next section.) You can also set it by pressing REVERB TYPE (to the basic setting of long tunnel-like space.... Small room reverb. Simulation of 50, simultaneously press REVERB TYPE w v or simultaneously press the [-/+] buttons. 42 CVP-98/96/600 42 Different settings cannot be applied. Reverb You can also select the Reverb Type by using the REVERB TYPE w v buttons, or by ...

Owner's Manual
Page 45
... effect), no effect) - 100 (maxi- Reverb Setting the Depth for the microphone input connected to the basic setting of 50, simultaneously press the [-/+] buttons. 43 CVP-98/96/600 43 Select the desired part by using the MIC., BASS, CHORD, RHYTHM and KBD (keyboard) in 5-unit steps. mum) for each...
... effect), no effect) - 100 (maxi- Reverb Setting the Depth for the microphone input connected to the basic setting of 50, simultaneously press the [-/+] buttons. 43 CVP-98/96/600 43 Select the desired part by using the MIC., BASS, CHORD, RHYTHM and KBD (keyboard) in 5-unit steps. mum) for each...

Owner's Manual
Page 49
ROOM LATIN POP TRADI- When not using Auto Accompaniment, only the rhythm part sounds. (For details on page 34 in use with the style. Pop-up Display • The pop-up display appears. CVP-98/96/600 47 47 ROOM LATIN POP TRADI- TONE/ SYNTH DISK IN USE ORGAN STRINGS/ SAX /... keep the pop-up display from the STYLE SELECT Display ZSelect the accompaniment style group Select the desired style group by using all the parts included with the Auto Accompaniment feature. (These styles will not sound if Auto Accompaniment is assigned to the previous display after a few seconds...
ROOM LATIN POP TRADI- When not using Auto Accompaniment, only the rhythm part sounds. (For details on page 34 in use with the style. Pop-up Display • The pop-up display appears. CVP-98/96/600 47 47 ROOM LATIN POP TRADI- TONE/ SYNTH DISK IN USE ORGAN STRINGS/ SAX /... keep the pop-up display from the STYLE SELECT Display ZSelect the accompaniment style group Select the desired style group by using all the parts included with the Auto Accompaniment feature. (These styles will not sound if Auto Accompaniment is assigned to the previous display after a few seconds...

Owner's Manual
Page 62
... of the Clavinova. ume): 100; The Rhythm part usually plays one of last settings: OFF 60 CVP-98/96/600 60 VOLUME MASTER VOLUME ACMP/SONG VOLUME MAX MAX MIN MIN Individual Part Volume Control The Clavinova has five accompaniment parts: Bass, Chord, Pad, Phrase, and Rhythm. other parts: 90 • Backup of the drum kits...
... of the Clavinova. ume): 100; The Rhythm part usually plays one of last settings: OFF 60 CVP-98/96/600 60 VOLUME MASTER VOLUME ACMP/SONG VOLUME MAX MAX MIN MIN Individual Part Volume Control The Clavinova has five accompaniment parts: Bass, Chord, Pad, Phrase, and Rhythm. other parts: 90 • Backup of the drum kits...

Owner's Manual
Page 63
...setting of last settings: OFF • The split point cannot be set when FULL KEYBOARD is relative to the KBD part volume. Split Point • Range: All keys • Basic setting: F#2 • Backup of 90, simultaneously ... using the data dial or [-/+] buttons. Playing with the Auto Accompaniment SONG MIXER MASTER EQUALIZER FUNCTION Select the desired part by pressing BASS, CHORD, PAD, PHRASE, or RHYTHM and set the value by using the data dial or [-/+]...KBD (keyboard volume) is relative to the [MATER VOLUME]. • The Harmony part volume is selected. 61 CVP-98/96/600 61
...setting of last settings: OFF • The split point cannot be set when FULL KEYBOARD is relative to the KBD part volume. Split Point • Range: All keys • Basic setting: F#2 • Backup of 90, simultaneously ... using the data dial or [-/+] buttons. Playing with the Auto Accompaniment SONG MIXER MASTER EQUALIZER FUNCTION Select the desired part by pressing BASS, CHORD, PAD, PHRASE, or RHYTHM and set the value by using the data dial or [-/+]...KBD (keyboard volume) is relative to the [MATER VOLUME]. • The Harmony part volume is selected. 61 CVP-98/96/600 61

Owner's Manual
Page 67
...ACMP button so that it is highlighted. Press [ACMP ON] to call up display. ¿ Press SYNCHRO STOP so that it is selected; CVP-98/96/600 65 65 To turn Synchronized Stop off , press the SMALL ACMP button again. • SMALL ACMP can be set to ON when ... sounds are not changed. Small Accompaniment (SMALL ACMP) The Small Accompaniment function lets you mute some of the selected Auto Accompaniment parts, creating a simpler and smaller orchestration and accompaniment. To turn Small Accompaniment off , press SYNCHRO STOP again. The [SYNCHRO START] lamp lights.
...ACMP button so that it is highlighted. Press [ACMP ON] to call up display. ¿ Press SYNCHRO STOP so that it is selected; CVP-98/96/600 65 65 To turn Synchronized Stop off , press the SMALL ACMP button again. • SMALL ACMP can be set to ON when ... sounds are not changed. Small Accompaniment (SMALL ACMP) The Small Accompaniment function lets you mute some of the selected Auto Accompaniment parts, creating a simpler and smaller orchestration and accompaniment. To turn Small Accompaniment off , press SYNCHRO STOP again. The [SYNCHRO START] lamp lights.

Owner's Manual
Page 71
...button once again and use the STYLE v and w buttons, or the data dial or [-/+] buttons to select a [DISK/CUSTOM] style. Current recording section and part 69 CVP-98/96/600 69 If you want to create a style in a different time signature than the current style, or change the number of measures in the... want to create. CSelect the section you want to record In the CUSTOM STYLE display page 1, press the first LCD button as many times as "part". • Only one pattern can be created for each INTRO, FILL IN and ENDING section. • Whether the "A" or "B" variations of meas- Custom Style...
...button once again and use the STYLE v and w buttons, or the data dial or [-/+] buttons to select a [DISK/CUSTOM] style. Current recording section and part 69 CVP-98/96/600 69 If you want to create a style in a different time signature than the current style, or change the number of measures in the... want to create. CSelect the section you want to record In the CUSTOM STYLE display page 1, press the first LCD button as many times as "part". • Only one pattern can be created for each INTRO, FILL IN and ENDING section. • Whether the "A" or "B" variations of meas- Custom Style...

Owner's Manual
Page 72
...section, or the data dial or [-/+] buttons once the MEASURE parameter has been selected. As soon as you choose to completely clear all parts of the currently selected section and start recording from scratch if you change the number of the style and start recording from scratch if ...you can select a new time signature as required, press the PAGE [ Custom Style Use the BEAT LCD button to clear all sections and parts of measures. prompt will appear, since you will have been set as required: 2, 3, 4, or 5. prompt will appear, since you will have to ...
...section, or the data dial or [-/+] buttons once the MEASURE parameter has been selected. As soon as you choose to completely clear all parts of the currently selected section and start recording from scratch if you change the number of the style and start recording from scratch if ...you can select a new time signature as required, press the PAGE [ Custom Style Use the BEAT LCD button to clear all sections and parts of measures. prompt will appear, since you will have been set as required: 2, 3, 4, or 5. prompt will appear, since you will have to ...

Owner's Manual
Page 73
...Chord 1 C2 Chord 2 Pd Pad P1 Phrase 1 P2 Phrase 2 Recording part Part containing no box). no data Playback part OFF The R1 part is a preset style or a style loaded from the optional Style File disk) the "Clear part ?" For the R1 part, only [DRUMS] voices can be highlighted). voice can be set to ... the source style is initially selected and set to the record mode by box) or turned "OFF" (part number only - All other than R1 and R2 must be cleared before they can be used . Since parts other parts will initially be set to the record mode. CVP-98/96/600 71 71
...Chord 1 C2 Chord 2 Pd Pad P1 Phrase 1 P2 Phrase 2 Recording part Part containing no box). no data Playback part OFF The R1 part is a preset style or a style loaded from the optional Style File disk) the "Clear part ?" For the R1 part, only [DRUMS] voices can be highlighted). voice can be set to ... the source style is initially selected and set to the record mode by box) or turned "OFF" (part number only - All other than R1 and R2 must be cleared before they can be used . Since parts other parts will initially be set to the record mode. CVP-98/96/600 71 71

Owner's Manual
Page 74
...the entire style. the beats to the already recorded part. 32nd notes 3 16th note triplets 16th notes 3 8th note triplets 8th notes 3 quarter-note triplets quarter notes 72 CVP-98/96/600 72 It is pressed and highlighted, only the selected part will be aligned: • Quantization can also ...be started and stopped via the PART QUANTIZE function in the Custom Style mode - Press the SOLO button ...
...the entire style. the beats to the already recorded part. 32nd notes 3 16th note triplets 16th notes 3 8th note triplets 8th notes 3 quarter-note triplets quarter notes 72 CVP-98/96/600 72 It is pressed and highlighted, only the selected part will be aligned: • Quantization can also ...be started and stopped via the PART QUANTIZE function in the Custom Style mode - Press the SOLO button ...

Owner's Manual
Page 75
... of the display. The BACK SPACE LCD button can be able to enter the character at the character you want to 12 characters in length). CVP-98/96/600 73 73 You will not be up one space and delete a character. Use the CHAR LCD button to position the underline cursor at... complete, use the PAGE buttons to select CUSTOM STYLE display page 3, and press the STYLE NAME LCD button to go to actually quantize the current part. Custom Style Once the required quantize size has been selected press the START LCD button to the style naming page. Repeat this procedure until your...
... of the display. The BACK SPACE LCD button can be able to enter the character at the character you want to 12 characters in length). CVP-98/96/600 73 73 You will not be up one space and delete a character. Use the CHAR LCD button to position the underline cursor at... complete, use the PAGE buttons to select CUSTOM STYLE display page 3, and press the STYLE NAME LCD button to go to actually quantize the current part. Custom Style Once the required quantize size has been selected press the START LCD button to the style naming page. Repeat this procedure until your...

Owner's Manual
Page 76
...find useful when creating custom styles. If this happens press OK to return to recall the last-stored version of the currently selected section (all parts of the section are recalled). The "Store XXXXXXXX?" The existing style will appear next to abort. • The tempo setting at the ... style before turning the power off - Use the MEMORY No. s Recall Section ...This function makes it possible to the previous display. 74 CVP-98/96/600 74 Simply press the RECALL SECTION LCD button in the internal memory. EXIT DISPLAY HOLD • Custom style data is not retained in ...
...find useful when creating custom styles. If this happens press OK to return to recall the last-stored version of the currently selected section (all parts of the section are recalled). The "Store XXXXXXXX?" The existing style will appear next to abort. • The tempo setting at the ... style before turning the power off - Use the MEMORY No. s Recall Section ...This function makes it possible to the previous display. 74 CVP-98/96/600 74 Simply press the RECALL SECTION LCD button in the internal memory. EXIT DISPLAY HOLD • Custom style data is not retained in ...

Owner's Manual
Page 77
..., relative to a different type. confirmation prompt will appear. Use the SECTION parameter to select the section (or "ALL" sections), and the PART parameter to abort. When VOLUME is selected the SECTION parameter is fixed at "ALL" and the VALUE range is in CUSTOM STYLE display page ... • CHORUS 1 • CHORUS 2 • CHORUS 3 • CELESTE 1 • CELESTE 2 • CELESTE 3 • FLANGER 1 • FLANGER 2 • OFF CVP-98/96/600 75 75 The REVERB and EFFECT DEPTH ranges are displayed. • Effect type "OTHERS" may appear if the preset effect type is other than...
..., relative to a different type. confirmation prompt will appear. Use the SECTION parameter to select the section (or "ALL" sections), and the PART parameter to abort. When VOLUME is selected the SECTION parameter is fixed at "ALL" and the VALUE range is in CUSTOM STYLE display page ... • CHORUS 1 • CHORUS 2 • CHORUS 3 • CELESTE 1 • CELESTE 2 • CELESTE 3 • FLANGER 1 • FLANGER 2 • OFF CVP-98/96/600 75 75 The REVERB and EFFECT DEPTH ranges are displayed. • Effect type "OTHERS" may appear if the preset effect type is other than...

Owner's Manual
Page 80
...error displays may appear in approximate kilobytes) so as to set up the approximate standard which point you can simplify the current style (by clearing a part, etc.), or DELETE to go to perform a store operation. Press CANCEL to return to CUSTOM STYLE display page 1, at which style to delete ...is not enough memory to the "Delete style ?" In this case it will appear if the memory becomes full during recording or editing. 78 CVP-98/96/600 78 s Memory Full During Recording This alert message will be necessary to the total 300 KB memory space. s Insufficient Memory To Store This...
...error displays may appear in approximate kilobytes) so as to set up the approximate standard which point you can simplify the current style (by clearing a part, etc.), or DELETE to go to perform a store operation. Press CANCEL to return to CUSTOM STYLE display page 1, at which style to delete ...is not enough memory to the "Delete style ?" In this case it will appear if the memory becomes full during recording or editing. 78 CVP-98/96/600 78 s Memory Full During Recording This alert message will be necessary to the total 300 KB memory space. s Insufficient Memory To Store This...

