
Owner's Manual
Page 5
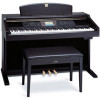
...manual are for instructional purposes only, and may appear somewhat different from the CVP-205, and in English. * The bitmap fonts used in which Yamaha owns copyrights or with respect to which it has license to as the CVP/Clavinova in this Owner's Manual. * The illustrations and LCD screens as...'T MAKE, DISTRIBUTE OR USE ILLEGAL COPIES. Thank you for future reference. Data List : Voice List, MIDI Data Format, etc. * The models CVP-205/205M/203 will be referred to use is provided. Also, a separate Data List is not permitted under relevant laws. Reference (page 53): This section ...
...manual are for instructional purposes only, and may appear somewhat different from the CVP-205, and in English. * The bitmap fonts used in which Yamaha owns copyrights or with respect to which it has license to as the CVP/Clavinova in this Owner's Manual. * The illustrations and LCD screens as...'T MAKE, DISTRIBUTE OR USE ILLEGAL COPIES. Thank you for future reference. Data List : Voice List, MIDI Data Format, etc. * The models CVP-205/205M/203 will be referred to use is provided. Also, a separate Data List is not permitted under relevant laws. Reference (page 53): This section ...
Owner's Manual
Page 11
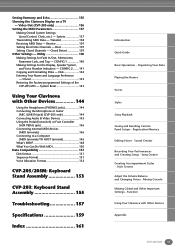
...You Can Do With MIDI 150 Data Compatibility 151 Disk format 151 Sequence Format 151 Voice Allocation Format 152 CVP-205/205M: Keyboard Stand Assembly 153 CVP-203: Keyboard Stand Assembly 155 Troubleshooting 157 Specifications 159 Index 161 Introduction Quick Guide Basic Operations - Receive...Making Settings for Fade In/Out, Metronome, Parameter Lock, and Tap - Owner 143 Restoring the Factory-programmed Settings of the CVP-205/203 - Video Out (CVP-205 only 136 Setting the MIDI Parameters 137 Making Overall System Settings (Local Control, Clock, etc.) - System 137 Transmitting MIDI...
...You Can Do With MIDI 150 Data Compatibility 151 Disk format 151 Sequence Format 151 Voice Allocation Format 152 CVP-205/205M: Keyboard Stand Assembly 153 CVP-203: Keyboard Stand Assembly 155 Troubleshooting 157 Specifications 159 Index 161 Introduction Quick Guide Basic Operations - Receive...Making Settings for Fade In/Out, Metronome, Parameter Lock, and Tap - Owner 143 Restoring the Factory-programmed Settings of the CVP-205/203 - Video Out (CVP-205 only 136 Setting the MIDI Parameters 137 Making Overall System Settings (Local Control, Clock, etc.) - System 137 Transmitting MIDI...
Owner's Manual
Page 13
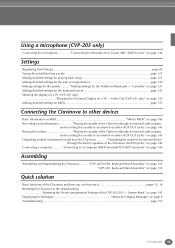
... 145 Outputting another instrument's sound from the Clavinova Outputting the sound of an external device through the built in speakers of the CVP-205/203 - Using a microphone (CVP-205 only) Connecting the microphone Connecting the Microphone or Guitar (MIC./LINE IN jack)" on page 144 Settings Registering Panel Setups...page 85...)" on page 145 Connecting a computer Connecting to a Computer (MIDI terminals/TO HOST terminals)" on page 146 Assembling Assembling and disassembling the Clavinova CVP-205/205M: Keyboard Stand Assembly" on page 153 "CVP-203: Keyboard Stand Assembly" on a TV -
... 145 Outputting another instrument's sound from the Clavinova Outputting the sound of an external device through the built in speakers of the CVP-205/203 - Using a microphone (CVP-205 only) Connecting the microphone Connecting the Microphone or Guitar (MIC./LINE IN jack)" on page 144 Settings Registering Panel Setups...page 85...)" on page 145 Connecting a computer Connecting to a Computer (MIDI terminals/TO HOST terminals)" on page 146 Assembling Assembling and disassembling the Clavinova CVP-205/205M: Keyboard Stand Assembly" on page 153 "CVP-203: Keyboard Stand Assembly" on a TV -

Owner's Manual
Page 153
... 4 x 20 mm tapping screws x5 4 x 14 mm thin screws x8 Cord holders x2 2 Attach the side panels to the pedal box. CVP-205/205M: Keyboard Stand Assembly CAUTION I Be careful not to confuse parts, and be sure to install all screws upon completing assembly of the main unit when...CAUTION • Fingers can cause damage. First attach one side panel, then attach the other than the position shown in any position other side panel. CVP-205/203 153 Have a Phillips-head (+) I Be sure to tighten up all parts in accordance with the sequence given below . 1 Open the package,...
... 4 x 20 mm tapping screws x5 4 x 14 mm thin screws x8 Cord holders x2 2 Attach the side panels to the pedal box. CVP-205/205M: Keyboard Stand Assembly CAUTION I Be careful not to confuse parts, and be sure to install all screws upon completing assembly of the main unit when...CAUTION • Fingers can cause damage. First attach one side panel, then attach the other than the position shown in any position other side panel. CVP-205/203 153 Have a Phillips-head (+) I Be sure to tighten up all parts in accordance with the sequence given below . 1 Open the package,...

Owner's Manual
Page 154
...operation. When moving the instrument after assembly, always hold the key cover or top portion. Top portion Key cover 240 220 110 127 154 CVP-205/203 I After completing the assembly, please check the following. • Are there any errors. • Is the Clavinova clear of doors ...; If the main unit creaks or is otherwise unsteady when you play on the keyboard, refer to the assembly diagrams and retighten all screws. CVP-205/205M: Keyboard Stand Assembly 6 Connect the speaker cord. 1 Before connecting the speaker cord, remove the vinyl tie attaching the speaker cord to the front...
...operation. When moving the instrument after assembly, always hold the key cover or top portion. Top portion Key cover 240 220 110 127 154 CVP-205/203 I After completing the assembly, please check the following. • Are there any errors. • Is the Clavinova clear of doors ...; If the main unit creaks or is otherwise unsteady when you play on the keyboard, refer to the assembly diagrams and retighten all screws. CVP-205/205M: Keyboard Stand Assembly 6 Connect the speaker cord. 1 Before connecting the speaker cord, remove the vinyl tie attaching the speaker cord to the front...

Owner's Manual
Page 161
... button 18, 41, 47 [BALANCE] button 18, 62 Bar Clear 116 Bar Copy 116 Basic Operations - Filter 108 CUT 43 CVP-203: Keyboard Stand Assembly 155 CVP-205/205M: Keyboard Stand Assembly 153 D Damper pedal 19, 59 Data Compatibility 151 [DATA ENTRY] dial 18, 47 Data Types in the ... 2 141 Connect the power cord 17 Connecting Audio & Video Devices 145 Connecting external MIDI devices 146 Connecting the Microphone or Guitar (CVP-205 only)........144 Connecting to a Computer 146 Controller 131 Converting into Kanji (Japanese language 46 Cool 56 COPY 44 Copying and Formatting Disks ...
... button 18, 41, 47 [BALANCE] button 18, 62 Bar Clear 116 Bar Copy 116 Basic Operations - Filter 108 CUT 43 CVP-203: Keyboard Stand Assembly 155 CVP-205/205M: Keyboard Stand Assembly 153 D Damper pedal 19, 59 Data Compatibility 151 [DATA ENTRY] dial 18, 47 Data Types in the ... 2 141 Connect the power cord 17 Connecting Audio & Video Devices 145 Connecting external MIDI devices 146 Connecting the Microphone or Guitar (CVP-205 only)........144 Connecting to a Computer 146 Controller 131 Converting into Kanji (Japanese language 46 Cool 56 COPY 44 Copying and Formatting Disks ...


