

User Guide
Page 8
...-Quality Problems 7-29 Solving Scan-Quality Problems 7-29 Maintenance 7-31 Adding Ink 7-32 Emptying the Waste Tray 7-36 Replacing the Maintenance Kit 7-39 Cleaning the Paper Release Blade 7-41 Cleaning the Maintenance Kit Wiper Blade 7-45 Cleaning the Outside of the System 7-47 Cleaning the Document Glass and Document Feeder 7-47 WorkCentre® C2424 Copier-Printer v
...-Quality Problems 7-29 Solving Scan-Quality Problems 7-29 Maintenance 7-31 Adding Ink 7-32 Emptying the Waste Tray 7-36 Replacing the Maintenance Kit 7-39 Cleaning the Paper Release Blade 7-41 Cleaning the Maintenance Kit Wiper Blade 7-45 Cleaning the Outside of the System 7-47 Cleaning the Document Glass and Document Feeder 7-47 WorkCentre® C2424 Copier-Printer v
User Guide
Page 11
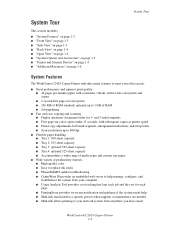
...of productivity features ■ High quality color ■ Easy to replace ink sticks ■ PhaserSMART online troubleshooting ■ CentreWare IS provides an embedded web server to help . ■ MaiLinX email notifies a specific person when supplies or maintenance are needed. ■ MaiLinX allows ...printing to 1 GB of RAM ■ Job pipelining ■ Fast and easy copying and scanning ■ Duplex automatic document feeder for each page. ■ PrintingScout provides on page 1-6 System Features The WorkCentre C2424 Copier...
...of productivity features ■ High quality color ■ Easy to replace ink sticks ■ PhaserSMART online troubleshooting ■ CentreWare IS provides an embedded web server to help . ■ MaiLinX email notifies a specific person when supplies or maintenance are needed. ■ MaiLinX allows ...printing to 1 GB of RAM ■ Job pipelining ■ Fast and easy copying and scanning ■ Duplex automatic document feeder for each page. ■ PrintingScout provides on page 1-6 System Features The WorkCentre C2424 Copier...

User Guide
Page 12
...) 2. Control panel 8. Document feeder access cover 9. Duplex automatic document feeder 10. Power switch 5. USB connection 7. Tray 2 4. Maintenance kit 2. Output tray 6. Waste tray 3. Tray 1 5. Power cord connection 4. Ethernet 10/100 Base-T connection 2424-081 WorkCentre® C2424 Copier-Printer 1-3 Exit cover 7. Tray 3 (optional) 3. Configuration card 8. Front cover release (product serial number is behind the...
...) 2. Control panel 8. Document feeder access cover 9. Duplex automatic document feeder 10. Power switch 5. USB connection 7. Tray 2 4. Maintenance kit 2. Output tray 6. Waste tray 3. Tray 1 5. Power cord connection 4. Ethernet 10/100 Base-T connection 2424-081 WorkCentre® C2424 Copier-Printer 1-3 Exit cover 7. Tray 3 (optional) 3. Configuration card 8. Front cover release (product serial number is behind the...

User Guide
Page 194
All Rights Reserved. 7-1 WorkCentre® C2424 Copier-Printer Troubleshooting This chapter includes: ■ "Automatic Diagnostic Tools" on page 7-2 ■ "Paper Jams" on page 7-4 ■ "Output Quality Problems" on page 7-26 ■ "Maintenance" on page 7-31 ■ "Moving and Repacking the System" on page 7-51 ■ "Web Links" on page 7-57 Copyright © 2005 Xerox Corporation.
All Rights Reserved. 7-1 WorkCentre® C2424 Copier-Printer Troubleshooting This chapter includes: ■ "Automatic Diagnostic Tools" on page 7-2 ■ "Paper Jams" on page 7-4 ■ "Output Quality Problems" on page 7-26 ■ "Maintenance" on page 7-31 ■ "Moving and Repacking the System" on page 7-51 ■ "Web Links" on page 7-57 Copyright © 2005 Xerox Corporation.
User Guide
Page 220
...Replace the maintenance kit. WorkCentre® C2424 Copier-Printer 7-27 In the Menu, select Information. Select Paper Tips Page, then press Enter. 1. b. Run the Remove Print Smears procedure: a. In the menu, select Information, then press the Enter button. see "Cleaning the Maintenance Kit Wiper... Blade" on page 45. Remove the orange maintenance kit. d. e. Close the side door. Select Information Pages, then press Enter. c. Select Print Quality Problems, then press the Enter button. The system will clean the ink from the rollers...
...Replace the maintenance kit. WorkCentre® C2424 Copier-Printer 7-27 In the Menu, select Information. Select Paper Tips Page, then press Enter. 1. b. Run the Remove Print Smears procedure: a. In the menu, select Information, then press the Enter button. see "Cleaning the Maintenance Kit Wiper... Blade" on page 45. Remove the orange maintenance kit. d. e. Close the side door. Select Information Pages, then press Enter. c. Select Print Quality Problems, then press the Enter button. The system will clean the ink from the rollers...

User Guide
Page 221
...Stripes. Close the exit cover and close the control panel. 5. Wipe the clear plastic wiper blade with a lint-free cloth. WorkCentre® C2424 Copier-Printer 7-28 On the control panel, press the System Setup button. In the menu, select Information, then press the Enter... more information, see "Cleaning the Maintenance Kit Wiper Blade" on page 45. 6. b. c. free cloth. Replace the maintenance kit. b. Lift the green guide. Clean the wiper blade in the Maintenance Kit: a. d. Close the side door. e. Predominate Light Stripes All four color bars are missing on the test...
...Stripes. Close the exit cover and close the control panel. 5. Wipe the clear plastic wiper blade with a lint-free cloth. WorkCentre® C2424 Copier-Printer 7-28 On the control panel, press the System Setup button. In the menu, select Information, then press the Enter... more information, see "Cleaning the Maintenance Kit Wiper Blade" on page 45. 6. b. c. free cloth. Replace the maintenance kit. b. Lift the green guide. Clean the wiper blade in the Maintenance Kit: a. d. Close the side door. e. Predominate Light Stripes All four color bars are missing on the test...
User Guide
Page 224
... the end of this guide. Your system needs little maintenance to www.xerox.com/office/c2424supplies. In the menu, select Information, then press the Enter button. 3. Select Supplies Info, then press the Enter button. 4. WorkCentre® C2424 Copier-Printer 7-31 Maintenance Maintenance This section includes: ■ "Adding Ink" on page 7-32 ■ "Emptying the Waste Tray" on...
... the end of this guide. Your system needs little maintenance to www.xerox.com/office/c2424supplies. In the menu, select Information, then press the Enter button. 3. Select Supplies Info, then press the Enter button. 4. WorkCentre® C2424 Copier-Printer 7-31 Maintenance Maintenance This section includes: ■ "Adding Ink" on page 7-32 ■ "Emptying the Waste Tray" on...

User Guide
Page 225
... ink by shape, not color. ■ To avoid ink jams, never insert broken ink sticks into the ink-loading bins. Caution Use of Xerox supplies not specified for this system. The Xerox Warranty, Service Agreements, and Total Satisfaction Guarantee do not cover damage, malfunction, or degradation of performance caused by Xerox for specific use of other than Genuine Xerox WorkCentre C2424 Solid Ink...
... ink by shape, not color. ■ To avoid ink jams, never insert broken ink sticks into the ink-loading bins. Caution Use of Xerox supplies not specified for this system. The Xerox Warranty, Service Agreements, and Total Satisfaction Guarantee do not cover damage, malfunction, or degradation of performance caused by Xerox for specific use of other than Genuine Xerox WorkCentre C2424 Solid Ink...

User Guide
Page 226
Follow these steps to load ink. 1. WorkCentre® C2424 Copier-Printer 7-33 Open the ink cover. 2424-012 2424-013 3. Lift the control panel. Maintenance 2. Determine which ink-loading bin appears low. Remove the ink stick from its packaging. A label above each bin indicates the color of ink in that bin. 4.
Follow these steps to load ink. 1. WorkCentre® C2424 Copier-Printer 7-33 Open the ink cover. 2424-012 2424-013 3. Lift the control panel. Maintenance 2. Determine which ink-loading bin appears low. Remove the ink stick from its packaging. A label above each bin indicates the color of ink in that bin. 4.

User Guide
Page 227
Do not force the ink stick into the opening of the appropriate ink-loading bin. Close the ink cover. 2424-014 2424-015 WorkCentre® C2424 Copier-Printer 7-34 Maintenance 5. Place the ink stick into the ink-loading bin. 1 2 3 4 6. Each ink stick is uniquely shaped to fit into the correct ink-loading bin.
Do not force the ink stick into the opening of the appropriate ink-loading bin. Close the ink cover. 2424-014 2424-015 WorkCentre® C2424 Copier-Printer 7-34 Maintenance 5. Place the ink stick into the ink-loading bin. 1 2 3 4 6. Each ink stick is uniquely shaped to fit into the correct ink-loading bin.

User Guide
Page 228
Instructions are included on the package. 7. Close the control panel. Maintenance 2424-016 To order ink, contact your local reseller or visit the Xerox web site at www.xerox.com/office/c2424supplies. WorkCentre® C2424 Copier-Printer 7-35
Instructions are included on the package. 7. Close the control panel. Maintenance 2424-016 To order ink, contact your local reseller or visit the Xerox web site at www.xerox.com/office/c2424supplies. WorkCentre® C2424 Copier-Printer 7-35

User Guide
Page 229
Videos are available with instructions for emptying the waste tray. Open the side door. 2424-035 WorkCentre® C2424 Copier-Printer 7-36 Caution The system's interior may be hot. Do not touch the hot surfaces! 1. Videos are located on the User Documentation CD-ROM and at www.xerox.com/office/ c2424support. Maintenance Emptying the Waste Tray Empty the green waste tray (labeled B) when the control panel displays a message stating that the waste tray is full.
Videos are available with instructions for emptying the waste tray. Open the side door. 2424-035 WorkCentre® C2424 Copier-Printer 7-36 Caution The system's interior may be hot. Do not touch the hot surfaces! 1. Videos are located on the User Documentation CD-ROM and at www.xerox.com/office/ c2424support. Maintenance Emptying the Waste Tray Empty the green waste tray (labeled B) when the control panel displays a message stating that the waste tray is full.

User Guide
Page 230
handle it carefully! Waste ink can be hot; Pull the green waste tray (labeled B) completely out of the system. Caution The waste tray may be discarded as normal office waste. 2424-037 WorkCentre® C2424 Copier-Printer 7-37 Empty the waste tray into a waste container. 2. Maintenance 2424-036 3.
handle it carefully! Waste ink can be hot; Pull the green waste tray (labeled B) completely out of the system. Caution The waste tray may be discarded as normal office waste. 2424-037 WorkCentre® C2424 Copier-Printer 7-37 Empty the waste tray into a waste container. 2. Maintenance 2424-036 3.

User Guide
Page 231
Close the side door. 2424-039 Caution Do not attempt to receive a Empty Waste Tray message on the control panel. 5. This damage is not covered under the printer warranty. WorkCentre® C2424 Copier-Printer 7-38 Maintenance 2424-038 Note The waste tray must be out of the system for more than 5 seconds or you will continue to reuse the waste ink in the printer; it completely into the system. Insert the waste tray and push it may damage the printer. 4.
Close the side door. 2424-039 Caution Do not attempt to receive a Empty Waste Tray message on the control panel. 5. This damage is not covered under the printer warranty. WorkCentre® C2424 Copier-Printer 7-38 Maintenance 2424-038 Note The waste tray must be out of the system for more than 5 seconds or you will continue to reuse the waste ink in the printer; it completely into the system. Insert the waste tray and push it may damage the printer. 4.

User Guide
Page 232
... with instructions for replacing the maintenance kit. Open the side door. 2424-035 WorkCentre® C2424 Copier-Printer 7-39 To order a new maintenance kit, contact your local reseller or visit the Xerox web site at www.xerox.com/office/ c2424support. Maintenance Replacing the Maintenance Kit The orange maintenance kit (labeled A) contains a maintenance roller that the maintenance kit is nearing the end...
... with instructions for replacing the maintenance kit. Open the side door. 2424-035 WorkCentre® C2424 Copier-Printer 7-39 To order a new maintenance kit, contact your local reseller or visit the Xerox web site at www.xerox.com/office/ c2424support. Maintenance Replacing the Maintenance Kit The orange maintenance kit (labeled A) contains a maintenance roller that the maintenance kit is nearing the end...

User Guide
Page 233
Maintenance 2. Insert a new maintenance kit. 2424-033 2424-034 WorkCentre® C2424 Copier-Printer 7-40 Pull the orange maintenance kit (labeled A) completely out of the system. 3.
Maintenance 2. Insert a new maintenance kit. 2424-033 2424-034 WorkCentre® C2424 Copier-Printer 7-40 Pull the orange maintenance kit (labeled A) completely out of the system. 3.

User Guide
Page 234
Lift the control panel. 2424-189 WorkCentre® C2424 Copier-Printer 7-41 Close the side door. Maintenance 2424-039 Cleaning the Paper Release Blade 1. 4.
Lift the control panel. 2424-189 WorkCentre® C2424 Copier-Printer 7-41 Close the side door. Maintenance 2424-039 Cleaning the Paper Release Blade 1. 4.

User Guide
Page 235
Remove paper from the output tray. Open the exit cover. 2424-018 2424-019 WorkCentre® C2424 Copier-Printer 7-42 Maintenance 3. 2.
Remove paper from the output tray. Open the exit cover. 2424-018 2424-019 WorkCentre® C2424 Copier-Printer 7-42 Maintenance 3. 2.

User Guide
Page 236
Clean the white plastic paper release blade on the green paper guide by wiping it with a pre-soaked alcohol cloth (using 90 percent isopropyl alcohol). 2424-156 6. Maintenance 8400-042 5. Tilt up the green paper guide toward the front of the system. 4. After the paper release blade is clean, put the green paper guide back in its original position. 2424-159 WorkCentre® C2424 Copier-Printer 7-43
Clean the white plastic paper release blade on the green paper guide by wiping it with a pre-soaked alcohol cloth (using 90 percent isopropyl alcohol). 2424-156 6. Maintenance 8400-042 5. Tilt up the green paper guide toward the front of the system. 4. After the paper release blade is clean, put the green paper guide back in its original position. 2424-159 WorkCentre® C2424 Copier-Printer 7-43

User Guide
Page 238
Use a lint-free cloth to the roller. 2424-160 WorkCentre® C2424 Copier-Printer 7-45 Open the side door. Maintenance 2424-035 2. Pull the orange maintenance kit (labeled A) completely out of the flexible plastic wiper blade located next to clean the top and upper edges of the system. 2424-033 3. Cleaning the Maintenance Kit Wiper Blade The maintenance kit contains a wiper blade that removes excess ink. 1.
Use a lint-free cloth to the roller. 2424-160 WorkCentre® C2424 Copier-Printer 7-45 Open the side door. Maintenance 2424-035 2. Pull the orange maintenance kit (labeled A) completely out of the flexible plastic wiper blade located next to clean the top and upper edges of the system. 2424-033 3. Cleaning the Maintenance Kit Wiper Blade The maintenance kit contains a wiper blade that removes excess ink. 1.


