
User Guide
Page 5
... the Print Job Interrupt Option 4-20 Using a Color Copy Password 4-20 5 Scanning Overview 5-2 Installing the Scan Driver 5-2 Basic Scanning 5-3 Scanning Originals at the Printer 5-4 Using Walk-Up Scanning 5-6 Retrieving Scanned Images 5-7 Using CentreWare IS to Retrieve Images 5-8 Using the Xerox Scan Utility 5-9 Importing Images into an Application 5-12 Scanning Options 5-15 Setting the Scan Resolution 5-15 Automatically Suppressing Background Variations 5-16 Setting...
... the Print Job Interrupt Option 4-20 Using a Color Copy Password 4-20 5 Scanning Overview 5-2 Installing the Scan Driver 5-2 Basic Scanning 5-3 Scanning Originals at the Printer 5-4 Using Walk-Up Scanning 5-6 Retrieving Scanned Images 5-7 Using CentreWare IS to Retrieve Images 5-8 Using the Xerox Scan Utility 5-9 Importing Images into an Application 5-12 Scanning Options 5-15 Setting the Scan Resolution 5-15 Automatically Suppressing Background Variations 5-16 Setting...
User Guide
Page 6
... 5-27 Deleting Image Files from the System 5-27 Deleting Image Files from the Xerox Scan Utility 5-29 Adding a Password for Scanning to Your Computer 5-29 Creating a Private Folder 5-30 Controlling Scanning Policies 5-30 Calibrating the Scanner 5-31 Starting the Calibration Procedure 5-31 Calibrating the Scanner at the Document Glass 5-32 Calibrating the Scanner at ... Settings 6-24 Solving Fax Problems 6-25 Configuring the Modem 6-25 Printing the Protocol Monitoring Report 6-25 Resetting Fax Options to the Factory Default 6-26 Phaser® 8560MFP/8860MFP Multifunction Printer iv
... 5-27 Deleting Image Files from the System 5-27 Deleting Image Files from the Xerox Scan Utility 5-29 Adding a Password for Scanning to Your Computer 5-29 Creating a Private Folder 5-30 Controlling Scanning Policies 5-30 Calibrating the Scanner 5-31 Starting the Calibration Procedure 5-31 Calibrating the Scanner at the Document Glass 5-32 Calibrating the Scanner at ... Settings 6-24 Solving Fax Problems 6-25 Configuring the Modem 6-25 Printing the Protocol Monitoring Report 6-25 Resetting Fax Options to the Factory Default 6-26 Phaser® 8560MFP/8860MFP Multifunction Printer iv

User Guide
Page 122
... that identifies your computer's name: ■ Windows users: Click Start, click Control Panel, and then click System. Select a Scanning Originals to Your User Name To scan originals to Your User Name Your user name is the name you do not have a company-assigned user name, your user name... is the name that may contain letters, numbers, or a combination of the screen. Press the Scan button, select Scan To, and then press the OK button. 2. The computer's name is displayed in the Full computer name field. ■ Macintosh users: Open...
... that identifies your computer's name: ■ Windows users: Click Start, click Control Panel, and then click System. Select a Scanning Originals to Your User Name To scan originals to Your User Name Your user name is the name you do not have a company-assigned user name, your user name... is the name that may contain letters, numbers, or a combination of the screen. Press the Scan button, select Scan To, and then press the OK button. 2. The computer's name is displayed in the Full computer name field. ■ Macintosh users: Open...

User Guide
Page 123
... displayed. g. See also: Including Scanned Images in the Walk-Up Scanning dialog box to scan the document at the system: a. c. Click the Start Walk-Up Scanning button. 4. e. If desired, change the scan options on the Phaser 8560MFP/8860MFP printer: 1. Select your computer: ■ Windows: Right-click the Xerox Scan Utility icon on page 5-20 Phaser® 8560MFP/8860MFP Multifunction Printer 5-6 Press the...
... displayed. g. See also: Including Scanned Images in the Walk-Up Scanning dialog box to scan the document at the system: a. c. Click the Start Walk-Up Scanning button. 4. e. If desired, change the scan options on the Phaser 8560MFP/8860MFP printer: 1. Select your computer: ■ Windows: Right-click the Xerox Scan Utility icon on page 5-20 Phaser® 8560MFP/8860MFP Multifunction Printer 5-6 Press the...

User Guide
Page 124
...Phaser® 8560MFP/8860MFP Multifunction Printer 5-7 Note: Using a method other than CentreWare IS requires installation of the scan driver from the Software and Documentation CD-ROM. Method Using CentreWare IS (page 5-8) Windows Macintosh Vista, 2000, XP, Server OS X, Version 2003 10.3 or Higher Unix Using the Xerox Scan Utility... retrieve images depends on how the system is connected to Retrieve Images on page 5-8 ■ Using the Xerox Scan Utility on page 5-9 ■ Importing Images into another application (page 5-12) = Available with a TCP/IP network connection. = Available ...
...Phaser® 8560MFP/8860MFP Multifunction Printer 5-7 Note: Using a method other than CentreWare IS requires installation of the scan driver from the Software and Documentation CD-ROM. Method Using CentreWare IS (page 5-8) Windows Macintosh Vista, 2000, XP, Server OS X, Version 2003 10.3 or Higher Unix Using the Xerox Scan Utility... retrieve images depends on how the system is connected to Retrieve Images on page 5-8 ■ Using the Xerox Scan Utility on page 5-9 ■ Importing Images into another application (page 5-12) = Available with a TCP/IP network connection. = Available ...

User Guide
Page 126
... that has been saved with specific settings, or you can use from a Phaser 8560MFP/8860MFP printer. The Xerox Scan Utility adds the base name to the email message, and then send the email. Phaser® 8560MFP/8860MFP Multifunction Printer 5-9 Using an Email Profile To send scanned images as attachments in email messages. If the icon does not appear...
... that has been saved with specific settings, or you can use from a Phaser 8560MFP/8860MFP printer. The Xerox Scan Utility adds the base name to the email message, and then send the email. Phaser® 8560MFP/8860MFP Multifunction Printer 5-9 Using an Email Profile To send scanned images as attachments in email messages. If the icon does not appear...

User Guide
Page 127
... name. 5. Enter the appropriate email information in the Base Attachment Name field. See also: Managing Scan Templates on page 5-20 Managing Folder and Email Profiles on page 5-24 Phaser® 8560MFP/8860MFP Multifunction Printer 5-10 Retrieving Scanned Images 3. The Xerox Scan Utility adds the base name to the email message, and then send the email. Select one...
... name. 5. Enter the appropriate email information in the Base Attachment Name field. See also: Managing Scan Templates on page 5-20 Managing Folder and Email Profiles on page 5-24 Phaser® 8560MFP/8860MFP Multifunction Printer 5-10 Retrieving Scanned Images 3. The Xerox Scan Utility adds the base name to the email message, and then send the email. Select one...

User Guide
Page 128
..., select Xerox Office Printing, select Scanning, and then select Xerox Scan Utility. ■ Macintosh: Click the Xerox Scan Utility icon in the dock. 2. See also: Managing Scan Templates on page 5-20 Managing Folder and Email Profiles on the taskbar, and then select Xerox Scan Utility. Access the Xerox Scan Utility on your computer: ■ Windows: Right-click the Xerox Scan Utility icon on page 5-24 Phaser® 8560MFP/8860MFP Multifunction...
..., select Xerox Office Printing, select Scanning, and then select Xerox Scan Utility. ■ Macintosh: Click the Xerox Scan Utility icon in the dock. 2. See also: Managing Scan Templates on page 5-20 Managing Folder and Email Profiles on the taskbar, and then select Xerox Scan Utility. Access the Xerox Scan Utility on your computer: ■ Windows: Right-click the Xerox Scan Utility icon on page 5-24 Phaser® 8560MFP/8860MFP Multifunction...

User Guide
Page 129
...to your computer from a Phaser 8560MFP/8860MFP printer into Windows or Macintosh applications on your mouse over the thumbnail, a pop-up message displays information including the resolution and size of the images in the folder. Retrieving Scanned Images Importing Images into an... Application This section includes: ■ Importing Scanned Images into a Windows Application (TWAIN) on page 5-12 ■ Using the WIA Image Manager in a Windows Application on page 5-13 ■ Using the Xerox Scan Utility in a document:...
...to your computer from a Phaser 8560MFP/8860MFP printer into Windows or Macintosh applications on your mouse over the thumbnail, a pop-up message displays information including the resolution and size of the images in the folder. Retrieving Scanned Images Importing Images into an... Application This section includes: ■ Importing Scanned Images into a Windows Application (TWAIN) on page 5-12 ■ Using the WIA Image Manager in a Windows Application on page 5-13 ■ Using the Xerox Scan Utility in a document:...

User Guide
Page 131
Retrieving Scanned Images Using the Xerox Scan Utility in a document: a. Select Insert. d. Click the Import button. Open the file in a folder, click the Select All check box. 4. For example, if you selected, click ... one or more images to place the image. 2. Select one image, hold down the Command button on the Xerox Scan Utility display thumbnails of the images. c. The Scan to Email and Copy to acquire the image. b. Phaser® 8560MFP/8860MFP Multifunction Printer 5-14 Select the scanner, and then click the Acquire button. Select the application's menu...
Retrieving Scanned Images Using the Xerox Scan Utility in a document: a. Select Insert. d. Click the Import button. Open the file in a folder, click the Select All check box. 4. For example, if you selected, click ... one or more images to place the image. 2. Select one image, hold down the Command button on the Xerox Scan Utility display thumbnails of the images. c. The Scan to Email and Copy to acquire the image. b. Phaser® 8560MFP/8860MFP Multifunction Printer 5-14 Select the scanner, and then click the Acquire button. Select the application's menu...

User Guide
Page 138
...the Scan to Email or Copy to Folder tabs. Phaser® 8560MFP/8860MFP Multifunction Printer 5-21 If the icon does not appear in the taskbar, click Start, select Programs, select Xerox Office Printing, select Scanning, and then select Xerox Scan Utility. ■ Macintosh: Click the Xerox Scan Utility icon ...the appropriate folder or email profile settings to Scan. 3. Access the Xerox Scan Utility on the taskbar, and then select Xerox Scan Utility. Select the Scan Settings tab, and then select the settings you want to use with the template: Color or Black and White, Original Size, ...
...the Scan to Email or Copy to Folder tabs. Phaser® 8560MFP/8860MFP Multifunction Printer 5-21 If the icon does not appear in the taskbar, click Start, select Programs, select Xerox Office Printing, select Scanning, and then select Xerox Scan Utility. ■ Macintosh: Click the Xerox Scan Utility icon ...the appropriate folder or email profile settings to Scan. 3. Access the Xerox Scan Utility on the taskbar, and then select Xerox Scan Utility. Select the Scan Settings tab, and then select the settings you want to use with the template: Color or Black and White, Original Size, ...

User Guide
Page 139
...to send the scanned images automatically to save the file in Xerox Scan Utility option is automatically checked. Phaser® 8560MFP/8860MFP Multifunction Printer 5-22 The Xerox Scan Utility adds the base file name to the front of the scanned images to remain in Xerox Scan Utility option checked.... template with the template: Color or Black and White, Original Size, Resolution, Original Type, File Format, and Sides to Scan. 3. Managing Scan Templates Creating a Template to Scan Images Directly to a Folder To create a template that places scanned images in the following fields...
...to send the scanned images automatically to save the file in Xerox Scan Utility option is automatically checked. Phaser® 8560MFP/8860MFP Multifunction Printer 5-22 The Xerox Scan Utility adds the base file name to the front of the scanned images to remain in Xerox Scan Utility option checked.... template with the template: Color or Black and White, Original Size, Resolution, Original Type, File Format, and Sides to Scan. 3. Managing Scan Templates Creating a Template to Scan Images Directly to a Folder To create a template that places scanned images in the following fields...

User Guide
Page 140
... the Xerox Scan Utility on your computer: ■ Windows: Right-click the Xerox Scan Utility icon on the taskbar, and then select Xerox Scan Utility. Click the Delete button. 5. Phaser® 8560MFP/8860MFP Multifunction Printer 5-23 If the icon does not appear in the taskbar, click Start, select Programs, select Xerox Office Printing, select Scanning, and then select Xerox Scan Utility. ■ Macintosh: Click the Xerox Scan Utility icon...
... the Xerox Scan Utility on your computer: ■ Windows: Right-click the Xerox Scan Utility icon on the taskbar, and then select Xerox Scan Utility. Click the Delete button. 5. Phaser® 8560MFP/8860MFP Multifunction Printer 5-23 If the icon does not appear in the taskbar, click Start, select Programs, select Xerox Office Printing, select Scanning, and then select Xerox Scan Utility. ■ Macintosh: Click the Xerox Scan Utility icon...

User Guide
Page 141
Phaser® 8560MFP/8860MFP Multifunction Printer 5-24 Managing Folder and Email Profiles Managing Folder and Email Profiles This section includes: ■ Creating or Editing Email Profiles on page 5-...; Creating or Editing Folder Profiles on page 5-26 ■ Deleting Folder Profiles on page 5-26 With the Xerox Scan Utility, you can create profiles to be reused when sending scanned images as email attachments or when copying scanned images to specific folders. Profiles eliminate the need for re-entering the same email or folder destination...
Phaser® 8560MFP/8860MFP Multifunction Printer 5-24 Managing Folder and Email Profiles Managing Folder and Email Profiles This section includes: ■ Creating or Editing Email Profiles on page 5-...; Creating or Editing Folder Profiles on page 5-26 ■ Deleting Folder Profiles on page 5-26 With the Xerox Scan Utility, you can create profiles to be reused when sending scanned images as email attachments or when copying scanned images to specific folders. Profiles eliminate the need for re-entering the same email or folder destination...

User Guide
Page 142
... list. 4. When prompted, confirm that you want to Email tab. 3. Phaser® 8560MFP/8860MFP Multifunction Printer 5-25 If the icon does not appear in the taskbar, click Start, select Programs, select Xerox Office Printing, select Scanning, and then select Xerox Scan Utility. ■ Macintosh: Click the Xerox Scan Utility icon in the Base Attachment Name field. 5. Click the Delete button...
... list. 4. When prompted, confirm that you want to Email tab. 3. Phaser® 8560MFP/8860MFP Multifunction Printer 5-25 If the icon does not appear in the taskbar, click Start, select Programs, select Xerox Office Printing, select Scanning, and then select Xerox Scan Utility. ■ Macintosh: Click the Xerox Scan Utility icon in the Base Attachment Name field. 5. Click the Delete button...

User Guide
Page 143
...the list displayed in the Folder Profiles drop-down list. 4. Access the Xerox Scan Utility on your computer: ■ Windows: Right-click the Xerox Scan Utility icon on the taskbar, and then select Xerox Scan Utility. Select the Copy to Folder tab. 3. Click the Save button to locate..., select Programs, select Xerox Office Printing, select Scanning, and then select Xerox Scan Utility. ■ Macintosh: Click the Xerox Scan Utility icon in the Save to Folder field, or click the Browse button to save the file in the dock. 2. Phaser® 8560MFP/8860MFP Multifunction Printer 5-26...
...the list displayed in the Folder Profiles drop-down list. 4. Access the Xerox Scan Utility on your computer: ■ Windows: Right-click the Xerox Scan Utility icon on the taskbar, and then select Xerox Scan Utility. Select the Copy to Folder tab. 3. Click the Save button to locate..., select Programs, select Xerox Office Printing, select Scanning, and then select Xerox Scan Utility. ■ Macintosh: Click the Xerox Scan Utility icon in the Save to Folder field, or click the Browse button to save the file in the dock. 2. Phaser® 8560MFP/8860MFP Multifunction Printer 5-26...
User Guide
Page 144
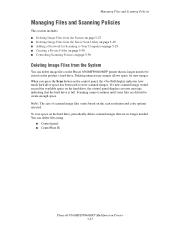
...Scan button on the scan resolution and color options selected. Scanning cannot continue until some files are no longer need to create enough space. Managing Files and Scanning Policies Managing Files and Scanning Policies This section includes: ■ Deleting Image Files from the System on page 5-27 ■ Deleting Image Files from the Xerox Scan Utility...You can delete files using: ■ Control panel ■ CentreWare IS Phaser® 8560MFP/8860MFP Multifunction Printer 5-27 Note: The size of scanned image files varies based on the control panel, the Full display indicates how ...
...Scan button on the scan resolution and color options selected. Scanning cannot continue until some files are no longer need to create enough space. Managing Files and Scanning Policies Managing Files and Scanning Policies This section includes: ■ Deleting Image Files from the System on page 5-27 ■ Deleting Image Files from the Xerox Scan Utility...You can delete files using: ■ Control panel ■ CentreWare IS Phaser® 8560MFP/8860MFP Multifunction Printer 5-27 Note: The size of scanned image files varies based on the control panel, the Full display indicates how ...

User Guide
Page 146
... or Copy to exit the Xerox Scan Utility. Select the Require password for Scanning to Your Computer To require a password when scanning to your computer: ■ Windows: Right-click the Xerox Scan Utility icon on the Xerox Scan Utility to specify a numeric, four-digit password. To add a password using the Xerox Scan Utility: 1. Select the Security Settings tab. 3. Phaser® 8560MFP/8860MFP Multifunction Printer 5-29 Select...
... or Copy to exit the Xerox Scan Utility. Select the Require password for Scanning to Your Computer To require a password when scanning to your computer: ■ Windows: Right-click the Xerox Scan Utility icon on the Xerox Scan Utility to specify a numeric, four-digit password. To add a password using the Xerox Scan Utility: 1. Select the Security Settings tab. 3. Phaser® 8560MFP/8860MFP Multifunction Printer 5-29 Select...

User Guide
Page 272
... 3-37 printing from Tray 1, 3-38 error and warning messages, 9-27 Ethernet connection, 2-3 Euroscale color correction, 7-4 exit cover paper jam, 9-2 exit path paper jam, 9-8 F Fast Color print-quality mode, 7-2 fast copy mode, 4-6 fax alerts, 9-28 fax number, 6-12 inserting...color, 6-15 using the send list, 6-12 Faxing Guide, 6-2 features printer configurations, 1-7 standard, 1-6 folder Copy to Folder tab, 5-21, 5-22 creating a private scan folder, 5-30 My Scanned Images, 5-7 private, 5-7 public, 5-7 selecting settings for scanned images, 5-11 Xerox Scan Utility, 5-21, 5-22 Phaser® 8560MFP...
... 3-37 printing from Tray 1, 3-38 error and warning messages, 9-27 Ethernet connection, 2-3 Euroscale color correction, 7-4 exit cover paper jam, 9-2 exit path paper jam, 9-8 F Fast Color print-quality mode, 7-2 fast copy mode, 4-6 fax alerts, 9-28 fax number, 6-12 inserting...color, 6-15 using the send list, 6-12 Faxing Guide, 6-2 features printer configurations, 1-7 standard, 1-6 folder Copy to Folder tab, 5-21, 5-22 creating a private scan folder, 5-30 My Scanned Images, 5-7 private, 5-7 public, 5-7 selecting settings for scanned images, 5-11 Xerox Scan Utility, 5-21, 5-22 Phaser® 8560MFP...

User Guide
Page 273
...illegal copying, B-1 illegal faxing, C-1 images adjusting, 4-8 adjusting color balance, 4-11 adjusting placement, 4-13 adjusting scan sensitivity, 4-10 adjusting the contrast, 4-10 attaching to email ...scanned images, 5-7 retrieving scanned images with CentreWare IS, 5-8 retrieving with the Xerox Scan Utility, 5-9 scanning 1-sided or 2-sided originals, 5-17 selecting preview option when creating a scan template, 5-21 selecting the send image to folder option when creating a scan template, 5-22 setting color or black and white, 5-16 shifting placement on copy pages, 4-15 Phaser® 8560MFP...
...illegal copying, B-1 illegal faxing, C-1 images adjusting, 4-8 adjusting color balance, 4-11 adjusting placement, 4-13 adjusting scan sensitivity, 4-10 adjusting the contrast, 4-10 attaching to email ...scanned images, 5-7 retrieving scanned images with CentreWare IS, 5-8 retrieving with the Xerox Scan Utility, 5-9 scanning 1-sided or 2-sided originals, 5-17 selecting preview option when creating a scan template, 5-21 selecting the send image to folder option when creating a scan template, 5-22 setting color or black and white, 5-16 shifting placement on copy pages, 4-15 Phaser® 8560MFP...


