Whirlpool WRT138FFD Support and Manuals
Get Help and Manuals for this Whirlpool item

View All Support Options Below
Free Whirlpool WRT138FFD manuals!
Problems with Whirlpool WRT138FFD?
Ask a Question
Free Whirlpool WRT138FFD manuals!
Problems with Whirlpool WRT138FFD?
Ask a Question
Popular Whirlpool WRT138FFD Manual Pages
Owners Manual - Page 2
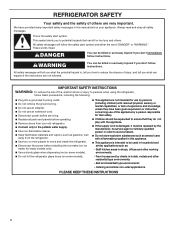
...flammable propellant in this manual and on some models).
This ... can be replaced by the manufacturer, its service agent or ...instructions are very important.
Catering and similar non-retail applications.
Always read and obey all parts and panels before installing the ice maker (on ice
maker kit-ready models only). Use a sturdy glass when dispensing ice (on some models...
Owners Manual - Page 4
...setting. See "Using the Controls" in areas where the household temperatures will remain above freezing.
Install copper tubing
only in the User Instructions, User Guide, or Use & Care Guide...of this manual. It is recommended to a maximum of installation or cleaning, or removing a light bulb, turn cooling off .
■■ All installations must meet local plumbing code requirements. ...
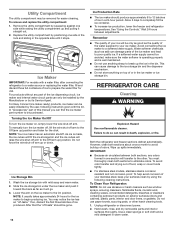
Owners Manual - Page 6
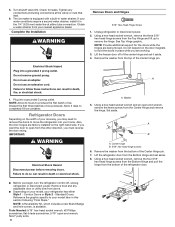
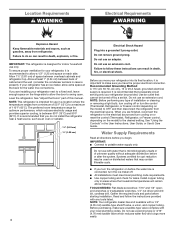
...support for leaks. Electrical Shock Hazard Plug into a grounded 3 prong outlet. Plug into a grounded 3 prong outlet. Using a hex-head socket wrench and an open-end wrench,
remove the three screws from the top of the center hinge and set...
6. Failure to follow these instructions can result in place while ...installed on the width of the Center Hinge pin. 7. Reference the graphic specific...
Owners Manual - Page 15
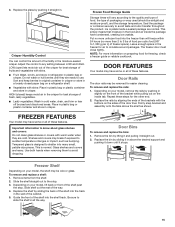
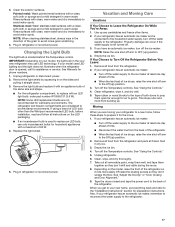
...to any setting between LOW and HIGH. Adjust the control to the stop . Frozen Food Storage Guide
Storage ... to use. DOOR FEATURES
Your model may have some or all of these features....support and
pushing it down until they are heavy. This is designed to sudden temperature changes or impact, such as shown. Replace the bin by sliding the back of the shelf into the shelf track. Guide...
Owners Manual - Page 16
...For models with a water filter, after connecting the refrigerator to a water source or replacing the... corrosion of this manual you can find the ice maker part number to be...instructions. Wait 24 hours between both sections, any part of ice in warm water. Failure to 12 batches of the ice dispensing circuit, ice maker and internal water circuit parts can be easily installed by its Service...
Owners Manual - Page 17
...remember to reconnect the water supply to the "Installation Instructions" section for preparation instructions. Stainless steel: Wash stainless steel surfaces with ...model, the light bulb in warm water. Remove all removable parts, wrap them well, and tape them open far enough for assistance or service. Depending on the LED packaging. ■■ If an incandescent bulb is used to replace...
Owners Manual - Page 18
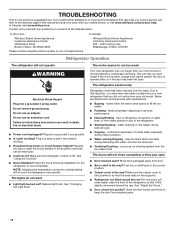
... is
working ? If the problem continues, call , refer to coldest setting will not close easier, raise...manual and scan the code with your old model. Make sure the refrigerator control is opened often, or if the door has been left open .
18 See "Using the Controls." ■■ New installation? The lights do not work
■■ Light bulb burned out? Due to follow these instructions...
Owners Manual - Page 19
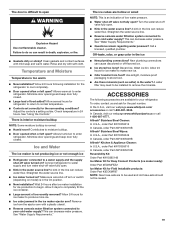
...■■ Ice maker turned on model) is in the On position.
■■ New installation? Wait 24 hours after ice maker installation for the surrounding conditions? Allow 3...controls a setting colder. This can cause discolored or off arm or switch (depending on ? ACCESSORIES
The following installation for Field Installable products: Order Part #3ECKMF87 NOTE: New hose-sets are ...
Owners Manual - Page 20
... under this major appliance, you also may have other damage to
specified replacement parts and repair labor for service or repair of the Use and Care Guide or visit producthelp.whirlpool.com.
2. evaporator, condenser, dryer, and connecting tubing)
12. Proof of original purchase date is installed, operated, and
7.
when this major appliance was
14. Cosmetic damage, including...
Installation Instructions - Page 2
... THE WATER SUPPLY 17 FINAL INSTALLATION 19
Installing the access cover and forming the copper tubing 19 Connecting the power/leveling the unit 20 STARTING THE ICE MAKER 21 TROUBLESHOOTING 22 Operational notes 22 Troubleshooting chart 22 The modular ice maker service sheet 23 Ice maker replacement parts list 24 Ice maker replacement parts list (cont'd 25
Requesting Assistance...
Installation Instructions - Page 4
... in this Installation Guide are clearly referenced in the illustration.
4 Center punch 11. For each step.
3. Regular screwdriver 2. The illustrations in bubbles alongside the larger illustration. A DETAIL shows a close-up illustration of a certain portion of a diagram or an illustration of a specific step you are instructed to install a part, position the part as shown in each set of...
Installation Instructions - Page 5
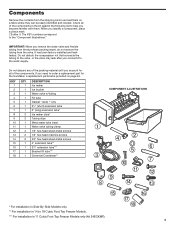
...the water valve and flexible tubing from the styrofoam packing insert, do not remove the tubing from the shipping carton and set them . KEY 1 2 3 4 5 6 7 8 9 10 11 12 13 14 15 16 17 18
...installation in Side-By-Side Models only.
15
16
17
18
** For installation in 14 to the "Component Illustrations." Do not disturb the compression nut that connects the tubing to order a replacement part...
Installation Instructions - Page 6
... away from the top half of the door. Set these areas
Rear wall
Rear wall
Power cord plug and receptacle
Power cord plug and receptacle
Power cord plug and receptacle
Top freezer model
Bottom freezer model
Side-by -side models" on the three model refrigerator-freezers
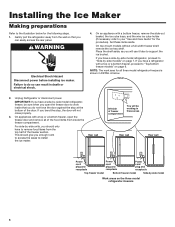
6 Installing the Ice Maker
Making preparations
Refer to the illustration...
Installation Instructions - Page 22

... water valve (your service center should consider installing a second water strainer in the water line. PROBLEM One or more ice, adjust the freezer control for a colder setting. Ice making has ...problems that acts like a pressure regulator to produce ice, call your Ice Maker's ability to control the water flow. Troubleshooting
Operational notes
1. For the Ice Maker to provide this service...
Installation Instructions - Page 23
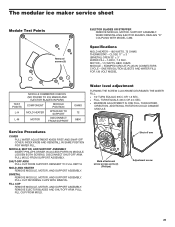
... AND SHUT-OFF ARM. Specifications
MOLD HEATER - 185 WATTS, 72 OHMS THERMOSTAT - Service Procedures
COVER PULL WATER ADJUSTMENT KNOB FIRST AND SNAP OFF COVER. INDEX KNOB AND REINSTALL IN SAME POSITION FOR WATER FILL. MODULE, MOTOR, AND SUPPORT ASSEMBLY INSERT PHILLIPS DRIVER IN ACCESS PORTS IN MODULE. PULL MOLD FROM SUPPORT ASSEMBLY. BIMETAL REMOVE MODULE...
Whirlpool WRT138FFD Reviews
We have not received any reviews for Whirlpool yet.