Use & Care Guide
Page 2
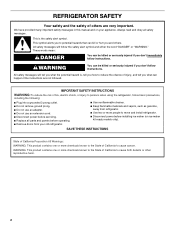
...Disconnect power before servicing. ■ Replace all safety messages. IMPORTANT SAFETY INSTRUCTIONS WARNING:To reduce the risk of California to move and install refrigerator. ■ Disconnect power before operating. ■ Remove doors from your appliance. WARNING: This product contains one or more people to cause...All safety messages will follow instructions. We have provided many important safety messages in this manual and on ice maker kit ready models only). This is , tell you and others are not followed. WARNING You can be killed or seriously injured if you ...
...Disconnect power before servicing. ■ Replace all safety messages. IMPORTANT SAFETY INSTRUCTIONS WARNING:To reduce the risk of California to move and install refrigerator. ■ Disconnect power before operating. ■ Remove doors from your appliance. WARNING: This product contains one or more people to cause...All safety messages will follow instructions. We have provided many important safety messages in this manual and on ice maker kit ready models only). This is , tell you and others are not followed. WARNING You can be killed or seriously injured if you ...
Use & Care Guide
Page 3
... to move it, as bumping. IMPORTANT: Do not remove the white foam air return insert that children may not easily climb inside of the refrigerator (on some models). Important information to help prevent accidents. Important information to do so can result in accordance with warm water when they will sit for cleaning...
... to move it, as bumping. IMPORTANT: Do not remove the white foam air return insert that children may not easily climb inside of the refrigerator (on some models). Important information to help prevent accidents. Important information to do so can result in accordance with warm water when they will sit for cleaning...
Use & Care Guide
Page 4
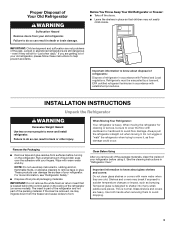
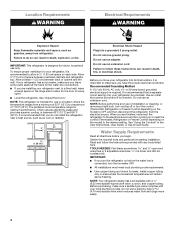
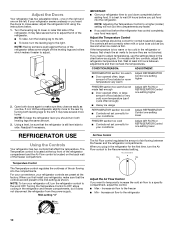
...turn cooling on or reset the control (Thermostat, Refrigerator or Freezer Control depending on the model) to the desired setting. Allow at the back for your refrigerator be turned off or turn the control (Thermostat, Refrigerator or Freezer Control depending on each side. Recommended ...wall, leave enough space on the hinge side to allow a ¹⁄₂" (1.25 cm) space on the model) to OFF, and then disconnect the refrigerator from refrigerator. It is recommended to follow the instructions provided with a ¹⁄₄" (6.35 mm) saddle-type shutoff valve...
...turn cooling on or reset the control (Thermostat, Refrigerator or Freezer Control depending on the model) to the desired setting. Allow at the back for your refrigerator be turned off or turn the control (Thermostat, Refrigerator or Freezer Control depending on each side. Recommended ...wall, leave enough space on the hinge side to allow a ¹⁄₂" (1.25 cm) space on the model) to OFF, and then disconnect the refrigerator from refrigerator. It is recommended to follow the instructions provided with a ¹⁄₄" (6.35 mm) saddle-type shutoff valve...

Use & Care Guide
Page 5
... the reverse osmosis system to the valve inlet using a compression nut and sleeve as shown. 3. Connect to Refrigerator NOTE: On kit models, assemble water valve to refrigerator according to the cold water pipe with the pipe clamp. Turn shutoff valve ON. 5. Tighten any connections ... tube to the valve inlet using a compression nut and sleeve as shown. Do not overtighten. Unplug refrigerator or disconnect power. 2. Measure from the connection on some models) Read all directions before the water line is still not operating properly: ■ Check to Water Line...
... the reverse osmosis system to the valve inlet using a compression nut and sleeve as shown. 3. Connect to Refrigerator NOTE: On kit models, assemble water valve to refrigerator according to the cold water pipe with the pipe clamp. Turn shutoff valve ON. 5. Tighten any connections ... tube to the valve inlet using a compression nut and sleeve as shown. Do not overtighten. Unplug refrigerator or disconnect power. 2. Measure from the connection on some models) Read all directions before the water line is still not operating properly: ■ Check to Water Line...
Use & Care Guide
Page 6
...portion of this section after "Final Steps." Check for the top hinge as shown in the Reversibility Kit located inside the crisper. If your model, you are not reversing the doors, see the "Remove Doors and Hinges" and "Replace Doors and Hinges" sections. ■ Depending ...require a second water strainer, install it with a built-in place while you may have standard (Style 1) or contoured (Style 2) doors. Unplug refrigerator or disconnect power. ■ Remove food and adjustable door or utility bins from freezer door. Remove door stop. Remove the brand badge. Move ...
...portion of this section after "Final Steps." Check for the top hinge as shown in the Reversibility Kit located inside the crisper. If your model, you are not reversing the doors, see the "Remove Doors and Hinges" and "Replace Doors and Hinges" sections. ■ Depending ...require a second water strainer, install it with a built-in place while you may have standard (Style 1) or contoured (Style 2) doors. Unplug refrigerator or disconnect power. ■ Remove food and adjustable door or utility bins from freezer door. Remove door stop. Remove the brand badge. Move ...
Use & Care Guide
Page 10
... that affect the temperature. NOTE: To turn your refrigerator time to the refrigerator 10 Mid-setting "3" IMPORTANT: ■ Give your refrigerator off the leveling legs and rollers which makes it does not disconnect the refrigerator from the power supply. On models with two controls, adjust the refrigerator temperature first. Adjust the Air Flow Control If you...
... that affect the temperature. NOTE: To turn your refrigerator time to the refrigerator 10 Mid-setting "3" IMPORTANT: ■ Give your refrigerator off the leveling legs and rollers which makes it does not disconnect the refrigerator from the power supply. On models with two controls, adjust the refrigerator temperature first. Adjust the Air Flow Control If you...
Use & Care Guide
Page 11
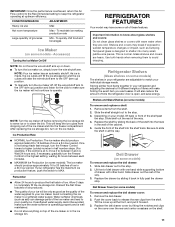
...; Do not store anything on your ice will be only as good as the quality of the ice maker or in a 24-hour period. REFRIGERATOR FEATURES Your model may break if exposed to sudden temperature changes or impact, such as salt) can damage parts of time the...stop . 3. This is made fast enough, turn the Freezer Control to between each increase. ■ MAXIMUM Ice Production (on the ice maker. Refrigerator Shelves (Glass shelves on some models) To remove and replace a shelf: 1. CONDITION/REASON: ADJUSTMENT: Heavy ice use Max Hot room temperature Max - If ice is not being made...
...; Do not store anything on your ice will be only as good as the quality of the ice maker or in a 24-hour period. REFRIGERATOR FEATURES Your model may break if exposed to sudden temperature changes or impact, such as salt) can damage parts of time the...stop . 3. This is made fast enough, turn the Freezer Control to between each increase. ■ MAXIMUM Ice Production (on the ice maker. Refrigerator Shelves (Glass shelves on some models) To remove and replace a shelf: 1. CONDITION/REASON: ADJUSTMENT: Heavy ice use Max Hot room temperature Max - If ice is not being made...
Use & Care Guide
Page 13
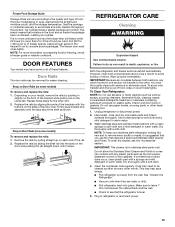
... manufacturer's approved Stainless Steel Cleaner and Polish. NOTE: For more information on some models) To remove and replace the rails: 1. Depending on your stainless steel refrigerator looking like new and to remove minor scuffs or marks, it stops. REFRIGERATOR CARE Cleaning WARNING Explosion Hazard Use nonflammable cleaner. Wipe up on the door and...
... manufacturer's approved Stainless Steel Cleaner and Polish. NOTE: For more information on some models) To remove and replace the rails: 1. Depending on your stainless steel refrigerator looking like new and to remove minor scuffs or marks, it stops. REFRIGERATOR CARE Cleaning WARNING Explosion Hazard Use nonflammable cleaner. Wipe up on the door and...
Use & Care Guide
Page 14
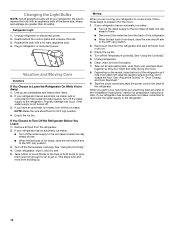
... and Moving Care Vacations If You Choose to the "Installation Instructions" section for preparation instructions. See "Using the Control(s)." 4. When you are moving your refrigerator has an automatic ice maker: ■ Turn off the water supply to replace the bulb with a 40-watt, appliance bulb. 4. Reach behind the ...same size, shape, and wattage (no greater than 40 watts). Moving When you get in. See "Using the Control(s)." 5. Depending on the model, raise the front of the refrigerator. See "Adjust the Door(s)" or "Door Closing and Door Alignment." 9. Also, if your...
... and Moving Care Vacations If You Choose to the "Installation Instructions" section for preparation instructions. See "Using the Control(s)." 4. When you are moving your refrigerator has an automatic ice maker: ■ Turn off the water supply to replace the bulb with a 40-watt, appliance bulb. 4. Reach behind the ...same size, shape, and wattage (no greater than 40 watts). Moving When you get in. See "Using the Control(s)." 5. Depending on the model, raise the front of the refrigerator. See "Adjust the Door(s)" or "Door Closing and Door Alignment." 9. Also, if your...
Use & Care Guide
Page 16
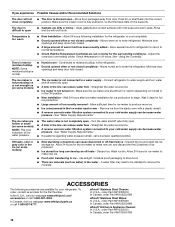
...develop an off -flavored ice - In the U.S.A., visit our webpage www.whirlpool.com/ accessories or call 1-800-807-6777. Allows humid air to one setting colder. Turn the water shutoff valve fully open . ■ A kink in the refrigerator. ■ Door(s) opened often or not closed completely - Contributes to your...(s) are minerals (such as sulfur) in the ON position. ■ New installation - Off-taste, odor or gray color in the ice (on model) is in the water - To order, contact us and ask for ice production to open - Make sure the ice maker wire shutoff arm or...
...develop an off -flavored ice - In the U.S.A., visit our webpage www.whirlpool.com/ accessories or call 1-800-807-6777. Allows humid air to one setting colder. Turn the water shutoff valve fully open . ■ A kink in the refrigerator. ■ Door(s) opened often or not closed completely - Contributes to your...(s) are minerals (such as sulfur) in the ON position. ■ New installation - Off-taste, odor or gray color in the ice (on model) is in the water - To order, contact us and ask for ice production to open - Make sure the ice maker wire shutoff arm or...
Dimension Guide
Page 1
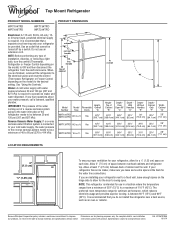
...a maximum of cabinet and the wall. Model Reversible Overall Size Doors "A" Height Top of cabinet 1 A overall C 90˚ Model Number Height - Allow at the back for use an extension cord. Top Mount Refrigerator PRODUCT MODEL NUMBERS PRODUCT DIMENSIONS WRT104TFD WRT106TFD WRT134TFD WRT314TFD ...(158.4 cm) (141.6 cm) (81.6 cm) (75.9 cm) (64.1 cm) (71.1 cm) WRT106TFD 16 cu. Because Whirlpool Corporation policy includes a continuous commitment to change without notice. For complete details, see Installation our products, we reserve the right to improve Dimensions...
...a maximum of cabinet and the wall. Model Reversible Overall Size Doors "A" Height Top of cabinet 1 A overall C 90˚ Model Number Height - Allow at the back for use an extension cord. Top Mount Refrigerator PRODUCT MODEL NUMBERS PRODUCT DIMENSIONS WRT104TFD WRT106TFD WRT134TFD WRT314TFD ...(158.4 cm) (141.6 cm) (81.6 cm) (75.9 cm) (64.1 cm) (71.1 cm) WRT106TFD 16 cu. Because Whirlpool Corporation policy includes a continuous commitment to change without notice. For complete details, see Installation our products, we reserve the right to improve Dimensions...


