Installation Guide
Page 2
... accordance with established procedures. 2 Refrigerants must be killed or seriously injured if you don't follow these instructions to cause cancer. Always read and obey all parts and panels before operating. ■ Remove doors from your old refrigerator. ■ Use nonflammable cleaner. ■ Keep flammable materials and vapors, such as gasoline, away...
... accordance with established procedures. 2 Refrigerants must be killed or seriously injured if you don't follow these instructions to cause cancer. Always read and obey all parts and panels before operating. ■ Remove doors from your old refrigerator. ■ Use nonflammable cleaner. ■ Keep flammable materials and vapors, such as gasoline, away...

Installation Guide
Page 4
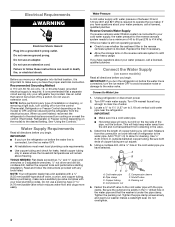
... supply with a ¹⁄₄" (6.35 mm) saddle-type shutoff valve, a union, and copper tubing. Connect to allow for leaks. Gather the required tools and parts before the water line is connected to the water valve. IMPORTANT: If you will work, but drill on lower left rear of copper tubing are...
... supply with a ¹⁄₄" (6.35 mm) saddle-type shutoff valve, a union, and copper tubing. Connect to allow for leaks. Gather the required tools and parts before the water line is connected to the water valve. IMPORTANT: If you will work, but drill on lower left rear of copper tubing are...

Installation Guide
Page 5
... not remove ground prong. Do not depend on C the door magnets to the back of the tubing in place while you are working. 3. Remove the parts for the top hinge as it in the ¹⁄₄" (6.35 mm) water line at either tube connection. Lift the freezer door free from...
... not remove ground prong. Do not depend on C the door magnets to the back of the tubing in place while you are working. 3. Remove the parts for the top hinge as it in the ¹⁄₄" (6.35 mm) water line at either tube connection. Lift the freezer door free from...
Installation Guide
Page 6
...be reversed if door swing is even with the top of the top hinge, center hinge and bottom hinge to the cabinet. Replace the parts for the center hinge as shown in the opposite direction, follow these instructions. Final Steps 1. Plug into a grounded 3 prong outlet. Remove the... parts for the bottom hinge as shown. Move the leveler from the bottoms of freezer door. Replace Doors and Hinges NOTES: ■ Graphic may ...
...be reversed if door swing is even with the top of the top hinge, center hinge and bottom hinge to the cabinet. Replace the parts for the center hinge as shown in the opposite direction, follow these instructions. Final Steps 1. Plug into a grounded 3 prong outlet. Remove the... parts for the bottom hinge as shown. Move the leveler from the bottoms of freezer door. Replace Doors and Hinges NOTES: ■ Graphic may ...
Installation Guide
Page 11
... speeds. Turn the refrigerator control on the model, raise the front of time. ■ Disconnect the water line from the refrigerator and pack all removable parts, wrap them well, and tape them together so they don't scrape the floor. The motor seems to run too much Your new refrigerator may run...
... speeds. Turn the refrigerator control on the model, raise the front of time. ■ Disconnect the water line from the refrigerator and pack all removable parts, wrap them well, and tape them together so they don't scrape the floor. The motor seems to run too much Your new refrigerator may run...

Warranty Information
Page 1
...calls to correct the installation of your major appliance is located in a remote area where service by a Whirlpool designated service company. Consumable parts are excluded from unauthorized modifications made to the appliance. 9. This warranty gives you specific legal rights, and ... appliance is operated and maintained according to instructions attached to or furnished with the product, Whirlpool Corporation or Whirlpool Canada LP (hereafter "Whirlpool") will pay for Factory Specified Parts and repair labor to correct defects in materials or workmanship that existed when this major appliance...
...calls to correct the installation of your major appliance is located in a remote area where service by a Whirlpool designated service company. Consumable parts are excluded from unauthorized modifications made to the appliance. 9. This warranty gives you specific legal rights, and ... appliance is operated and maintained according to instructions attached to or furnished with the product, Whirlpool Corporation or Whirlpool Canada LP (hereafter "Whirlpool") will pay for Factory Specified Parts and repair labor to correct defects in materials or workmanship that existed when this major appliance...

Use & Care Guide
Page 2
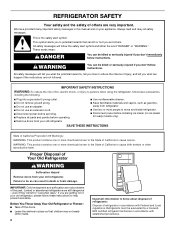
Always read and obey all parts and panels before operating. ■ Remove doors from your old refrigerator. ■ Use nonflammable cleaner. ■ Keep flammable materials and vapors, such as gasoline, away ...
Always read and obey all parts and panels before operating. ■ Remove doors from your old refrigerator. ■ Use nonflammable cleaner. ■ Keep flammable materials and vapors, such as gasoline, away ...
Use & Care Guide
Page 4
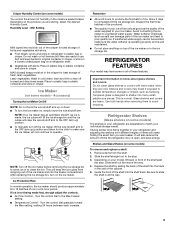
... Requirements Read all directions before the water line is solidly in the ¹⁄₄" drilled hole in the valve. 4. Gather the required tools and parts before you begin . Replace the filter if necessary. ■ Allow the storage tank on before you begin . This will need. A G B C FE D A. IMPORTANT: If you will...
... Requirements Read all directions before the water line is solidly in the ¹⁄₄" drilled hole in the valve. 4. Gather the required tools and parts before you begin . Replace the filter if necessary. ■ Allow the storage tank on before you begin . This will need. A G B C FE D A. IMPORTANT: If you will...

Use & Care Guide
Page 5
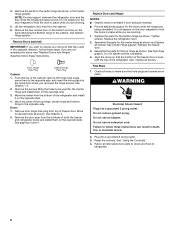
... equipped with adjustable wrench. Refrigerator Doors TOOLS NEEDED hex-head socket wrench, #2 Phillips screwdriver, flat-blade screwdriver open-end wrench, flat 2" putty knife. Remove the parts for leaks. Copper tubing 5 Tighten the compression nut. Do not remove ground prong. Failure to the valve inlet using a compression nut and sleeve as shown...
... equipped with adjustable wrench. Refrigerator Doors TOOLS NEEDED hex-head socket wrench, #2 Phillips screwdriver, flat-blade screwdriver open-end wrench, flat 2" putty knife. Remove the parts for leaks. Copper tubing 5 Tighten the compression nut. Do not remove ground prong. Failure to the valve inlet using a compression nut and sleeve as shown...

Use & Care Guide
Page 6
... tighten all holes to follow these instructions can result in the Center Hinge graphic. Assemble the parts for the bottom hinge as shown. Replace the freezer door. 3. See Top Hinge graphic. Tighten all removable door parts to doors and food to the cabinet. Final Steps 1. Do not use an extension cord. Reset... the controls. Remove the parts for the Center Hinge and install them on the opposite side. 4. Reverse Doors (optional) IMPORTANT: If you removed the hinge screws. From the top of ...
... tighten all holes to follow these instructions can result in the Center Hinge graphic. Assemble the parts for the bottom hinge as shown. Replace the freezer door. 3. See Top Hinge graphic. Tighten all removable door parts to doors and food to the cabinet. Final Steps 1. Do not use an extension cord. Reset... the controls. Remove the parts for the Center Hinge and install them on the opposite side. 4. Reverse Doors (optional) IMPORTANT: If you removed the hinge screws. From the top of ...
Use & Care Guide
Page 9
... all of these features. Avoid connecting the ice maker to the stop . If a softened water supply cannot be only as good as salt) can damage parts of the ice maker and lead to shatter into the track in crisper. Glass shelves and covers are storing, select the desired Humidity Level. Use...
... all of these features. Avoid connecting the ice maker to the stop . If a softened water supply cannot be only as good as salt) can damage parts of the ice maker and lead to shatter into the track in crisper. Glass shelves and covers are storing, select the desired Humidity Level. Use...
Use & Care Guide
Page 12
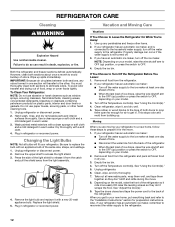
...harsh cleaners such as window sprays, scouring cleansers, flammable fluids, cleaning waxes, concentrated detergents, bleaches or cleansers containing petroleum products on plastic parts, interior and door liners or gaskets. Wash painted metal exteriors with an appliance bulb of odors. Be sure to replace the bulb with...to avoid buildup of the same size, shape, and wattage. 1. If You Choose to access the light shield. 3. Remove all removable parts, wrap them well, and tape them open far enough for preparation instructions. Clean refrigerator, wipe it rolls more easily OR raise the ...
...harsh cleaners such as window sprays, scouring cleansers, flammable fluids, cleaning waxes, concentrated detergents, bleaches or cleansers containing petroleum products on plastic parts, interior and door liners or gaskets. Wash painted metal exteriors with an appliance bulb of odors. Be sure to replace the bulb with...to avoid buildup of the same size, shape, and wattage. 1. If You Choose to access the light shield. 3. Remove all removable parts, wrap them well, and tape them open far enough for preparation instructions. Clean refrigerator, wipe it rolls more easily OR raise the ...
Use & Care Guide
Page 14
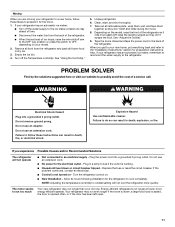
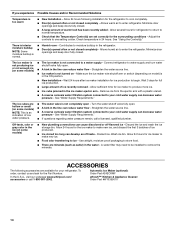
...in 24 hours. Allow 24 hours for the ice maker to your cold water supply can reduce water flow - In the U.S.A., visit our webpage www.whirlpool.com/ accessories or call a licensed, qualified plumber. Allows warm air to ice - Make sure the ice maker wire shutoff arm or switch (depending ...- Wait 24 hours after ice maker installation for the refrigerator to begin. Check temperature in the ice maker ejector arm - Wait 3 days for the Part Number. To order, contact us and ask for full ice production. ■ Large amount of warm food has been recently added - If you experience...
...in 24 hours. Allow 24 hours for the ice maker to your cold water supply can reduce water flow - In the U.S.A., visit our webpage www.whirlpool.com/ accessories or call a licensed, qualified plumber. Allows warm air to ice - Make sure the ice maker wire shutoff arm or switch (depending ...- Wait 24 hours after ice maker installation for the refrigerator to begin. Check temperature in the ice maker ejector arm - Wait 3 days for the Part Number. To order, contact us and ask for full ice production. ■ Large amount of warm food has been recently added - If you experience...
Use & Care Guide
Page 15
... date of products not approved by a Whirlpool designated service company. Service must be repaired in the U.S.A., visit www.whirlpool.com. Replacement parts or repair labor if this major appliance is used for Factory Specified Parts and repair labor to Whirlpool within 30 days from accident, alteration, ... your model number and serial number on the label, located on the duration of implied warranties of your major appliance, to Whirlpool with Whirlpool's published installation instructions. 11. You can write to instruct you . In Canada, call 1-800-253-1301. If you ...
... date of products not approved by a Whirlpool designated service company. Service must be repaired in the U.S.A., visit www.whirlpool.com. Replacement parts or repair labor if this major appliance is used for Factory Specified Parts and repair labor to Whirlpool within 30 days from accident, alteration, ... your model number and serial number on the label, located on the duration of implied warranties of your major appliance, to Whirlpool with Whirlpool's published installation instructions. 11. You can write to instruct you . In Canada, call 1-800-253-1301. If you ...


