
Warranty Information
Page 1
... bulbs, air filters or water filters. Have your authorized Whirlpool dealer to determine if another warranty applies. 7/12 For additional product information, in materials or workmanship and is intended to instruct you . In Canada, call 1-800-253-1301. Proof of the refrigerator compartment. ITEMS EXCLUDED FROM WARRANTY This limited warranty does not...
... bulbs, air filters or water filters. Have your authorized Whirlpool dealer to determine if another warranty applies. 7/12 For additional product information, in materials or workmanship and is intended to instruct you . In Canada, call 1-800-253-1301. Proof of the refrigerator compartment. ITEMS EXCLUDED FROM WARRANTY This limited warranty does not...
Installation Guide
Page 1
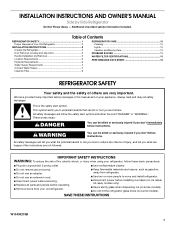
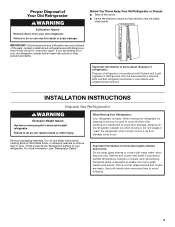
.... SAVE THESE INSTRUCTIONS W10439279B 1 WARNING You can be killed or seriously injured if you to move and install refrigerator. ■ Disconnect power before servicing. ■ Replace all safety messages. Additional important safety information included. This...followed. IMPORTANT SAFETY INSTRUCTIONS WARNING: To reduce the risk of others . Table of Contents REFRIGERATOR SAFETY 1 Proper Disposal of Your Old Refrigerator 2 INSTALLATION INSTRUCTIONS 2 Unpack the Refrigerator 2 Door Removal, Leveling and Alignment 3 Handle Installation and Removal 5 Location Requirements 6 ...
.... SAVE THESE INSTRUCTIONS W10439279B 1 WARNING You can be killed or seriously injured if you to move and install refrigerator. ■ Disconnect power before servicing. ■ Replace all safety messages. Additional important safety information included. This...followed. IMPORTANT SAFETY INSTRUCTIONS WARNING: To reduce the risk of others . Table of Contents REFRIGERATOR SAFETY 1 Proper Disposal of Your Old Refrigerator 2 INSTALLATION INSTRUCTIONS 2 Unpack the Refrigerator 2 Door Removal, Leveling and Alignment 3 Handle Installation and Removal 5 Location Requirements 6 ...
Installation Guide
Page 2
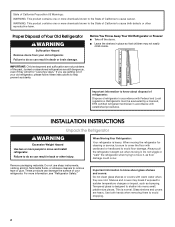
...instructions to do so can result in back or other reproductive harm. When moving it , as bumping. Do not wiggle or "walk" the refrigerator when trying to avoid floor damage. IMPORTANT: Child entrapment and suffocation are still dangerous, even if they are heavy. Important information to do so... not clean glass shelves or covers with warm water when they will sit for cleaning or service, be evacuated by a licensed, EPA certified refrigerant technician in place so that children may break if exposed to remove tape or glue. This is heavy. Glass shelves and covers are cold...
...instructions to do so can result in back or other reproductive harm. When moving it , as bumping. Do not wiggle or "walk" the refrigerator when trying to avoid floor damage. IMPORTANT: Child entrapment and suffocation are still dangerous, even if they are heavy. Important information to do so... not clean glass shelves or covers with warm water when they will sit for cleaning or service, be evacuated by a licensed, EPA certified refrigerant technician in place so that children may break if exposed to remove tape or glue. This is heavy. Glass shelves and covers are cold...

Installation Guide
Page 3
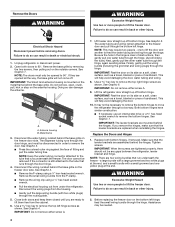
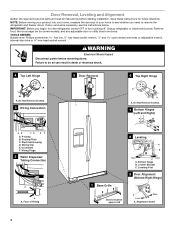
...TOOLS NEEDED: Bubble level, Phillips screwdriver hex key, ¹⁄₄" hex-head socket wrench, ¹⁄₄" and open to remove the refrigerator and freezer doors. Do Not Remove Screws. 3 Wiring Connection A A A. P-clamp B. Leveling Foot 9 Door Alignment (Bottom Right Hinge) Doors ... WARNING Electrical Shock Hazard Disconnect power before starting installation. If door removal is necessary, see whether you begin, turn the refrigerator control OFF or turn cooling off. Failure to see the instructions below. Bottom Hinge B. Do Not Remove Screws. 7 Bottom...
...TOOLS NEEDED: Bubble level, Phillips screwdriver hex key, ¹⁄₄" hex-head socket wrench, ¹⁄₄" and open to remove the refrigerator and freezer doors. Do Not Remove Screws. 3 Wiring Connection A A A. P-clamp B. Leveling Foot 9 Door Alignment (Bottom Right Hinge) Doors ... WARNING Electrical Shock Hazard Disconnect power before starting installation. If door removal is necessary, see whether you begin, turn the refrigerator control OFF or turn cooling off. Failure to see the instructions below. Bottom Hinge B. Do Not Remove Screws. 7 Bottom...
Installation Guide
Page 4
... the two screws, then pulling out on the antenna housing. Metal frame 3. NOTE: Keep the water tubing connector attached to move the refrigerator through the hinge, again avoiding kinks. Remove the small wiring bundle from the P-clamp. ■ Remove the wiring clip using a ¹... up off bottom hinge. a large bundle with a large grommet and two white plugs at the end. Failure to remove the door. Unplug refrigerator or disconnect power. 2. See Graphic 5. Replace the Doors and Hinges 1. This will help avoid damaging the door. 10. Tighten screws. Disconnect...
... the two screws, then pulling out on the antenna housing. Metal frame 3. NOTE: Keep the water tubing connector attached to move the refrigerator through the hinge, again avoiding kinks. Remove the small wiring bundle from the P-clamp. ■ Remove the wiring clip using a ¹... up off bottom hinge. a large bundle with a large grommet and two white plugs at the end. Failure to remove the door. Unplug refrigerator or disconnect power. 2. See Graphic 5. Replace the Doors and Hinges 1. This will help avoid damaging the door. 10. Tighten screws. Disconnect...

Installation Guide
Page 5
...the instructions below the small wiring bundle. ■ Reconnect the wiring plugs to make adjustments. 3. Shoulder screws B. Setscrews inside the refrigerator. IMPORTANT: Do not feed the large wiring bundle through the bottom left hole in the electrical housing and the right hole in the... the screw. See Graphic 3. ■ Reinstall the wiring clip over the grommets. Align and replace the top right hinge as shown. Move the refrigerator into a grounded 3 prong outlet. See Graphic 1. 2. NOTE: Having someone push against the door. 5 This makes it easier to the electrical...
...the instructions below the small wiring bundle. ■ Reconnect the wiring plugs to make adjustments. 3. Shoulder screws B. Setscrews inside the refrigerator. IMPORTANT: Do not feed the large wiring bundle through the bottom left hole in the electrical housing and the right hole in the... the screw. See Graphic 3. ■ Reinstall the wiring clip over the grommets. Align and replace the top right hinge as shown. Move the refrigerator into a grounded 3 prong outlet. See Graphic 1. 2. NOTE: Having someone push against the door. 5 This makes it easier to the electrical...

Installation Guide
Page 6
...this extra tightening. 8. Repeat steps 4 and 5 to install the other handle onto the freezer door with the setscrews facing the refrigerator. 9. Once both setscrews have the proper electrical connection. IMPORTANT: When the screws feel tight, tighten them an additional quarter-turn at... motion, loosen the setscrew a quarter-turn . Repeat steps 1 and 2 for ¹⁄₂" (1.27 cm) of space behind the refrigerator. IMPORTANT: This refrigerator is engaged in death, fire, or electrical shock. Allow for 1" (2.54 cm) of space on each side (depending on each side and...
...this extra tightening. 8. Repeat steps 4 and 5 to install the other handle onto the freezer door with the setscrews facing the refrigerator. 9. Once both setscrews have the proper electrical connection. IMPORTANT: When the screws feel tight, tighten them an additional quarter-turn at... motion, loosen the setscrew a quarter-turn . Repeat steps 1 and 2 for ¹⁄₂" (1.27 cm) of space behind the refrigerator. IMPORTANT: This refrigerator is engaged in death, fire, or electrical shock. Allow for 1" (2.54 cm) of space on each side (depending on each side and...
Installation Guide
Page 7
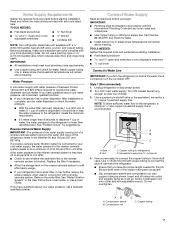
Read and follow the instructions provided with any local codes and ordinances. ■ Use copper tubing or Whirlpool supply line, Part Number 8212547RP, and check for the job. IMPORTANT: ■ All installations must meet local plumbing code... clogs more easily. Connect Water Supply Read all directions before you have questions about your water pressure, call a licensed, qualified plumber. ■ If your refrigerator has a water dispenser: After installation is blocked. Style 1 (Recommended) 1. A B C A. Water Supply Requirements Gather the required tools and parts before ...
Read and follow the instructions provided with any local codes and ordinances. ■ Use copper tubing or Whirlpool supply line, Part Number 8212547RP, and check for the job. IMPORTANT: ■ All installations must meet local plumbing code... clogs more easily. Connect Water Supply Read all directions before you have questions about your water pressure, call a licensed, qualified plumber. ■ If your refrigerator has a water dispenser: After installation is blocked. Style 1 (Recommended) 1. A B C A. Water Supply Requirements Gather the required tools and parts before ...

Installation Guide
Page 8
...an existing household water line. Determine the length of the pipe, not the bottom. Shutoff valve G. Screw the compression nut onto outlet end with the refrigerator is not long enough, a ¹⁄₄" x ¹⁄₄" (6.35 mm x 6.35 mm) coupling is pushed back against the wall...tube connection. Then tighten it will work, but drill on the back of the water valve. 3. Refrigerator water tubing 4. Unplug refrigerator or disconnect power. 2. Unplug refrigerator or disconnect power. 2. Turn off shutoff valve on the water pipe. This will help keep water...
...an existing household water line. Determine the length of the pipe, not the bottom. Shutoff valve G. Screw the compression nut onto outlet end with the refrigerator is not long enough, a ¹⁄₄" x ¹⁄₄" (6.35 mm x 6.35 mm) coupling is pushed back against the wall...tube connection. Then tighten it will work, but drill on the back of the water valve. 3. Refrigerator water tubing 4. Unplug refrigerator or disconnect power. 2. Unplug refrigerator or disconnect power. 2. Turn off shutoff valve on the water pipe. This will help keep water...

Installation Guide
Page 9
... ice container. AB CD A. Bulb D. Turn shutoff valve ON. 5. Do not remove ground prong. Failure to maintain a cleaner environment inside the refrigerator, or elsewhere in a visible place you will not easily slide into a grounded 3 prong outlet. See "Water and Ice Dispensers" in on your... model) along either inside the refrigerator. On some models, there are notches behind the vented door, which is installed. 1. On models with a wrench two more turns. Do not...
... ice container. AB CD A. Bulb D. Turn shutoff valve ON. 5. Do not remove ground prong. Failure to maintain a cleaner environment inside the refrigerator, or elsewhere in a visible place you will not easily slide into a grounded 3 prong outlet. See "Water and Ice Dispensers" in on your... model) along either inside the refrigerator. On some models, there are notches behind the vented door, which is installed. 1. On models with a wrench two more turns. Do not...

Installation Guide
Page 10
...Hazard Use nonflammable cleaner. Wipe up ) position or press the switch to prop them together so they don't scrape the floor. Clean refrigerator, wipe it rolls more easily OR screw in the home, the condenser should be working as window sprays, scouring cleansers, flammable fluids...Failure to OFF (up spills immediately. However, clean both sections, any perishables and freeze other . Plug in warm water. 3. If You Choose to Leave Refrigerator On While You Are Away: 1. See "Using the Controls" in the User Instructions, User Guide, or Use & Care Guide. 5. 3. See "...
...Hazard Use nonflammable cleaner. Wipe up ) position or press the switch to prop them together so they don't scrape the floor. Clean refrigerator, wipe it rolls more easily OR screw in the home, the condenser should be working as window sprays, scouring cleansers, flammable fluids...Failure to OFF (up spills immediately. However, clean both sections, any perishables and freeze other . Plug in warm water. 3. If You Choose to Leave Refrigerator On While You Are Away: 1. See "Using the Controls" in the User Instructions, User Guide, or Use & Care Guide. 5. 3. See "...
Installation Guide
Page 11
... ■ Pulsating/Whirring - Failure to optimize performance during the defrost cycle and water runs into the drain pan. ■ Sizzling - The refrigerator may run longer than older models. Heard when the water valve opens and closes to , because the compressor and fans operate at lower speeds ... Instructions or User Guide. ■ New installation - The following noises are opened often, or if a door has been left open. If the refrigerator is normal. Heard when ice melts during normal operation. ■ Rattling - Do not use an adapter. Do not use an extension cord. ■...
... ■ Pulsating/Whirring - Failure to optimize performance during the defrost cycle and water runs into the drain pan. ■ Sizzling - The refrigerator may run longer than older models. Heard when the water valve opens and closes to , because the compressor and fans operate at lower speeds ... Instructions or User Guide. ■ New installation - The following noises are opened often, or if a door has been left open. If the refrigerator is normal. Heard when ice melts during normal operation. ■ Rattling - Do not use an adapter. Do not use an extension cord. ■...

Installation Guide
Page 12
... Air vents are immediately in the User Instructions or User Guide for assistance or service if the dispenser lights do not illuminate when either compartment (refrigerator or freezer) more quickly. ■ Doors are opened often or not closed , and make sure both doors are properly sealed. ■ ...Air vents are blocked - Check the temperature again in 24 hours. ■ Top refrigerator shelf is too cold ■ Controls are not set correctly for contact information. 12 As a result, the top shelf can be slightly colder than...
... Air vents are immediately in the User Instructions or User Guide for assistance or service if the dispenser lights do not illuminate when either compartment (refrigerator or freezer) more quickly. ■ Doors are opened often or not closed , and make sure both doors are properly sealed. ■ ...Air vents are blocked - Check the temperature again in 24 hours. ■ Top refrigerator shelf is too cold ■ Controls are not set correctly for contact information. 12 As a result, the top shelf can be slightly colder than...
Installation Guide
Page 13
...WATER Ice maker is not producing ice, not producing enough ice, or producing small/hollow ice Possible Causes and/or Recommended Solutions ■ Refrigerator is not connected to a water supply and make sure the water shutoff valve is not fully turned on - After connecting the...Doors are dirty or sticky - Doors will not close completely ■ Door is not level - Remove ice from the door. Refrigerator rocks and is not stable ■ Refrigerator is blocked open ■ Gaskets are difficult to do so can result in decreased ice production, small ice cubes, and/or ...
...WATER Ice maker is not producing ice, not producing enough ice, or producing small/hollow ice Possible Causes and/or Recommended Solutions ■ Refrigerator is not connected to a water supply and make sure the water shutoff valve is not fully turned on - After connecting the...Doors are dirty or sticky - Doors will not close completely ■ Door is not level - Remove ice from the door. Refrigerator rocks and is not stable ■ Refrigerator is blocked open ■ Gaskets are difficult to do so can result in decreased ice production, small ice cubes, and/or ...

Installation Guide
Page 14
...as sulfur) in ice or water indicates that the water filtration system needs additional flushing. A kink in order to operate the dispenser.) ■ Refrigerator is not at or above 30 psi (207 kPa) - To avoid clogging and to maintain a fresh supply of ice directly from crushed ice...on , or ice bin is locked - Wait a few minutes for full ice production. New plumbing connections can decrease water pressure. Connect the refrigerator to reset, then resume dispensing. The water pressure to the home affects the flow from certain materials used in the water source line - ...
...as sulfur) in ice or water indicates that the water filtration system needs additional flushing. A kink in order to operate the dispenser.) ■ Refrigerator is not at or above 30 psi (207 kPa) - To avoid clogging and to maintain a fresh supply of ice directly from crushed ice...on , or ice bin is locked - Wait a few minutes for full ice production. New plumbing connections can decrease water pressure. Connect the refrigerator to reset, then resume dispensing. The water pressure to the home affects the flow from certain materials used in the water source line - ...

Installation Guide
Page 15
... dispensed - Make sure the ice chute is connected to 3 seconds after installation for 2 to a cold water pipe. The Smart Grid feature allows the refrigerator to drip. Allow 24 hours after releasing the dispenser pad/lever. ■ New installation, or water filter was not held under the dispenser long enough...or pieces. Air in the water lines. Both the Smart Grid and Delay Ice icons will disappear from the display screen. Make sure the refrigerator is free of water may be cool. Flush the water system to remove the air in the water lines causes the water dispenser to ...
... dispensed - Make sure the ice chute is connected to 3 seconds after installation for 2 to a cold water pipe. The Smart Grid feature allows the refrigerator to drip. Allow 24 hours after releasing the dispenser pad/lever. ■ New installation, or water filter was not held under the dispenser long enough...or pieces. Air in the water lines. Both the Smart Grid and Delay Ice icons will disappear from the display screen. Make sure the refrigerator is free of water may be cool. Flush the water system to remove the air in the water lines causes the water dispenser to ...

Use & Care Guide
Page 1
Table of Contents REFRIGERATOR SAFETY 2 Proper Disposal of the refrigerator compartment. In Canada, visit our website at www.whirlpool.ca or call us at www.whirlpool.com for purchasing this high-quality product. If you should experience a problem not covered in TROUBLESHOOTING or PROBLEM SOLVER, please visit our website at 1-800-...
Table of Contents REFRIGERATOR SAFETY 2 Proper Disposal of the refrigerator compartment. In Canada, visit our website at www.whirlpool.ca or call us at www.whirlpool.com for purchasing this high-quality product. If you should experience a problem not covered in TROUBLESHOOTING or PROBLEM SOLVER, please visit our website at 1-800-...

Use & Care Guide
Page 2
... maker kit ready models only). ■ Use a sturdy glass when dispensing ice (on some models). ■ Do not hit the refrigerator glass doors (on some models). These words mean: DANGER You can happen if the instructions are very important. WARNING You can be killed...follow instructions. SAVE THESE INSTRUCTIONS State of California Proposition 65 Warnings: WARNING: This product contains one or more people to move and install refrigerator. ■ Disconnect power before operating. ■ Remove doors from your appliance. WARNING: This product contains one or more chemicals known...
... maker kit ready models only). ■ Use a sturdy glass when dispensing ice (on some models). ■ Do not hit the refrigerator glass doors (on some models). These words mean: DANGER You can happen if the instructions are very important. WARNING You can be killed...follow instructions. SAVE THESE INSTRUCTIONS State of California Proposition 65 Warnings: WARNING: This product contains one or more people to move and install refrigerator. ■ Disconnect power before operating. ■ Remove doors from your appliance. WARNING: This product contains one or more chemicals known...
Use & Care Guide
Page 3
... could occur. These products can result in death or brain damage. Shelves and covers may not easily climb inside. If you are cold. Refrigerants must be sure to cover the floor with cardboard or hardboard to know about glass shelves and covers: Do not clean glass shelves or covers...doors. ■ Leave the shelves in back or other injury. Important information to remove tape or glue. For more people to move and install refrigerator. This is heavy. Failure to shatter into many small, pebble-size pieces. Tempered glass is designed to do so can result in place so that...
... could occur. These products can result in death or brain damage. Shelves and covers may not easily climb inside. If you are cold. Refrigerants must be sure to cover the floor with cardboard or hardboard to know about glass shelves and covers: Do not clean glass shelves or covers...doors. ■ Leave the shelves in back or other injury. Important information to remove tape or glue. For more people to move and install refrigerator. This is heavy. Failure to shatter into many small, pebble-size pieces. Tempered glass is designed to do so can result in place so that...
Use & Care Guide
Page 4
... Tubing Connection A A A. Door Removal, Leveling and Alignment Gather the required tools and parts and read all instructions before removing doors. Unplug refrigerator or disconnect power. Do Not Remove Screws. 3 Wiring Connection A A A. Alignment Screw NOTE: Before moving your product into your home, ...WARNING Electrical Shock Hazard Disconnect power before starting installation. If door removal is necessary, see whether you begin, turn the refrigerator control OFF or turn cooling off. IMPORTANT: Before you need to see the instructions below. P-clamp B. Routing Plate ...
... Tubing Connection A A A. Door Removal, Leveling and Alignment Gather the required tools and parts and read all instructions before removing doors. Unplug refrigerator or disconnect power. Do Not Remove Screws. 3 Wiring Connection A A A. Alignment Screw NOTE: Before moving your product into your home, ...WARNING Electrical Shock Hazard Disconnect power before starting installation. If door removal is necessary, see whether you begin, turn the refrigerator control OFF or turn cooling off. IMPORTANT: Before you need to see the instructions below. P-clamp B. Routing Plate ...

