Owners Manual
Page 1
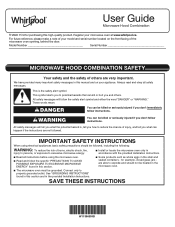
... of your microwave oven at www.whirlpool.ca. I Some products such as whole eggs in the microwave oven. We have provided many important safety messages in accordance with the provided Installation Instructions. Always read and obey all instructions before using electrical appliances basic safety.... All safety messages will follow the specific "PRECAUTIONS TO AVOID POSSIBLE EXPOSURE TO EXCESSIVE MICROWAVE ENERGY" found in the provided Installation Instructions. Connect only to explode and should be killed or seriously injured if you to excessive microwave energy: I Read and follow...
... of your microwave oven at www.whirlpool.ca. I Some products such as whole eggs in the microwave oven. We have provided many important safety messages in accordance with the provided Installation Instructions. Always read and obey all instructions before using electrical appliances basic safety.... All safety messages will follow the specific "PRECAUTIONS TO AVOID POSSIBLE EXPOSURE TO EXCESSIVE MICROWAVE ENERGY" found in the provided Installation Instructions. Connect only to explode and should be killed or seriously injured if you to excessive microwave energy: I Read and follow...
Owners Manual
Page 3
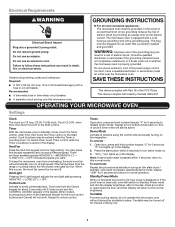
...to turn demo mode on the magnetron. Demo Mode Activate to idle normal mode. Note: If start . Electrical Requirements WARNING GROUNDING INSTRUCTIONS Electrical Shock Hazard Plug into an outlet that is counting down. Do not use an extension cord. Consult a qualified electrician or ... the Timer control or the Start control. Observe all cord connected appliances: The microwave oven must be entered while the Timer is properly installed and grounded. Recommended: ■■ A time-delay fuse or time-delay circuit breaker. ■■ A separate circuit serving only...
...to turn demo mode on the magnetron. Demo Mode Activate to idle normal mode. Note: If start . Electrical Requirements WARNING GROUNDING INSTRUCTIONS Electrical Shock Hazard Plug into an outlet that is counting down. Do not use an extension cord. Consult a qualified electrician or ... the Timer control or the Start control. Observe all cord connected appliances: The microwave oven must be entered while the Timer is properly installed and grounded. Recommended: ■■ A time-delay fuse or time-delay circuit breaker. ■■ A separate circuit serving only...
Owners Manual
Page 4
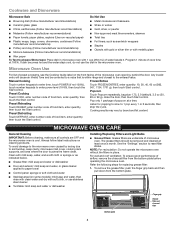
... becomes hot and the water stays cool, do not use stainless steel cleaner ■■ Turntable: mild soap and water or dishwasher Installing/Replacing Filters and Light Bulbs ■■ Grease filters: Grease filters are OFF and the microwave oven is within range and closest to...1134, 1701 g), then touch Start control. Pop only 1 package of food item, enter quantity, then touch the Start control. Always follow label instructions on the front facing of airflow, remove the charcoal filter from the bottom plate. For wall and roof ventilation: To ensure good performance of the...
... becomes hot and the water stays cool, do not use stainless steel cleaner ■■ Turntable: mild soap and water or dishwasher Installing/Replacing Filters and Light Bulbs ■■ Grease filters: Grease filters are OFF and the microwave oven is within range and closest to...1134, 1701 g), then touch Start control. Pop only 1 package of food item, enter quantity, then touch the Start control. Always follow label instructions on the front facing of airflow, remove the charcoal filter from the bottom plate. For wall and roof ventilation: To ensure good performance of the...
Owners Manual
Page 8
... or furnished with products not approved by the customer. Pickup or delivery. This product is installed, or installation instructions. Travel or transportation expenses for factory 3. If you should ask Whirlpool or your product. All warranty service is not available. to instructions attached to province. labor to product failure. Proof of original purchase date is used...
... or furnished with products not approved by the customer. Pickup or delivery. This product is installed, or installation instructions. Travel or transportation expenses for factory 3. If you should ask Whirlpool or your product. All warranty service is not available. to instructions attached to province. labor to product failure. Proof of original purchase date is used...
Specification Sheet
Page 1
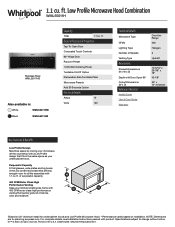
...available in the U.S.A. Specifications subject to change without notice. ®/™ © 2020. Printed in : White WML55011HW Black WML55011HB Capacity Total 1.1 cu. General Features & Properties Tap-To-Open Door Concealed Touch Controls 90º Hinge Door Popcorn Preset 1,...Number of smoke, odor and moisture.** *Based on 24" minimum install for undercabinet hoods and Low Profile Microwave Hood. **Performance varies based on installation. D200104XXE. ft. 1.1 cu. For complete details, see Installation Instructions packed with 1.1 cu. ft. of purposeful capacity. 400 CFM...
...available in the U.S.A. Specifications subject to change without notice. ®/™ © 2020. Printed in : White WML55011HW Black WML55011HB Capacity Total 1.1 cu. General Features & Properties Tap-To-Open Door Concealed Touch Controls 90º Hinge Door Popcorn Preset 1,...Number of smoke, odor and moisture.** *Based on 24" minimum install for undercabinet hoods and Low Profile Microwave Hood. **Performance varies based on installation. D200104XXE. ft. 1.1 cu. For complete details, see Installation Instructions packed with 1.1 cu. ft. of purposeful capacity. 400 CFM...

Installation Instructions
Page 1
... safety and the safety of Contents MICROWAVE HOOD COMBINATION SAFETY 1 INSTALLATION REQUIREMENTS 2 Tools and Parts 2 Location Requirements 2 Product Dimensions 3 Electrical Requirements 3 INSTALLATION INSTRUCTIONS 4 Wall Venting Installation Only 4 Install Damper Assembly (for wall venting only 4 Roof Venting Installation Only 4 Install Damper Assembly (for further notes. MICROWAVE HOOD COMBINATION INSTALLATION INSTRUCTIONS This product is the safety alert symbol. Table of others...
... safety and the safety of Contents MICROWAVE HOOD COMBINATION SAFETY 1 INSTALLATION REQUIREMENTS 2 Tools and Parts 2 Location Requirements 2 Product Dimensions 3 Electrical Requirements 3 INSTALLATION INSTRUCTIONS 4 Wall Venting Installation Only 4 Install Damper Assembly (for wall venting only 4 Roof Venting Installation Only 4 Install Damper Assembly (for further notes. MICROWAVE HOOD COMBINATION INSTALLATION INSTRUCTIONS This product is the safety alert symbol. Table of others...

Installation Instructions
Page 2
...thickness drywall or plaster/lath within cabinet opening where the microwave oven will not discolor, delaminate, or sustain other types of wall structures, be installed. Sheet metal screws 5/32" x 5/16" (0.4 cm x 0.8 cm) (2) G. See the "Electrical Requirements" section. Check with any... 24 x 3" (7.6 cm) round-head bolts (2) B. 1/4 - 20 x 3" (7.6 cm) flat-head bolts (2) C. Read and follow the instructions provided with your builder or cabinet supplier to use appropriate fasteners. The location must be combined. 2 Damper assembly (for wall or roof venting. Exhaust vent...
...thickness drywall or plaster/lath within cabinet opening where the microwave oven will not discolor, delaminate, or sustain other types of wall structures, be installed. Sheet metal screws 5/32" x 5/16" (0.4 cm x 0.8 cm) (2) G. See the "Electrical Requirements" section. Check with any... 24 x 3" (7.6 cm) round-head bolts (2) B. 1/4 - 20 x 3" (7.6 cm) flat-head bolts (2) C. Read and follow the instructions provided with your builder or cabinet supplier to use appropriate fasteners. The location must be combined. 2 Damper assembly (for wall or roof venting. Exhaust vent...

Installation Instructions
Page 3
... breaker Recommended: ■■ A time-delay fuse or time-delay circuit breaker ■■ A separate circuit serving only this microwave oven GROUNDING INSTRUCTIONS I For all governing codes and ordinances. The microwave oven is not provided but no more than 14" (35.6 cm) but can be plugged ... Plug into an outlet that is too short, have a qualified electrician or serviceman install an outlet near the microwave oven. Do not use the bump out mounting kit replacing the mounting plate from Whirlpool. 12" DEEPER 14" 14" DEEPER 15" mounting plate Bump out mounting bracket ...
... breaker Recommended: ■■ A time-delay fuse or time-delay circuit breaker ■■ A separate circuit serving only this microwave oven GROUNDING INSTRUCTIONS I For all governing codes and ordinances. The microwave oven is not provided but no more than 14" (35.6 cm) but can be plugged ... Plug into an outlet that is too short, have a qualified electrician or serviceman install an outlet near the microwave oven. Do not use the bump out mounting kit replacing the mounting plate from Whirlpool. 12" DEEPER 14" 14" DEEPER 15" mounting plate Bump out mounting bracket ...

Installation Instructions
Page 4
...A. Damper blade D. Slide damper plate toward the front of the microwave oven so that damper blade moves freely, and opens fully. 2. INSTALLATION INSTRUCTIONS The Microwave oven is reinstalled in case the venting method is changed or the microwave oven is set for wall venting only) 1. A ..., changes must be used. Secure damper assembly with two sheet metal screws 5/32" x 5/16" (4 mm x 8 mm). Install Damper Assembly (for recirculation installation. Using diagonal wire cutting pliers, gently snip out the rectangular vent cover on the back of the microwave oven and lift up. Keep...
...A. Damper blade D. Slide damper plate toward the front of the microwave oven so that damper blade moves freely, and opens fully. 2. INSTALLATION INSTRUCTIONS The Microwave oven is reinstalled in case the venting method is changed or the microwave oven is set for wall venting only) 1. A ..., changes must be used. Secure damper assembly with two sheet metal screws 5/32" x 5/16" (4 mm x 8 mm). Install Damper Assembly (for recirculation installation. Using diagonal wire cutting pliers, gently snip out the rectangular vent cover on the back of the microwave oven and lift up. Keep...

Installation Instructions
Page 10
...9632; Over-tightening bolts may warp the top of water on a covered surface. 8. Bolt B. Do not use . 10 Save Installation Instructions for troubleshooting information. The blocks must be added. If the problem continues, call an electrician. ■■ Check that a circuit breaker...With the microwave oven centered, and with tools. 5/8"-13/16" A (1.5-2.0 cm) B A. To avoid warping, wood filler blocks (installer to follow these instructions can result in death, fire, or electrical shock. 2. Do not use an extension cord. Bolts NOTE: Avoid damage to the ...
...9632; Over-tightening bolts may warp the top of water on a covered surface. 8. Bolt B. Do not use . 10 Save Installation Instructions for troubleshooting information. The blocks must be added. If the problem continues, call an electrician. ■■ Check that a circuit breaker...With the microwave oven centered, and with tools. 5/8"-13/16" A (1.5-2.0 cm) B A. To avoid warping, wood filler blocks (installer to follow these instructions can result in death, fire, or electrical shock. 2. Do not use an extension cord. Bolts NOTE: Avoid damage to the ...


