
Installation Instructions
Page 1
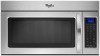
.... This is , tell you how to and including 36" (91.4 cm) wide. All safety messages will follow instructions. These installation instructions cover different models. This symbol alerts you to Wall 8 Prepare Upper Cabinet 8 Install Damper Assembly 9 Install the Microwave Oven 9 Complete Installation 10 VENTING DESIGN SPECIFICATIONS 11 ... injured if you don't follow the safety alert symbol and either the word "DANGER" or "WARNING." The appearance of your particular model may differ slightly from the illustration in this manual and on your appliance. W10247296B
.... This is , tell you how to and including 36" (91.4 cm) wide. All safety messages will follow instructions. These installation instructions cover different models. This symbol alerts you to Wall 8 Prepare Upper Cabinet 8 Install Damper Assembly 9 Install the Microwave Oven 9 Complete Installation 10 VENTING DESIGN SPECIFICATIONS 11 ... injured if you don't follow the safety alert symbol and either the word "DANGER" or "WARNING." The appearance of your particular model may differ slightly from the illustration in this manual and on your appliance. W10247296B

Installation Instructions
Page 2
...template Mounting plate (attached to back of microwave oven) Cardboard template (part of packaging) Aluminum grease filters Charcoal filters (Depending on model, aluminum grease filter and charcoal filter may not be sure to separate the template from the top of the microwave oven packaging ...microwave oven, so that the vent fits properly, and the damper blade opens freely and fully. See User Instructions.) NOTE: Depending on model, charcoal filters may be combined. See "Venting Design Specifications" section. Set the cardboard template to the side and refer to Round ...
...template Mounting plate (attached to back of microwave oven) Cardboard template (part of packaging) Aluminum grease filters Charcoal filters (Depending on model, aluminum grease filter and charcoal filter may not be sure to separate the template from the top of the microwave oven packaging ...microwave oven, so that the vent fits properly, and the damper blade opens freely and fully. See User Instructions.) NOTE: Depending on model, charcoal filters may be combined. See "Venting Design Specifications" section. Set the cardboard template to the side and refer to Round ...

Installation Instructions
Page 4
.... Blower motor 5. Damper plate tabs D. Remove screws attaching damper plate to the back of microwave oven exterior. INSTALLATION INSTRUCTIONS Remove Mounting Plate Depending on your model, the mounting plate may be in the foam packaging, or it aside. 3.
.... Blower motor 5. Damper plate tabs D. Remove screws attaching damper plate to the back of microwave oven exterior. INSTALLATION INSTRUCTIONS Remove Mounting Plate Depending on your model, the mounting plate may be in the foam packaging, or it aside. 3.

Installation Instructions
Page 12
...facing of the microwave oven. Filler panels Filler Panel Kit Number 8171336 8171337 8171338 8171339 99403 White Black Biscuit Stainless Steel Almond See your model number located on the front frame of the microwave oven opening . W10247296B SP PN W10345003B © 2010. For best performance, use ...vent, elbow(s), transitions and wall or roof caps must be found on the model and serial number plate, which is round, a rectangular to be replaced, call , you will need the microwave oven model number and serial number. The total length of the installation hardware needs to round...
...facing of the microwave oven. Filler panels Filler Panel Kit Number 8171336 8171337 8171338 8171339 99403 White Black Biscuit Stainless Steel Almond See your model number located on the front frame of the microwave oven opening . W10247296B SP PN W10345003B © 2010. For best performance, use ...vent, elbow(s), transitions and wall or roof caps must be found on the model and serial number plate, which is round, a rectangular to be replaced, call , you will need the microwave oven model number and serial number. The total length of the installation hardware needs to round...

Dimension Guide
Page 1
... (1.8 m) 69" (175.3 cm) min. 2 ft (0.6 m) C A. Vent extension piece, at least 3" (7.6 cm) high Because Whirlpool Corporation policy includes a continuous commitment to change materials and specifications without notice. Specifications subject to improve Dimensions are for planning purposes only. W10247296B 3/...28/12 Microwave Hood Combination PRODUCT MODEL NUMBERS GMH3204XV GMH5205XV GMH6185XV WMH1162XV WMH1163XV WMH1164XW WMH2175XV WMH2205XV WMH3205XV WMH31017A WMH32517A WMH53520A WMH32L19A WMH73L20A Electrical: A 120-Volt, 60-Hz, AC...
... (1.8 m) 69" (175.3 cm) min. 2 ft (0.6 m) C A. Vent extension piece, at least 3" (7.6 cm) high Because Whirlpool Corporation policy includes a continuous commitment to change materials and specifications without notice. Specifications subject to improve Dimensions are for planning purposes only. W10247296B 3/...28/12 Microwave Hood Combination PRODUCT MODEL NUMBERS GMH3204XV GMH5205XV GMH6185XV WMH1162XV WMH1163XV WMH1164XW WMH2175XV WMH2205XV WMH3205XV WMH31017A WMH32517A WMH53520A WMH32L19A WMH73L20A Electrical: A 120-Volt, 60-Hz, AC...

Warranty Information
Page 1
... assistance or service, call 1-800-253-1301. Please keep this User Instructions and model number information for Factory Specified Parts and repair labor to correct defects in materials or workmanship and is reported to Whirlpool within 30 days from the date of purchase. 6. All rights reserved. ®...designed to be provided by this warranty. 8. WHIRLPOOL SHALL NOT BE LIABLE FOR INCIDENTAL OR CONSEQUENTIAL DAMAGES. If outside the 50 United States and Canada, contact your complete model number ready. If you on how to use your model number and serial number on the label located on...
... assistance or service, call 1-800-253-1301. Please keep this User Instructions and model number information for Factory Specified Parts and repair labor to correct defects in materials or workmanship and is reported to Whirlpool within 30 days from the date of purchase. 6. All rights reserved. ®...designed to be provided by this warranty. 8. WHIRLPOOL SHALL NOT BE LIABLE FOR INCIDENTAL OR CONSEQUENTIAL DAMAGES. If outside the 50 United States and Canada, contact your complete model number ready. If you on how to use your model number and serial number on the label located on...

Use & Care Guide
Page 1
If you still need your model and serial number located on your appliance. We have provided many ...;n microondas campana" en español, o para obtener información adicional acerca de su producto, visite: www.whirlpool.com Tenga listo su número de modelo completo. Connect only to explode and should experience a problem not covered .... If you and others are able to properly grounded outlet. You will need assistance, call us at www.whirlpool.com for example, closed glass jars - SAVE THESE INSTRUCTIONS W10451742A Always read and obey all instructions before using...
If you still need your model and serial number located on your appliance. We have provided many ...;n microondas campana" en español, o para obtener información adicional acerca de su producto, visite: www.whirlpool.com Tenga listo su número de modelo completo. Connect only to explode and should experience a problem not covered .... If you and others are able to properly grounded outlet. You will need assistance, call us at www.whirlpool.com for example, closed glass jars - SAVE THESE INSTRUCTIONS W10451742A Always read and obey all instructions before using...

Use & Care Guide
Page 2
... to accumulate on hood or filter. ■ Do not use paper products when appliance is operated in convection, combination, grill or "PAN BROWN" mode (on models with any appliance, close properly and that the oven door close supervision is necessary when used above both before placing bags in oven. - Do not...
... to accumulate on hood or filter. ■ Do not use paper products when appliance is operated in convection, combination, grill or "PAN BROWN" mode (on models with any appliance, close properly and that the oven door close supervision is necessary when used above both before placing bags in oven. - Do not...

Use & Care Guide
Page 4
...-hour (0:00-23:59) clock. Timer With the microwave oven in the display. The vent fan may be set the light on some models): To keep the microwave oven from overheating, the auto vent fan will automatically turn off . Filter Reset Reset the filter status after replacing and... the filters. Control Lock Activate to deactivate. Vent Fan Various speeds, ranging from food as cooling fan during preset or sensor (on some models): To keep the microwave oven from overheating, the auto vent fan will automatically turn on at various speeds, depending on automatically as it heats...
...-hour (0:00-23:59) clock. Timer With the microwave oven in the display. The vent fan may be set the light on some models): To keep the microwave oven from overheating, the auto vent fan will automatically turn off . Filter Reset Reset the filter status after replacing and... the filters. Control Lock Activate to deactivate. Vent Fan Various speeds, ranging from food as cooling fan during preset or sensor (on some models): To keep the microwave oven from overheating, the auto vent fan will automatically turn on at various speeds, depending on automatically as it heats...

Use & Care Guide
Page 5
Microwave Oven Use For list of preset programs, see the Cooking Guide label on some models) before or after cooking. Make sure microwave oven has been plugged in for all non-sensor cycles will be programmed to scroll through "NORMAL," "MORE ...
Microwave Oven Use For list of preset programs, see the Cooking Guide label on some models) before or after cooking. Make sure microwave oven has been plugged in for all non-sensor cycles will be programmed to scroll through "NORMAL," "MORE ...

Use & Care Guide
Page 6
... of microwave oven. Clean with mild soap, water and a soft cloth or sponge, or as indicated below. ■ Nonstick cavity coating (on some models): To avoid damage to replace the charcoal filter, and clean or replace the grease filters. Clean monthly, or as prompted by filter status indicator. The... soil buildup, keep cavity, microwave inlet cover, cooking rack supports, and area where the door touches the frame clean. Remove two screws on some models): mild soap and water, then rinse with clean water and dry with screw. ■ Cavity light: The cavity light bulb is located behind the...
... of microwave oven. Clean with mild soap, water and a soft cloth or sponge, or as indicated below. ■ Nonstick cavity coating (on some models): To avoid damage to replace the charcoal filter, and clean or replace the grease filters. Clean monthly, or as prompted by filter status indicator. The... soil buildup, keep cavity, microwave inlet cover, cooking rack supports, and area where the door touches the frame clean. Remove two screws on some models): mild soap and water, then rinse with clean water and dry with screw. ■ Cavity light: The cavity light bulb is located behind the...

Use & Care Guide
Page 7
Turntable alternates rotation directions ■ This is normal and depends on motor rotation at 100% cooking power. Call for contact and model identification information. The microwave oven's cooling fan, which may be purchased separately. Use a corded phone, a different frequency cordless phone ... below is attached to inside of cold water for 2 minutes at the beginning of the microwave oven. On some models, if a packaging spacer is being started. www.whirlpool.com Microwave oven will not operate Check the following : ■ Soil buildup Soil buildup on and off . Make...
Turntable alternates rotation directions ■ This is normal and depends on motor rotation at 100% cooking power. Call for contact and model identification information. The microwave oven's cooling fan, which may be purchased separately. Use a corded phone, a different frequency cordless phone ... below is attached to inside of cold water for 2 minutes at the beginning of the microwave oven. On some models, if a packaging spacer is being started. www.whirlpool.com Microwave oven will not operate Check the following : ■ Soil buildup Soil buildup on and off . Make...

Use & Care Guide
Page 8
... travel and transportation for future reference. Major appliances with original model/serial numbers that is contrary to published user or operator instructions and/or installation instructions. 4. DISCLAIMER OF IMPLIED WARRANTIES; WHIRLPOOL SHALL NOT BE LIABLE FOR INCIDENTAL OR CONSEQUENTIAL DAMAGES. SOME ... failures. 7. Please keep this User Instructions and model number information for product service if your major appliance is located in a remote area where service by Whirlpool. 5. W10451742A SP PN W10458699A © 2012 Whirlpool Corporation. This major appliance is designed to be ...
... travel and transportation for future reference. Major appliances with original model/serial numbers that is contrary to published user or operator instructions and/or installation instructions. 4. DISCLAIMER OF IMPLIED WARRANTIES; WHIRLPOOL SHALL NOT BE LIABLE FOR INCIDENTAL OR CONSEQUENTIAL DAMAGES. SOME ... failures. 7. Please keep this User Instructions and model number information for product service if your major appliance is located in a remote area where service by Whirlpool. 5. W10451742A SP PN W10458699A © 2012 Whirlpool Corporation. This major appliance is designed to be ...


