
Owners Manual
Page 1
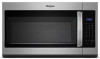
... glass jars are not followed. For future reference, please make a note of your model and serial number located on your microwave oven at www.whirlpool.ca. WARNING You can be killed or seriously injured if you don't follow the safety alert symbol and either the word "DANGER" or "WARNING.... I The microwave oven must be heated in the provided Installation Instructions. IMPORTANT SAFETY INSTRUCTIONS When using the microwave oven. for purchasing this manual and on the front facing of injury, and tell you what can kill or hurt you how to reduce the chance of the microwave ...
... glass jars are not followed. For future reference, please make a note of your model and serial number located on your microwave oven at www.whirlpool.ca. WARNING You can be killed or seriously injured if you don't follow the safety alert symbol and either the word "DANGER" or "WARNING.... I The microwave oven must be heated in the provided Installation Instructions. IMPORTANT SAFETY INSTRUCTIONS When using the microwave oven. for purchasing this manual and on the front facing of injury, and tell you what can kill or hurt you how to reduce the chance of the microwave ...
Owners Manual
Page 2
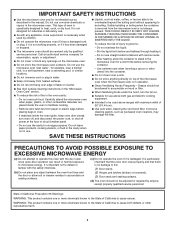
... between the oven front face and the door or allow the container to heat, cook, or dry food. for example, near a kitchen sink, in the manual. Stir the liquid both gas and electric cooking equipment. I To reduce the risk of injury to the State of table or counter. I Do not cover...
... between the oven front face and the door or allow the container to heat, cook, or dry food. for example, near a kitchen sink, in the manual. Stir the liquid both gas and electric cooking equipment. I To reduce the risk of injury to the State of table or counter. I Do not cover...

Owners Manual
Page 4
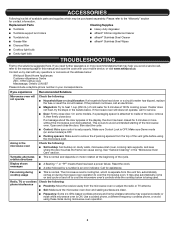
.... Clean monthly. Remove 2 screws on cleaning products. Replace the vent grille by arcing due to enter power level (10-90), then touch the Start control. Manual Cooking/Stage Cooking Soften/Melt Touch COOK TIME, touch number keypads to enter time, touch COOK POWER (if not 100%), touch number keypads to soil...
.... Clean monthly. Remove 2 screws on cleaning products. Replace the vent grille by arcing due to enter power level (10-90), then touch the Start control. Manual Cooking/Stage Cooking Soften/Melt Touch COOK TIME, touch number keypads to enter time, touch COOK POWER (if not 100%), touch number keypads to soil...
Owners Manual
Page 5
... packing spacers from the top of the vent grille before using these items during microwave oven operation to the warranty page in this manual and scan the code with any questions or concerns at the address below . Please refer to avoid unintended starting of the cycle. ...try the steps in the display, the door has been closed for assistance. If a message about the door appears in the bullets below : Whirlpool Brand Home Appliances Customer eXperience Centre 200 - 6750 Century Ave. Turntable alternates ■■ This is normal. If you experience Recommended Solutions ...
... packing spacers from the top of the vent grille before using these items during microwave oven operation to the warranty page in this manual and scan the code with any questions or concerns at the address below . Please refer to avoid unintended starting of the cycle. ...try the steps in the display, the door has been closed for assistance. If a message about the door appears in the bullets below : Whirlpool Brand Home Appliances Customer eXperience Centre 200 - 6750 Century Ave. Turntable alternates ■■ This is normal. If you experience Recommended Solutions ...
Installation Instructions
Page 1
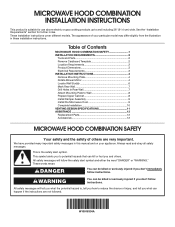
... "DANGER" or "WARNING." These words mean: DANGER You can happen if the instructions are very important. We have provided many important safety messages in this manual and on your particular model may differ slightly from the illustration in Rear Wall 7 Attach Mounting Plate to reduce the chance of injury, and tell...
... "DANGER" or "WARNING." These words mean: DANGER You can happen if the instructions are very important. We have provided many important safety messages in this manual and on your particular model may differ slightly from the illustration in Rear Wall 7 Attach Mounting Plate to reduce the chance of injury, and tell...


