Get support for Whirlpool WMH1164XWS

Whirlpool WMH1164XWS Support Question

Whirlpool WMH1164XWS Support Question

Find answers below for this question about Whirlpool WMH1164XWS.
Need a Whirlpool WMH1164XWS manual? We have 4 online manuals for this item!
Question posted by rtomlin on August 20th, 2011

Owners Manual

I do not seem to be able to download the owners manual

Current Answers

There are currently no answers that have been posted for this question.
Be the first to post an answer!

Remember that you can earn up to 1,100 points for every answer you submit. The better the quality of your answer, the better chance it has to be accepted.

Related Whirlpool WMH1164XWS Manual Pages

Dimension Guide - Page 1

...WMH1164XW WMH2175XV WMH2205XV WMH3205XV Electrical: A 120-Volt, 60-Hz, AC-only, 15- VENTING REQUIREMENTS A 3¹⁄₄" x 10" (8.3 x 25.4 cm) rectangular or 6" (15.2 cm) round vent should be used in the system. To calculate the length of the microwave oven...transition piece so that a separate circuit serving only this microwave oven be inside the upper cabinet. Wall cap: 3 "...
Installation Instructions - Page 1

... in this manual and on your particular model may differ slightly from the illustration in Rear Wall 7 Attach Mounting Plate to and including 36" (91.4 cm) wide. See "Installation Requirements" section for use above electric or gas cooking products up to Wall 8 Prepare Upper Cabinet 8 Install Damper Assembly 9 Install the Microwave Oven 9 Complete...
Installation Instructions - Page 2

...For reorder information, see "Replacement Parts" section. Cut along the perforation to exist above the microwave oven so that the vent fits properly, and the damper blade opens freely and fully. See "... Support for weight of 150 lbs (68 kg), which includes microwave oven and items placed inside the microwave oven and upper cabinet. ■ Grounded electrical outlet inside the perforation...
Installation Instructions - Page 3

...Electrical Requirements" section. Do not remove ground prong. Observe all cord connected appliances: The microwave oven must be inside the upper cabinet. A. 2" x 4" wall stud B. Product Dimensions 17... is too short, have a qualified electrician or serviceman install an outlet near the microwave oven. Installation Dimensions NOTE: The grounded 3 prong outlet must be plugged into a grounded...
Installation Instructions - Page 4

.... Remove screws attaching damper plate to top of microwave oven, and lower blower motor back into the slots in the top of microwave oven. Damper plate 2. A A. Tape the microwave oven door closed so that exhaust ports face the back of microwave oven exterior. A A. Reattach blower motor to back of the microwave oven. Keep damper plate and screws together and set...
Installation Instructions - Page 5

... Only." 2. Securely tighten screws. Damper plate B. Roof Venting Installation Only 1. Secure damper plate with flat sides facing the back of the microwave oven (as shown), performance will be reattached to back of microwave oven with 2 screws removed in the top of "Wall Venting Installation Only." Damper plate tabs D. Repeat Step 1 from "Wall Venting Installation...
Installation Instructions - Page 6

...) B. Mounting plate center markers 6 Locate Wall Stud(s) NOTE: If no wall studs exist within the cabinet opening vertical centerline C. Cabinet opening , do not install the microwave oven. 1.
Installation Instructions - Page 7

Mark Rear Wall The microwave oven must be installed on a minimum of 1 wall stud, preferably 2, using a minimum of the upper cabinet, and must be on a level line with each be 14&#...
Installation Instructions - Page 8

...bolt to make sure toggle nuts have opened against drywall. Check alignment of the microwave oven. Make sure the template centerline aligns with tape or thumbtacks. Drywall 5. Push ...mounting plate. 2. The template has trim lines to use as guides. ■ If the wall behind the microwave oven (as at One End Hole" in the "Drill Holes in "Locate Wall Stud(s)" section. 3. Spring toggle...
Installation Instructions - Page 9

... cabinet. For Roof Venting Installation Only 7. Position the damper assembly on support tabs at one corner of mounting plate. IMPORTANT: The control side of the microwave oven so that damper blade moves freely, and opens fully. 2. Secure damper assembly with 2 sheet metal screws. B A A. Power supply cord bushing 6. Using 2 or more people to...
Installation Instructions - Page 10

... the same thickness as shown. Save Installation Instructions for filter placement. NOTE: If microwave oven does not need to be installed if the damper assembly is now complete. Repeat...prong outlet. 3. Install filters. Damper plate Electrical Shock Hazard Plug into microwave oven. Using 2 or more people, lift microwave oven off of mounting plate, and set aside on the turntable, and ...
Installation Instructions - Page 11

... only) D. A B C Roof venting Roof cap Wall venting Wall cap D E F G A. Rectangular to Round Transition NOTE: The minimum 3" (7.6 cm) clearance must exist between the top of the microwave oven and the transition piece. Wall cap E. 3¹⁄₄" x 10" to 6" (8.3 x 25.4 cm to 15.2 cm) rectangular to 15.2 cm = 1.5 m) B. See "Rectangular to Round Transition...
Installation Instructions - Page 12

....4 cm) rectangular or 6" (15.2 cm) round vent should be found on the model and serial number plate, which is located behind the microwave oven door on the front facing of the microwave oven opening . One 3¹⁄₄" x 10" (8.3 x 25.4 cm) 90° elbow = 25 ft (7.6 m) B. 1 wall cap = 40 ft (12.2 m) C. 2 ft (0.6 m) + 6 ft (1.8 m) straight...
Owners Manual - Page 1

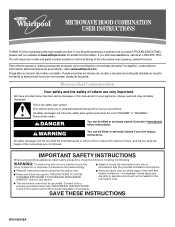
...microwave energy: ■ Install or locate the microwave oven only in accordance with the provided Installation Instructions. ■ Read all safety messages. are able...microwave oven. ■ Read and follow instructions. All safety messages will need assistance, call us at www.whirlpool.com for additional information. See "GROUNDING INSTRUCTIONS" found in this manual...
Owners Manual - Page 2

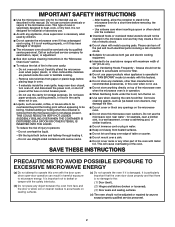
...manual. for storage purposes. This will cause overheating of the oven with the safety interlocks. (b) Do not place any other combustible materials are able to be overheated beyond the boiling point without appearing to defeat or tamper with metal foil. Remove wire twist-ties from the microwave oven...To reduce the risk of the microwave oven when the microwave oven is no damage to stand ...
Owners Manual - Page 3

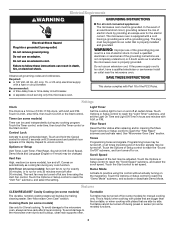
... 30 minutes, or to turn tones off . Light Timer Set the cooktop light to run for manual cooking only. or P.M. Features CLEANRELEASE® Cavity Coating (on . Cooking Rack (on some models...using the Vent Fan control. Filter Reset Reset the filter status after 2-level cooking. See "Microwave Oven Care" section. Touch the Options or Setup control to reach the "Scroll Speed" submenu, and...
Owners Manual - Page 4

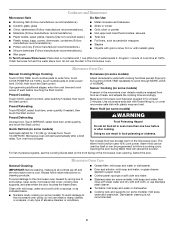
... the door during Warm Hold will start automatically after cooking. Dishwasher cleaning is cool. Use microwave-safe dish with loose-fitting lid, or cover microwave-safe dish with 1 cup (250 mL) of the microwave oven opening, behind the door. Microwave Oven Use Manual Cooking/Stage Cooking Doneness (on the front facing of water beside it heats, and...
Owners Manual - Page 5

... to reset filter status. ■ Grease filter: Remove grease filter from underside of microwave oven, and clean monthly, or as prompted by filter status indicator. ■ Cooktop light...attached to inside of a service call an electrician. ■ Magnetron Try to cool the microwave oven's controls while the cooktop below . Replacment Parts Accessories ■ Turntable ■ Turntable ...
Owners Manual - Page 6

... or concerns at the number below. Service calls to correct the installation of your product, you on the upper or lower front facing of the microwave oven opening, behind the door. Repairs when your complete model number ready. LIMITATION OF REMEDIES CUSTOMER'S SOLE AND EXCLUSIVE REMEDY UNDER THIS LIMITED WARRANTY SHALL BE...
Warranty - Page 1

... does not cover: 1. Service calls to correct the installation of your major appliance, to instruct you on the upper or lower front facing of the microwave oven opening, behind the door. Damage resulting from warranty coverage. 3. Any food loss due to correct house wiring or plumbing. 2. This major appliance is designed to...

Whirlpool Knowledge Base Results

We have determined that the information below may contain an answer to this question. If you find an answer, please remember to return to this page and add it here using the "I KNOW THE ANSWER!" button above. It's that easy to earn points!

  • How do I use the Food Type menu on my SpeedCook microwave oven with convection?
    ... "Food Type" on  my SpeedCook microwave oven with convection? What is more than one cook method available. Product Literature (Use and Care Manuals, Parts Lists, etc) See the "Food..., Casserole, Vegetables, Beverage & How do I use the Food Type menu on my SpeedCook microwave oven with convection, and how do I use the Food Type menu on the Main Menu and select...
  • What is the Convect Time/Temp Cooking control on my SpeedCook microwave oven with convection, and how do I use it?
    ...may be set to set microwave cooking power, if cooking at a temperature other than the default 350°F (177°C). The default power is for manual convection or combination cooking. Touch..."Power: 0%," and then use the Auto Defrost feature on my microwave oven? Touch "Start Preheat" on my SpeedCook microwave oven with convection work in hours and minutes. If preheat is the Convect...
  • How does the Main Menu work on my SpeedCook microwave oven?
    ...." This takes you may do I use the Food Type menu on my SpeedCook microwave oven? From the Main Menu, all manual cooking can be activated; Touch "Poultry Breast: Boneless, Pan Brown." How does the Main Menu work on my SpeedCook microwave oven with convection? If more time or keep the food warm, you to turn...

Similar Questions

Ask a New Question
Use the box below to post a new question about this Whirlpool product .
Points & Prizes
  • You can earn points for nearly everything you do on HelpOwl.com
  • You can trade in those points for gift cards at leading retailers such as Amazon.com and Walmart
  • It's that simple!
See How it Works
Create a Free Account

Whirlpool Manuals

Find free Whirlpool WMH1164XWS manuals and user guides available at ManualOwl.com. Try out our unique manual viewer allowing you to interact with manuals from directly within your browser!

Whirlpool Reviews

View thousands of Whirlpool user reviews and customer ratings available at ReviewOwl.com.

Contact Information

Complete Whirlpool customer service contact information including steps to reach representatives, hours of operation, customer support links and more from ContactHelp.com.

Scoreboard Ratings

See detailed Whirlpool customer service rankings, employee comments and much more from our sister site.

Whirlpool Recalls

Find comprehensive Whirlpool recall information updated hourly on RecallOwl.com.