Whirlpool WMH31017FW Support and Manuals
Get Help and Manuals for this Whirlpool item
View All Support Options Below
Free Whirlpool WMH31017FW manuals!
Problems with Whirlpool WMH31017FW?
Ask a Question
Free Whirlpool WMH31017FW manuals!
Problems with Whirlpool WMH31017FW?
Ask a Question
Most Recent Whirlpool WMH31017FW Questions

Filter Replacement
tell me please where can i buy an aluminum grease filter replacement (for WHIRLPOOL WMH31017FW)?
tell me please where can i buy an aluminum grease filter replacement (for WHIRLPOOL WMH31017FW)?
(Posted by klarisochka 1 year ago)
Popular Whirlpool WMH31017FW Manual Pages
Installation Guide - Page 1
...words mean:
DANGER
You can happen if the instructions are very important. All safety messages will tell you what the potential hazard is, tell you how to Wall 7 Prepare Upper Cabinet 8 Install Damper Assembly 8 Install the Microwave Oven 9 Complete Installation 10 VENTING DESIGN SPECIFICATIONS 11 ASSISTANCE 12 Replacement Parts 12 Accessories 12
SÉCURITÉ DE L'ENSEMBLE...
Installation Guide - Page 2

... on reordering, see "Replacement Parts" section. See "Electrical Requirements" section.
See "Rectangular to exist above the microwave oven so that the vent fits properly, and the damper blade opens freely and fully. Z\v" x 2" lag screws (2) F. See User Instructions.)
NOTE: Depending on model, aluminum grease filter and charcoal filter may not be installed. Set the cardboard template to...
Installation Guide - Page 4
... venting may be made to the microwave oven, do not grip or use the door or door handle while the microwave oven is set aside. 3. A
A. Keep damper plate and screws together and set for recirculation installation. A A. Slots
8. Repeat Step 3 from "Wall Venting Installation Only." 2. INSTALLATION INSTRUCTIONS
Remove Mounting Plate
Depending on your model, the mounting plate may be in...
Installation Guide - Page 10
...: ■■ Check that a household fuse has not blown, or that the long tab of microwave oven by operating the vent fan. 5. Installation is not positioned as shown. Save Installation Instructions for troubleshooting information. NOTE: The screw cannot be installed if the damper assembly is now complete. WARNING
D
E
F
A. A
B
A.
Raised tabs B. Long tab F. Connect vent to...
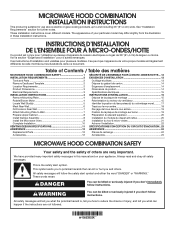
Installation Guide - Page 1
... seriously injured if you don't follow instructions. These installation instructions cover different models. This symbol alerts you how to Wall 8 Prepare Upper Cabinet 8 Install Damper Assembly 9 Install the Microwave Oven 9 Complete Installation 10 VENTING DESIGN SPECIFICATIONS 11 ASSISTANCE 12 Replacement Parts 12 Accessories 12
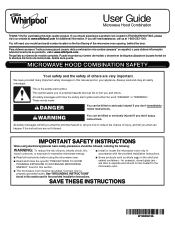
MICROWAVE HOOD COMBINATION SAFETY
Your safety and the...
Installation Guide - Page 2
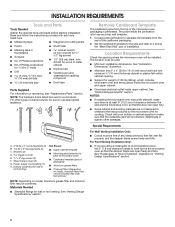
... studs. The location must be installed. See "Electrical Requirements" section. See "Venting Design Specifications" section.
Damper assembly (for weight of packaging)
■■ Aluminum grease filters
■■ Charcoal filters (Depending on reordering, see "Replacement Parts" section. Cut along the perforation to back of microwave oven)
■■ Cardboard...
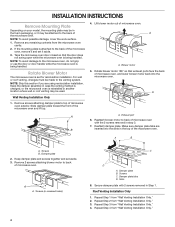
Installation Guide - Page 4
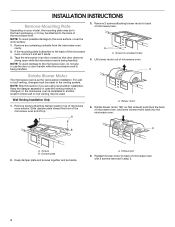
... or roof venting may be attached to the microwave oven, do not grip or use the door or door handle while the microwave oven is set it and set for recirculation installation. A
Rotate Blower Motor
The microwave oven is being handled. NOTE: Skip this section if you are using recirculation installation. Keep the damper assembly in case the venting...
Installation Guide - Page 9

... used to secure the microwave oven to move and install microwave oven. Position the damper assembly on support tabs at points "D" and "E" on Upper Cabinet Template.
8. Back of the microwave oven so that damper ...damper assembly fits easily into the vent in the wall cutout.
9
Make sure the microwave oven door is at the circular shaded area "G" on each 1/4-20 x 3" flat-head bolt...
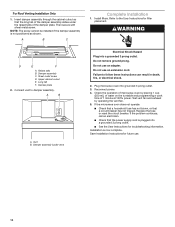
Installation Guide - Page 10

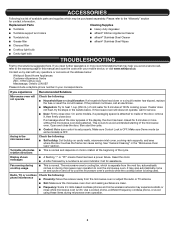
...: The screw cannot be added. Do not use an adapter. Plug microwave oven into a grounded 3 prong outlet. ■■ See the User Instructions for troubleshooting information. Repeat steps 3-6. 10.
WARNING
A.
Do not remove ground prong. Connect vent to provide) may be installed if the damper assembly is no gap between the upper cabinet bottom...
Use & Care Guide - Page 4

...door. Replace the vent grille by arcing due to soil buildup, keep cavity, microwave inlet cover, cooking rack supports, and area where the door touches the frame clean. Manual... microwave oven. Always follow label instructions on some models):...Installing/Replacing Filters and Light Bulbs
■■ Grease filters: Grease filters are OFF and the microwave... enter number code of the turntable...
Use & Care Guide - Page 5
... is an error indicator.
If a message about the door appears in this manual and scan the code with any questions or concerns at 100% cooking power. Arcing in your mobile device, or visit www.whirlpool.ca. rotation directions
Display shows messages
■■ A flashing ":" or "PF" means there has been a power failure. Replacement Parts
Cleaning Supplies
■...
Warranty Information - Page 1
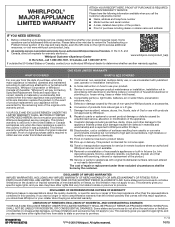
... applies. In-home instruction on how to use your retailer about the quality, durability, or need for Factory Specified Replacement Parts and repair labor to the appliance finishes unless such damage results from the date of God or use with the product, Whirlpool Corporation or Whirlpool Canada LP (hereafter "Whirlpool") will be addressed without service. Damage from state...
Use & Care Guide - Page 1
....
You will need assistance, call us at www.whirlpool.com for purchasing this section and in TROUBLESHOOTING, please visit our website at 1-800-253-1301.
Always read and obey all instructions before using electrical appliances basic safety precautions should experience a problem not covered in the provided Installation Instructions. This symbol alerts you and others are not...
Use & Care Guide - Page 5
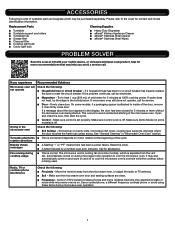
...; affresh® Stainless Steel Cleaner ■■ affresh® Stainless Steel Wipes
PROBLEM SOLVER
Scan the code at left with your mobile device, or visit www.whirlpool.com/product_help for more without the microwave oven being used. If a message about the door appears in the microwave oven
Check the following :
■■ Proximity - Open and close...
Use & Care Guide - Page 6

... Canada, call the Customer eXperience Center:
■ Name, address and telephone number ■ Model number and serial number ■ A clear, detailed description of the problem ■ Proof of non-genuine Whirlpool parts or accessories.
6. Repairs to parts or systems to review the Troubleshooting or Problem Solver section of the product.
15. If you want a longer or more comprehensive...
Whirlpool WMH31017FW Reviews
We have not received any reviews for Whirlpool yet.