
Installation Instructions
Page 1
...Assembly 9 Install the Microwave Oven 9 Complete Installation 10 VENTING DESIGN SPECIFICATIONS 11 ASSISTANCE 12 Replacement Parts 12 Accessories 12 MICROWAVE HOOD COMBINATION SAFETY Your safety and the safety of Contents MICROWAVE HOOD COMBINATION SAFETY 1 INSTALLATION ...REQUIREMENTS 2 Tools and Parts 2 Remove Cardboard Template 2 Location Requirements 2 Product Dimensions 3 Electrical Requirements 3 INSTALLATION INSTRUCTIONS 4 Remove Mounting Plate 4 ...
...Assembly 9 Install the Microwave Oven 9 Complete Installation 10 VENTING DESIGN SPECIFICATIONS 11 ASSISTANCE 12 Replacement Parts 12 Accessories 12 MICROWAVE HOOD COMBINATION SAFETY Your safety and the safety of Contents MICROWAVE HOOD COMBINATION SAFETY 1 INSTALLATION ...REQUIREMENTS 2 Tools and Parts 2 Remove Cardboard Template 2 Location Requirements 2 Product Dimensions 3 Electrical Requirements 3 INSTALLATION INSTRUCTIONS 4 Remove Mounting Plate 4 ...

Installation Instructions
Page 2
...assembly (for wall or roof venting) Not Shown: Upper cabinet template Mounting plate (attached to it during the "Mark Rear Wall" part of the microwave oven packaging is perforated. The piece inside upper cabinet. Set the cardboard template to the side and refer to back ...of microwave oven) Cardboard template (part of the cardboard packaging. 2. See "Electrical Requirements" section. hole drill ■ No. 2 Phillips screwdriver bit for wood or metal ■ No...
...assembly (for wall or roof venting) Not Shown: Upper cabinet template Mounting plate (attached to it during the "Mark Rear Wall" part of the microwave oven packaging is perforated. The piece inside upper cabinet. Set the cardboard template to the side and refer to back ...of microwave oven) Cardboard template (part of the cardboard packaging. 2. See "Electrical Requirements" section. hole drill ■ No. 2 Phillips screwdriver bit for wood or metal ■ No...

Installation Instructions
Page 8
... the top of "Mark Rear Wall." Mounting plate C. Push the 2 bolts with toggle nuts through the drywall, and finger tighten the bolts to the thickest part of the rear wall (for example, the thickness of mounting plate, making sure it is level. 8. Wall Stud at Both End Holes (Figure 4) 1. Push the...
... the top of "Mark Rear Wall." Mounting plate C. Push the 2 bolts with toggle nuts through the drywall, and finger tighten the bolts to the thickest part of the rear wall (for example, the thickness of mounting plate, making sure it is level. 8. Wall Stud at Both End Holes (Figure 4) 1. Push the...

Installation Instructions
Page 12
... the system you need additional assistance, call us at our toll free number or visit our website listed in the "Tools and Parts" section) A A. Each panel is a list of the installation hardware needs to be installed to round transition piece must be replaced...located behind the door. ■ Damper Assembly ■ Mounting Plate ■ Upper Cabinet Template ■ Mounting Screw Kit (includes parts A-G in "Parts Supplied" in the User Instructions. ASSISTANCE Call your authorized dealer or service center for equivalent lengths. Accessories Filler Panel Kits are available from...
... the system you need additional assistance, call us at our toll free number or visit our website listed in the "Tools and Parts" section) A A. Each panel is a list of the installation hardware needs to be installed to round transition piece must be replaced...located behind the door. ■ Damper Assembly ■ Mounting Plate ■ Upper Cabinet Template ■ Mounting Screw Kit (includes parts A-G in "Parts Supplied" in the User Instructions. ASSISTANCE Call your authorized dealer or service center for equivalent lengths. Accessories Filler Panel Kits are available from...

Warranty Information
Page 1
...or use your major appliance is located in accordance with published installation instructions. 11. Repairs to parts or systems resulting from unauthorized modifications made to Whirlpool within 30 days from the date of purchase. 6. ITEMS EXCLUDED FROM WARRANTY This limited warranty ...is operated and maintained according to instructions attached to or furnished with the product, Whirlpool Corporation or Whirlpool Canada LP (hereafter "Whirlpool") will pay for Factory Specified Parts and repair labor to obtain service under these excluded circumstances shall be provided by the...
...or use your major appliance is located in accordance with published installation instructions. 11. Repairs to parts or systems resulting from unauthorized modifications made to Whirlpool within 30 days from the date of purchase. 6. ITEMS EXCLUDED FROM WARRANTY This limited warranty ...is operated and maintained according to instructions attached to or furnished with the product, Whirlpool Corporation or Whirlpool Canada LP (hereafter "Whirlpool") will pay for Factory Specified Parts and repair labor to obtain service under these excluded circumstances shall be provided by the...

Use & Care Guide
Page 1
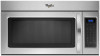
... ■ The microwave oven must be grounded. Puede encontrar su número de modelo y de serie en la etiqueta ubicada en la parte frontal de la abertura del horno de microondas, detrás de la puerta. This symbol alerts you and others are not followed. WARNING ... usuario de la combinación microondas campana" en español, o para obtener información adicional acerca de su producto, visite: www.whirlpool.com Tenga listo su número de modelo completo. Always read and obey all instructions before using electrical appliances basic safety precautions should not be...
... ■ The microwave oven must be grounded. Puede encontrar su número de modelo y de serie en la etiqueta ubicada en la parte frontal de la abertura del horno de microondas, detrás de la puerta. This symbol alerts you and others are not followed. WARNING ... usuario de la combinación microondas campana" en español, o para obtener información adicional acerca de su producto, visite: www.whirlpool.com Tenga listo su número de modelo completo. Always read and obey all instructions before using electrical appliances basic safety precautions should not be...

Use & Care Guide
Page 2
... in operation. ■ When flambeing foods under the hood, turn oven off, and disconnect the power cord, or shut off the pad and touch electrical parts involving a risk of injury to be boiling. This type of 36" (91.44 cm). ■ Clean Ventilating Hoods Frequently - It is not designed ...persons: - for a short time before placing bags in harmful exposure to defeat or tamper with the safety interlocks. (b) Do not place any materials, other part of the oven. Remove wire twist-ties from heated surfaces. ■ Do not let cord hang over edge of fire in a wet basement, or near...
... in operation. ■ When flambeing foods under the hood, turn oven off, and disconnect the power cord, or shut off the pad and touch electrical parts involving a risk of injury to be boiling. This type of 36" (91.44 cm). ■ Clean Ventilating Hoods Frequently - It is not designed ...persons: - for a short time before placing bags in harmful exposure to defeat or tamper with the safety interlocks. (b) Do not place any materials, other part of the oven. Remove wire twist-ties from heated surfaces. ■ Do not let cord hang over edge of fire in a wet basement, or near...

Use & Care Guide
Page 3
... minutes more (off . Do not use of the grounding plug can result in a risk of the FCC Rules. SAVE THESE INSTRUCTIONS This device complies with Part 18 of electric shock. Do not remove ground prong. WARNING: Improper use an extension cord.
... minutes more (off . Do not use of the grounding plug can result in a risk of the FCC Rules. SAVE THESE INSTRUCTIONS This device complies with Part 18 of electric shock. Do not remove ground prong. WARNING: Improper use an extension cord.

Use & Care Guide
Page 5
...avoid using these items during cooktop usage ■ This is attached to inside of the door, remove it, then firmly close door. Replacement Parts Cleaning Supplies ■ Turntable ■ Turntable support and rollers ■ Turntable hub ■ Grease filter ■ Charcoal filter ■ Cooktop...fuse or circuit breaker If a household fuse has blown or a circuit breaker has tripped, replace the fuse or reset the circuit breaker. www.whirlpool.com Microwave oven will not operate Check the following : ■ Soil buildup Soil buildup on during microwave oven operation to heat 1 cup ...
...avoid using these items during cooktop usage ■ This is attached to inside of the door, remove it, then firmly close door. Replacement Parts Cleaning Supplies ■ Turntable ■ Turntable support and rollers ■ Turntable hub ■ Grease filter ■ Charcoal filter ■ Cooktop...fuse or circuit breaker If a household fuse has blown or a circuit breaker has tripped, replace the fuse or reset the circuit breaker. www.whirlpool.com Microwave oven will not operate Check the following : ■ Soil buildup Soil buildup on during microwave oven operation to heat 1 cup ...

Use & Care Guide
Page 6
... REMEDIES CUSTOMER'S SOLE AND EXCLUSIVE REMEDY UNDER THIS LIMITED WARRANTY SHALL BE PRODUCT REPAIR AS PROVIDED HEREIN. Consumable parts are excluded from unauthorized modifications made to view FAQs (Frequently Asked Questions), visit www.whirlpool.com. Service must be easily determined. Damage resulting from your complete model number ready. Have your major appliance...
... REMEDIES CUSTOMER'S SOLE AND EXCLUSIVE REMEDY UNDER THIS LIMITED WARRANTY SHALL BE PRODUCT REPAIR AS PROVIDED HEREIN. Consumable parts are excluded from unauthorized modifications made to view FAQs (Frequently Asked Questions), visit www.whirlpool.com. Service must be easily determined. Damage resulting from your complete model number ready. Have your major appliance...


