
Installation Instructions
Page 2
..."Venting Design Specifications" section. 2 For Roof Venting Installation Only: ■ If you are not designed to withstand the heat produced by the microwave oven for 1/4" x 2" lag screws ■ Scissors ■ 1½" (3.8 cm) diam. hole drill ■ No. 2 Phillips ... information, see "Replacement Parts" section. For other damages. See "Venting Design Specifications" section. Sheet metal screws (2) G. Damper assembly (for weight of installation. See "Installation Dimensions" illustration. ■ Minimum one 2" x 4" (50.8 x 101.6 mm) wood wall stud and minimum...
..."Venting Design Specifications" section. 2 For Roof Venting Installation Only: ■ If you are not designed to withstand the heat produced by the microwave oven for 1/4" x 2" lag screws ■ Scissors ■ 1½" (3.8 cm) diam. hole drill ■ No. 2 Phillips ... information, see "Replacement Parts" section. For other damages. See "Venting Design Specifications" section. Sheet metal screws (2) G. Damper assembly (for weight of installation. See "Installation Dimensions" illustration. ■ Minimum one 2" x 4" (50.8 x 101.6 mm) wood wall stud and minimum...

Installation Instructions
Page 9
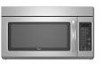
... holes. 2. NOTE: If venting through the power supply cord hole in place. 9 A B C D Install the Microwave Oven WARNING Excessive Weight Hazard Use two or more people, lift microwave oven and hang it on the back of mounting plate. Place a washer on the template. B A A. These are ...for the power supply cord. Handle the microwave oven gently. 1. Mounting plate B. Support tabs 4. Cut the ...
... holes. 2. NOTE: If venting through the power supply cord hole in place. 9 A B C D Install the Microwave Oven WARNING Excessive Weight Hazard Use two or more people, lift microwave oven and hang it on the back of mounting plate. Place a washer on the template. B A A. These are ...for the power supply cord. Handle the microwave oven gently. 1. Mounting plate B. Support tabs 4. Cut the ...