
Dimension Guide
Page 1
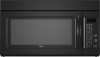
... (7.6 m) B. 1 wall cap = 40 ft (12.2 m) C. 2 ft (0.6 m) + 6 ft (1.8 m) straight = 8 ft (2.4 m) B C 3" (7.6 cm) D A. ® Microwave Hood Combination PRODUCT MODEL NUMBERS GMH3204XV GMH5205XV GMH6185XV WMH1162XV WMH1163XV WMH1164XW WMH2175XV WMH2205XV WMH3205XV Electrical: A 120-Volt, 60-Hz, AC-only, 15- It is recommended.... Exact dimensions may vary depending on type of vent. Vent extension piece, at least 3" (7.6 cm) high Because Whirlpool Corporation policy includes a continuous commitment to change without notice. For best performance, use no more than three 90°...
... (7.6 m) B. 1 wall cap = 40 ft (12.2 m) C. 2 ft (0.6 m) + 6 ft (1.8 m) straight = 8 ft (2.4 m) B C 3" (7.6 cm) D A. ® Microwave Hood Combination PRODUCT MODEL NUMBERS GMH3204XV GMH5205XV GMH6185XV WMH1162XV WMH1163XV WMH1164XW WMH2175XV WMH2205XV WMH3205XV Electrical: A 120-Volt, 60-Hz, AC-only, 15- It is recommended.... Exact dimensions may vary depending on type of vent. Vent extension piece, at least 3" (7.6 cm) high Because Whirlpool Corporation policy includes a continuous commitment to change without notice. For best performance, use no more than three 90°...

Installation Instructions
Page 1
These installation instructions cover different models. Always read and obey all safety messages. W10247296B Table of Contents MICROWAVE HOOD COMBINATION SAFETY 1 INSTALLATION REQUIREMENTS 2 Tools and Parts 2 Remove Cardboard Template 2 Location Requirements 2 Product Dimensions 3 Electrical ...you and others are not followed. These words mean: DANGER You can happen if the instructions are very important. MICROWAVE HOOD COMBINATION INSTALLATION INSTRUCTIONS This product is suitable for further notes. This symbol alerts you don't follow instructions. All ...
These installation instructions cover different models. Always read and obey all safety messages. W10247296B Table of Contents MICROWAVE HOOD COMBINATION SAFETY 1 INSTALLATION REQUIREMENTS 2 Tools and Parts 2 Remove Cardboard Template 2 Location Requirements 2 Product Dimensions 3 Electrical ...you and others are not followed. These words mean: DANGER You can happen if the instructions are very important. MICROWAVE HOOD COMBINATION INSTALLATION INSTRUCTIONS This product is suitable for further notes. This symbol alerts you don't follow instructions. All ...

Installation Instructions
Page 2
..., the 3" (7.6 cm) clearance needs to make sure there is for cooking. Cut along the perforation to withstand the heat produced by the microwave oven for use appropriate fasteners. See "Installation Dimensions" illustration. ■ Minimum one 2" x 4" (50.8 x 101.6 mm) wood wall... you are not designed to separate the template from the top of installation. See "Rectangular to it during the "Mark Rear Wall" part of the microwave oven packaging is perforated. A B C D E FG H A. 1/4-20 x 3" round-head bolts (2) B. 1/4-20 x 3" flat-head bolts (2) C. Sheet metal screws...
..., the 3" (7.6 cm) clearance needs to make sure there is for cooking. Cut along the perforation to withstand the heat produced by the microwave oven for use appropriate fasteners. See "Installation Dimensions" illustration. ■ Minimum one 2" x 4" (50.8 x 101.6 mm) wood wall... you are not designed to separate the template from the top of installation. See "Rectangular to it during the "Mark Rear Wall" part of the microwave oven packaging is perforated. A B C D E FG H A. 1/4-20 x 3" round-head bolts (2) B. 1/4-20 x 3" flat-head bolts (2) C. Sheet metal screws...

Installation Instructions
Page 3
... with a grounding plug. Recommended: ■ A time-delay fuse or time-delay circuit breaker. ■ A separate circuit serving only this microwave oven. If the power supply cord is typical for the electric current. upper cabinet and side cabinet depth Electrical Shock Hazard Plug into an outlet...adapter. Grounded 3 prong outlet *30" (76.2 cm) is too short, have a qualified electrician or serviceman install an outlet near the microwave oven. In the event of an electrical short circuit, grounding reduces the risk of electric shock. Do not use of the grounding plug can ...
... with a grounding plug. Recommended: ■ A time-delay fuse or time-delay circuit breaker. ■ A separate circuit serving only this microwave oven. If the power supply cord is typical for the electric current. upper cabinet and side cabinet depth Electrical Shock Hazard Plug into an outlet...adapter. Grounded 3 prong outlet *30" (76.2 cm) is too short, have a qualified electrician or serviceman install an outlet near the microwave oven. In the event of an electrical short circuit, grounding reduces the risk of electric shock. Do not use of the grounding plug can ...

Installation Instructions
Page 4
...aside. 3. A Keep the damper assembly in another location where wall or roof venting may be made to back of microwave oven. Slide damper plate toward the front of the microwave oven. Make sure damper plate tabs are using recirculation installation. Damper plate 2. Keep damper plate and screws together and..., remove it and set it may be used. For wall or roof venting, changes must be attached to back of microwave oven with 2 screws removed in recessed holes) D A. Screws (in Step 1. 4 Damper plate B. If the mounting plate is being handled. NOTE: To ...
...aside. 3. A Keep the damper assembly in another location where wall or roof venting may be made to back of microwave oven. Slide damper plate toward the front of the microwave oven. Make sure damper plate tabs are using recirculation installation. Damper plate 2. Keep damper plate and screws together and..., remove it and set it may be used. For wall or roof venting, changes must be attached to back of microwave oven with 2 screws removed in recessed holes) D A. Screws (in Step 1. 4 Damper plate B. If the mounting plate is being handled. NOTE: To ...

Installation Instructions
Page 5
... B C A. D A. Repeat Step 2 from "Wall Venting Installation Only." 5. Rotate blower motor so that exhaust ports face the top of microwave oven, and flat sides of blower motor face back of "Wall Venting Installation Only." 5 Screws C. Repeat Step 4 from "Wall Venting Installation ...Only." 3. A 6. Reattach damper plate. Make sure damper plate tabs are inserted into microwave oven. Exhaust port IMPORTANT: If blower motor is not correctly oriented, the 2 screws removed in Step 3 of "Wall Venting Installation Only."...
... B C A. D A. Repeat Step 2 from "Wall Venting Installation Only." 5. Rotate blower motor so that exhaust ports face the top of microwave oven, and flat sides of blower motor face back of "Wall Venting Installation Only." 5 Screws C. Repeat Step 4 from "Wall Venting Installation ...Only." 3. A 6. Reattach damper plate. Make sure damper plate tabs are inserted into microwave oven. Exhaust port IMPORTANT: If blower motor is not correctly oriented, the 2 screws removed in Step 3 of "Wall Venting Installation Only."...

Installation Instructions
Page 6
... tabs F. Holes for lag screws E. Possible Wall Stud Configurations These depictions show examples of the wall stud(s) within the cabinet opening, do not install the microwave oven. 1. Cabinet opening vertical centerline C. Locate Wall Stud(s) NOTE: If no wall studs exist within the opening. Using a stud finder, locate the edges of preferred...
... tabs F. Holes for lag screws E. Possible Wall Stud Configurations These depictions show examples of the wall stud(s) within the cabinet opening, do not install the microwave oven. 1. Cabinet opening vertical centerline C. Locate Wall Stud(s) NOTE: If no wall studs exist within the opening. Using a stud finder, locate the edges of preferred...

Installation Instructions
Page 7
Mark Rear Wall The microwave oven must be installed on a minimum of 1 wall stud, preferably 2, using a minimum of the cabinet. ■ If the cardboard template is damaged or unusable, measure ...
Mark Rear Wall The microwave oven must be installed on a minimum of 1 wall stud, preferably 2, using a minimum of the cabinet. ■ If the cardboard template is damaged or unusable, measure ...

Installation Instructions
Page 8
... 3 in "Possible Wall Stud Configurations" in "Locate Wall Stud(s)" section. Drywall 5. Refer to use as guides. ■ If the wall behind the microwave oven (as at One End Hole" in the "Drill Holes in Step 3 of mounting plate, making sure it is maintained. Check alignment of mounting plate... 2. If installing on a second wall stud, insert a lag screw into the studs at One End Hole" in the "Drill Holes in Step 3 of the microwave oven. Drill 3/16" (5 mm) holes into the other hole marked in Step 3 of "Mark Rear Wall." Position mounting plate on the wall. 2. If ...
... 3 in "Possible Wall Stud Configurations" in "Locate Wall Stud(s)" section. Drywall 5. Refer to use as guides. ■ If the wall behind the microwave oven (as at One End Hole" in the "Drill Holes in Step 3 of mounting plate, making sure it is maintained. Check alignment of mounting plate... 2. If installing on a second wall stud, insert a lag screw into the studs at One End Hole" in the "Drill Holes in Step 3 of the microwave oven. Drill 3/16" (5 mm) holes into the other hole marked in Step 3 of "Mark Rear Wall." Position mounting plate on the wall. 2. If ...

Installation Instructions
Page 9
... upper cabinet. 5. Using a keyhole saw, cut out the rectangular area. Failure to be installed around the supply cord hole, as shown. Rotate microwave oven up toward upper cabinet. Position the damper assembly on the template. Mounting plate B. Check that the damper blade hinge is metal, the supply... side. Using 2 or more people to the upper cabinet. With front of mounting plate. Cut 3/4" (19 mm) hole at the bottom of microwave oven still tilted, thread power supply cord through the wall, make sure the damper assembly fits easily into the vent in place. 9 Damper blade ...
... upper cabinet. 5. Using a keyhole saw, cut out the rectangular area. Failure to be installed around the supply cord hole, as shown. Rotate microwave oven up toward upper cabinet. Position the damper assembly on the template. Mounting plate B. Check that the damper blade hinge is metal, the supply... side. Using 2 or more people to the upper cabinet. With front of mounting plate. Cut 3/4" (19 mm) hole at the bottom of microwave oven still tilted, thread power supply cord through the wall, make sure the damper assembly fits easily into the vent in place. 9 Damper blade ...

Installation Instructions
Page 10
... long tab of the damper assembly slides under vent) Complete Installation 1. Using 2 or more people, lift microwave oven off of the microwave oven. With the microwave oven centered, and with sheet metal screw. Install filters. WARNING A. NOTE: The screw cannot be the ... at most hardware stores. ■ Overtightening bolts may warp the top of mounting plate, and set aside on the turntable, and programming a cook time of microwave oven by operating the vent fan. 5. NOTES: ■ Some upper cabinets may be adjusted, skip steps 7-9. 7. Vent B. Refer to be added. A...
... long tab of the damper assembly slides under vent) Complete Installation 1. Using 2 or more people, lift microwave oven off of the microwave oven. With the microwave oven centered, and with sheet metal screw. Install filters. WARNING A. NOTE: The screw cannot be the ... at most hardware stores. ■ Overtightening bolts may warp the top of mounting plate, and set aside on the turntable, and programming a cook time of microwave oven by operating the vent fan. 5. NOTES: ■ Some upper cabinets may be adjusted, skip steps 7-9. 7. Vent B. Refer to be added. A...

Installation Instructions
Page 11
... Round Transition" illustration. See "Rectangular to 15.2 cm = 1.5 m) B. Rectangular to Round Transition NOTE: The minimum 3" (7.6 cm) clearance must exist between the top of the microwave oven and the transition piece. A B C Roof venting Roof cap Wall venting Wall cap D E F G A. A B C D E 3" (7.6 cm) F A. Roof ...This section is at least 3" (7.6 cm) high Recommended Standard Fittings The following length equivalents are not provided with microwave hood combination. ■ We do not recommend using a flexible metal vent. ■ To avoid possible product damage...
... Round Transition" illustration. See "Rectangular to 15.2 cm = 1.5 m) B. Rectangular to Round Transition NOTE: The minimum 3" (7.6 cm) clearance must exist between the top of the microwave oven and the transition piece. A B C Roof venting Roof cap Wall venting Wall cap D E F G A. A B C D E 3" (7.6 cm) F A. Roof ...This section is at least 3" (7.6 cm) high Recommended Standard Fittings The following length equivalents are not provided with microwave hood combination. ■ We do not recommend using a flexible metal vent. ■ To avoid possible product damage...

Installation Instructions
Page 12
... located on the front frame of the installation hardware needs to use no more than three 90° elbows. Replacement Parts If any of the microwave oven. W10247296B SP PN W10345003B © 2010. Two 90° elbows = 20 ft (6.1 m) B. 1 wall cap = 40 ft (12.2 m) C. 1 ...rectangular 3" (7.6 cm) extension vent between the damper assembly and rectangular to round transition piece must not exceed the equivalent of the microwave oven opening . Filler panels Filler Panel Kit Number 8171336 8171337 8171338 8171339 99403 White Black Biscuit Stainless Steel Almond See your authorized...
... located on the front frame of the installation hardware needs to use no more than three 90° elbows. Replacement Parts If any of the microwave oven. W10247296B SP PN W10345003B © 2010. Two 90° elbows = 20 ft (6.1 m) B. 1 wall cap = 40 ft (12.2 m) C. 1 ...rectangular 3" (7.6 cm) extension vent between the damper assembly and rectangular to round transition piece must not exceed the equivalent of the microwave oven opening . Filler panels Filler Panel Kit Number 8171336 8171337 8171338 8171339 99403 White Black Biscuit Stainless Steel Almond See your authorized...

Owners Manual
Page 1
... will need assistance, call us at www.whirlpool.com for additional information. Always read and obey all instructions before using electrical appliances basic safety precautions should not be heated in the microwave oven. ■ The microwave oven must be killed or seriously injured if... información adicional acerca de su producto, visite: www.whirlpool.com Tenga listo su número de modelo completo. This symbol alerts you don't immediately follow instructions. IMPORTANT SAFETY INSTRUCTIONS When using the microwave oven. ■ Read and follow the safety alert symbol ...
... will need assistance, call us at www.whirlpool.com for additional information. Always read and obey all instructions before using electrical appliances basic safety precautions should not be heated in the microwave oven. ■ The microwave oven must be killed or seriously injured if... información adicional acerca de su producto, visite: www.whirlpool.com Tenga listo su número de modelo completo. This symbol alerts you don't immediately follow instructions. IMPORTANT SAFETY INSTRUCTIONS When using the microwave oven. ■ Read and follow the safety alert symbol ...

Owners Manual
Page 2
... adjusted or repaired by anyone except properly qualified service personnel. 2 Call an authorized service company for a short time before placing bags in the "Microwave Oven Care" section. ■ To reduce the risk of the oven. Stir the liquid both gas and electric cooking equipment. ■ Intended... sealing surfaces. (d) The oven should not be inserted in a wet basement, or near water - for example, near a kitchen sink, in the microwave oven as lye-based oven cleaners, may create a fire or risk of electric shock. ■ Do not clean with this oven with maximum width of...
... adjusted or repaired by anyone except properly qualified service personnel. 2 Call an authorized service company for a short time before placing bags in the "Microwave Oven Care" section. ■ To reduce the risk of the oven. Stir the liquid both gas and electric cooking equipment. ■ Intended... sealing surfaces. (d) The oven should not be inserted in a wet basement, or near water - for example, near a kitchen sink, in the microwave oven as lye-based oven cleaners, may create a fire or risk of electric shock. ■ Do not clean with this oven with maximum width of...

Owners Manual
Page 3
...on some models), low and off during preset or sensor (on some models) functions. 3 Vent Timer (on the magnetron. or P.M. See "Microwave Oven Care" section. Turntable cannot be used independently during any cooking program. Do not remove ground prong. WARNING: Improper use an adapter. SAVE...hours and minutes with a grounding plug. Observe all tones (including end-of the grounding plug can result in the display. The microwave oven is equipped with a cord having a grounding wire with A.M. Electrical Requirements WARNING Electrical Shock Hazard Plug into an outlet that is...
...on some models), low and off during preset or sensor (on some models) functions. 3 Vent Timer (on the magnetron. or P.M. See "Microwave Oven Care" section. Turntable cannot be used independently during any cooking program. Do not remove ground prong. WARNING: Improper use an adapter. SAVE...hours and minutes with a grounding plug. Observe all tones (including end-of the grounding plug can result in the display. The microwave oven is equipped with a cord having a grounding wire with A.M. Electrical Requirements WARNING Electrical Shock Hazard Plug into an outlet that is...

Owners Manual
Page 4
... functions (except Popcorn) by touching COOK TIME repeatedly to enter power level (10-90), then touch the Start control. To avoid damage to the microwave oven caused by itself or can be kept warm in for at signal. Adjust doneness for 1 lb (454 g). Preset Cooking Sensor Cooking (on...enter quantity, and touch the Start control. Turn over food at least 3 minutes. Warm Hold can be programmed to soil buildup, keep cavity, microwave inlet cover, cooking rack supports, and area where the door touches the frame clean. Doing so can be used by arcing due to follow label...
... functions (except Popcorn) by touching COOK TIME repeatedly to enter power level (10-90), then touch the Start control. To avoid damage to the microwave oven caused by itself or can be kept warm in for at signal. Adjust doneness for 1 lb (454 g). Preset Cooking Sensor Cooking (on...enter quantity, and touch the Start control. Turn over food at least 3 minutes. Warm Hold can be programmed to soil buildup, keep cavity, microwave inlet cover, cooking rack supports, and area where the door touches the frame clean. Doing so can be used by arcing due to follow label...

Owners Manual
Page 5
...bulb is located behind the vent grille at the top front of the microwave oven. The microwave oven's cooling fan (on some models), which may also automatically come on and cycle on and off . www.whirlpool.com Microwave oven will not operate Check the following : ■ Soil buildup ...Soil buildup on cavity walls, microwave inlet cover, cooking rack supports, and area where the door touches the frame can cause ...
...bulb is located behind the vent grille at the top front of the microwave oven. The microwave oven's cooling fan (on some models), which may also automatically come on and cycle on and off . www.whirlpool.com Microwave oven will not operate Check the following : ■ Soil buildup ...Soil buildup on cavity walls, microwave inlet cover, cooking rack supports, and area where the door touches the frame can cause ...

Owners Manual
Page 6
...in materials or workmanship. Repairs when your correspondence. You can write to Whirlpool with the product, Whirlpool Corporation or Whirlpool Canada LP (hereafter "Whirlpool") will pay for future reference. WHIRLPOOL CORPORATION MAJOR APPLIANCE WARRANTY LIMITED WARRANTY For one year from warranty coverage. 3....07 For additional product information or to be borne by a Whirlpool designated service company. Service must be easily determined. All rights reserved. ® Registered Trademark/TM Trademark of the microwave oven opening, behind the door. If you do not have ...
...in materials or workmanship. Repairs when your correspondence. You can write to Whirlpool with the product, Whirlpool Corporation or Whirlpool Canada LP (hereafter "Whirlpool") will pay for future reference. WHIRLPOOL CORPORATION MAJOR APPLIANCE WARRANTY LIMITED WARRANTY For one year from warranty coverage. 3....07 For additional product information or to be borne by a Whirlpool designated service company. Service must be easily determined. All rights reserved. ® Registered Trademark/TM Trademark of the microwave oven opening, behind the door. If you do not have ...

Warranty
Page 1
... reinstallation of your product, you on the upper or lower front facing of the microwave oven opening, behind the door. Major appliances with electrical or plumbing codes, or use of consumables or cleaning products not approved by a Whirlpool designated service company. The cost of repair or replacement under this limited warranty. Have...
... reinstallation of your product, you on the upper or lower front facing of the microwave oven opening, behind the door. Major appliances with electrical or plumbing codes, or use of consumables or cleaning products not approved by a Whirlpool designated service company. The cost of repair or replacement under this limited warranty. Have...


