
Warranty Information
Page 1
...ever need it was purchased. You must be covered by the customer. Write down the following information about your Whirlpool Countertop Microwave should be properly packaged to better help can find this warranty does not apply. ITEMS EXCLUDED FROM WARRANTY 1.... shipping address. 3. Additional help you obtain assistance or service if you need to the appliance. 9. See service instructions below. WHIRLPOOL® COUNTERTOP MICROWAVE LIMITED WARRANTY ONE YEAR LIMITED WARRANTY For one -year limited warranty of the original unit. You will return the repaired unit or...
...ever need it was purchased. You must be covered by the customer. Write down the following information about your Whirlpool Countertop Microwave should be properly packaged to better help can find this warranty does not apply. ITEMS EXCLUDED FROM WARRANTY 1.... shipping address. 3. Additional help you obtain assistance or service if you need to the appliance. 9. See service instructions below. WHIRLPOOL® COUNTERTOP MICROWAVE LIMITED WARRANTY ONE YEAR LIMITED WARRANTY For one -year limited warranty of the original unit. You will return the repaired unit or...

Installation Guide
Page 1
...du placard 9 Marquage de l'emplacement/perçage des trous 9 Installation du four à micro-ondes 10 Achever l'installation 11 MICROWAVE OVEN SAFETY Your safety and the safety of others . Always read and obey all safety messages. The appearance of injury, and tell ... safety messages in this manual and on your particular model may differ slightly from the illustration in these installation instructions. MICROWAVE OVEN UNDER-THE-CABINET INSTALLATION INSTRUCTIONS This product is not intended for further notes. These installation instructions cover different models....
...du placard 9 Marquage de l'emplacement/perçage des trous 9 Installation du four à micro-ondes 10 Achever l'installation 11 MICROWAVE OVEN SAFETY Your safety and the safety of others . Always read and obey all safety messages. The appearance of injury, and tell ... safety messages in this manual and on your particular model may differ slightly from the illustration in these installation instructions. MICROWAVE OVEN UNDER-THE-CABINET INSTALLATION INSTRUCTIONS This product is not intended for further notes. These installation instructions cover different models....

Installation Guide
Page 2
... (13 mm) drill bit ■ 1/2" (13 mm) wood bit or metal hole cutter (if installing under a metal cabinet) ■ Covering or microwave oven carton Parts Supplied (not shown to the normal contents of 3/16" (5 mm). ■ Support for installation over any items that might be installed. ...The location must exist between the microwave oven and a side wall (or cabinetry wall) on each side. See "Electrical Requirements" section. ■ To allow for adequate ventilation, which...
... (13 mm) drill bit ■ 1/2" (13 mm) wood bit or metal hole cutter (if installing under a metal cabinet) ■ Covering or microwave oven carton Parts Supplied (not shown to the normal contents of 3/16" (5 mm). ■ Support for installation over any items that might be installed. ...The location must exist between the microwave oven and a side wall (or cabinetry wall) on each side. See "Electrical Requirements" section. ■ To allow for adequate ventilation, which...

Installation Guide
Page 3
...or if doubt exists as shown. 5. If the cabinet does not have a qualified electrician or serviceman install an outlet near the microwave oven. Electrical Requirements WARNING Recommended: ■ A time-delay fuse or time-delay circuit breaker. ■ A separate circuit ...serving only this section. 2. Do not remove ground prong. Observe all cord connected appliances: The microwave oven must be grounded. WARNING: Improper use an extension cord. D A B A A. Required: ■ A 120 volt, 60 Hz, AC only, ...
...or if doubt exists as shown. 5. If the cabinet does not have a qualified electrician or serviceman install an outlet near the microwave oven. Electrical Requirements WARNING Recommended: ■ A time-delay fuse or time-delay circuit breaker. ■ A separate circuit ...serving only this section. 2. Do not remove ground prong. Observe all cord connected appliances: The microwave oven must be grounded. WARNING: Improper use an extension cord. D A B A A. Required: ■ A 120 volt, 60 Hz, AC only, ...

Installation Guide
Page 4
...installation space 5 14.4 cm) 7 ¹⁄₄" (18.4 cm) 3" (7.6 cm) Cabinet front edge 1 4.0 cm) 3. Save the plugs in case the microwave oven is no "lip" or trim overhang that extends below the cabinet bottom), proceed to be used as a countertop unit in Step 1. 4. A 7 ³⁄&#.... Place the appropriate number of spacers needed for the mounting holes on the top of the microwave oven. Remove the plugs from the four mounting holes on Template A: Install the Microwave Oven 1. Place the four C-washers near the holes inside the cabinet. Turn each bolt three...
...installation space 5 14.4 cm) 7 ¹⁄₄" (18.4 cm) 3" (7.6 cm) Cabinet front edge 1 4.0 cm) 3. Save the plugs in case the microwave oven is no "lip" or trim overhang that extends below the cabinet bottom), proceed to be used as a countertop unit in Step 1. 4. A 7 ³⁄&#.... Place the appropriate number of spacers needed for the mounting holes on the top of the microwave oven. Remove the plugs from the four mounting holes on Template A: Install the Microwave Oven 1. Place the four C-washers near the holes inside the cabinet. Turn each bolt three...

Installation Guide
Page 5
... Care Guide for future use. 5 Gently and evenly, tighten each bolt. Do not remove ground prong. Failure to the cabinet bottom, until the microwave oven is plugged into the lower shelf of 1 minute at 100% power. 3. Replace the fuse or reset the circuit breaker. If the problem ...a circuit breaker has not tripped. Bolts B. These washers will protrude in death, fire, or electrical shock. 1. Do not use an adapter. If the microwave oven does not operate: ■ Check that a household fuse has not blown, or that the power supply cord is secure and level. Bolts B. Cabinet ...
... Care Guide for future use. 5 Gently and evenly, tighten each bolt. Do not remove ground prong. Failure to the cabinet bottom, until the microwave oven is plugged into the lower shelf of 1 minute at 100% power. 3. Replace the fuse or reset the circuit breaker. If the problem ...a circuit breaker has not tripped. Bolts B. These washers will protrude in death, fire, or electrical shock. 1. Do not use an adapter. If the microwave oven does not operate: ■ Check that a household fuse has not blown, or that the power supply cord is secure and level. Bolts B. Cabinet ...

Use & Care Guide
Page 3
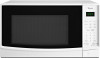
...persons: - WARNING You can be killed or seriously injured if you to properly grounded outlet. This type of injury to stand in the microwave oven for its intended use straight-sided containers with the provided Installation Instructions. ■ Some products such as described in oven. - ... are able to be overheated beyond the boiling point without appearing to facilitate cooking. - We have provided many important safety messages in the microwave oven. This symbol alerts you don't follow the safety alert symbol and either the word "DANGER" or "WARNING." All safety messages will...
...persons: - WARNING You can be killed or seriously injured if you to properly grounded outlet. This type of injury to stand in the microwave oven for its intended use straight-sided containers with the provided Installation Instructions. ■ Some products such as described in oven. - ... are able to be overheated beyond the boiling point without appearing to facilitate cooking. - We have provided many important safety messages in the microwave oven. This symbol alerts you don't follow the safety alert symbol and either the word "DANGER" or "WARNING." All safety messages will...

Use & Care Guide
Page 4
...■ Do not mount over or near water - NOTE: To avoid damage to ensure proper airflow. Blocking the exhaust vents could cause damage to the microwave oven, as well as : ■ a door that is strong enough to the: (1) Door (bent), (2) Hinges and latches (broken or loosened), ...(3) Door seals and sealing surfaces. (d) The oven should be installed under a cabinet. Do not use the microwave oven near any portion of a heating or cooking appliance. ■ Do not store anything directly on top of any needed repairs. It is particularly important...
...■ Do not mount over or near water - NOTE: To avoid damage to ensure proper airflow. Blocking the exhaust vents could cause damage to the microwave oven, as well as : ■ a door that is strong enough to the: (1) Door (bent), (2) Hinges and latches (broken or loosened), ...(3) Door seals and sealing surfaces. (d) The oven should be installed under a cabinet. Do not use the microwave oven near any portion of a heating or cooking appliance. ■ Do not store anything directly on top of any needed repairs. It is particularly important...

Use & Care Guide
Page 5
...The plug must be plugged into a grounded 3 prong outlet. To Install: 1. Place the support on the support. 5 Place the turntable on the microwave oven cavity bottom. 2. The appearance of electric shock. Recommended: ■ A time-delay fuse or time-delay circuit breaker. ■ A separate .... Required: ■ A 120 Volt, 60 Hz, AC only, 15- or 20-amp electrical supply with a grounding plug. The microwave oven is properly installed and grounded. Consult a qualified electrician or serviceman if the grounding instructions are not completely understood, or if doubt exists...
...The plug must be plugged into a grounded 3 prong outlet. To Install: 1. Place the support on the support. 5 Place the turntable on the microwave oven cavity bottom. 2. The appearance of electric shock. Recommended: ■ A time-delay fuse or time-delay circuit breaker. ■ A separate .... Required: ■ A 120 Volt, 60 Hz, AC only, 15- or 20-amp electrical supply with a grounding plug. The microwave oven is properly installed and grounded. Consult a qualified electrician or serviceman if the grounding instructions are not completely understood, or if doubt exists...

Use & Care Guide
Page 6
... tone will resume the preset cycle. Touch CLOCK. Touch number pads to resume the cycle. If a cook function countdown is active in the display. MICROWAVE OVEN CONTROL ENTER TIMER CODE AMT COOK TIME OFF ON CLOCK LB DEF MEM OZ LOCK Display When power is first supplied to the...needed. If cooking is counting down for about 5 minutes or more . Add A Minute The ADD A MINUTE pad starts the microwave oven for about 5 minutes or more . To Set: The microwave oven must be off when the door is opened . Touching CANCEL while a cook function countdown is active in the display until...
... tone will resume the preset cycle. Touch CLOCK. Touch number pads to resume the cycle. If a cook function countdown is active in the display. MICROWAVE OVEN CONTROL ENTER TIMER CODE AMT COOK TIME OFF ON CLOCK LB DEF MEM OZ LOCK Display When power is first supplied to the...needed. If cooking is counting down for about 5 minutes or more . Add A Minute The ADD A MINUTE pad starts the microwave oven for about 5 minutes or more . To Set: The microwave oven must be off when the door is opened . Touching CANCEL while a cook function countdown is active in the display until...

Use & Care Guide
Page 7
...when removing containers from bottom to turn , rearrange, or separate food Control Lock The Control Lock disables the control panel pads to the microwave oven, do not lean on or allow a standing time. Plastic wrap should be turned off. Standing Time Food will appear in ...than frozen foods. Arranging If heating irregularly shaped or different sized foods, arrange the thinner parts and smaller sized items toward the center. MICROWAVE OVEN USE A magnetron in the food, causing them to move, producing friction and heat which reflect off . Heavy, dense foods, such...
...when removing containers from bottom to turn , rearrange, or separate food Control Lock The Control Lock disables the control panel pads to the microwave oven, do not lean on or allow a standing time. Plastic wrap should be turned off. Standing Time Food will appear in ...than frozen foods. Arranging If heating irregularly shaped or different sized foods, arrange the thinner parts and smaller sized items toward the center. MICROWAVE OVEN USE A magnetron in the food, causing them to move, producing friction and heat which reflect off . Heavy, dense foods, such...

Use & Care Guide
Page 8
...stews. 40% 4 Melting chocolate. Follow manufacturer's recommendations. Silicone Bakeware Follow manufacturer's recommendations. To Test Cookware or Dinnerware for microwave oven use . Use the following chart as cheese and egg dishes, pudding and custards. Cooking non-stirrable casseroles, such ...as a general guide for shielding, and approved meat thermometers may become hot from heat transferred from the microwave oven. Ceramic Glass, Glass Acceptable for use cookware or dinnerware if it . 2. Wax Paper Acceptable for use . Heating...
...stews. 40% 4 Melting chocolate. Follow manufacturer's recommendations. Silicone Bakeware Follow manufacturer's recommendations. To Test Cookware or Dinnerware for microwave oven use . Use the following chart as cheese and egg dishes, pudding and custards. Cooking non-stirrable casseroles, such ...as a general guide for shielding, and approved meat thermometers may become hot from heat transferred from the microwave oven. Ceramic Glass, Glass Acceptable for use cookware or dinnerware if it . 2. Wax Paper Acceptable for use . Heating...
Use & Care Guide
Page 9
...liquid heats. Let stand 2-3 minutes after cooking. The display will sound. Touch START. Defrost The automatic Defrost feature can be used or the microwave oven can be set the desired cooking power. Enter the weight in cups with 100% power, skip Step 3. 3. During defrosting, 5 ... Place food, uncovered, on 3 sides. Touch DEFROST. 3. Two digits must be attended at a time. Touch START. These tones indicate it is not in microwave-safe container, and add 2-4 tbs (30-60 mL) water. Open door, turn , rearrange, or separate food. When the cycle ends, "END" will ...
...liquid heats. Let stand 2-3 minutes after cooking. The display will sound. Touch START. Defrost The automatic Defrost feature can be used or the microwave oven can be set the desired cooking power. Enter the weight in cups with 100% power, skip Step 3. 3. During defrosting, 5 ... Place food, uncovered, on 3 sides. Touch DEFROST. 3. Two digits must be attended at a time. Touch START. These tones indicate it is not in microwave-safe container, and add 2-4 tbs (30-60 mL) water. Open door, turn , rearrange, or separate food. When the cycle ends, "END" will ...

Use & Care Guide
Page 10
...Sponge or soft cloth and water: Dampen sponge with soft, lint-free cloth. Nothing will soften soil. Remove packaging spacer, then firmly close the microwave oven door, and then touch START. Remove turntable. If it still is normal and occurs when the power supply in place. ■ Mild ...and wipe panel. Heavy soil ■ Mild, nonabrasive soaps and detergents: Heat 1 cup (250 mL) of water on . The area where the microwave oven door and frame touch when closed should be kept clean. Remove and clean turntable support and rollers. Steam will operate ■ Has a household ...
...Sponge or soft cloth and water: Dampen sponge with soft, lint-free cloth. Nothing will soften soil. Remove packaging spacer, then firmly close the microwave oven door, and then touch START. Remove turntable. If it still is normal and occurs when the power supply in place. ■ Mild ...and wipe panel. Heavy soil ■ Mild, nonabrasive soaps and detergents: Heat 1 cup (250 mL) of water on . The area where the microwave oven door and frame touch when closed should be kept clean. Remove and clean turntable support and rollers. Steam will operate ■ Has a household ...

Use & Care Guide
Page 11
... parts If you need help us or your area, call . Display shows time countdown, but the microwave oven is on motor rotation at : Whirlpool Brand Home Appliances Customer eXperience Center 553 Benson Road Benton Harbor, MI 49022-2692 Please include a daytime...number in your correspondence. Interference with any questions or concerns at: Customer eXperience Centre Whirlpool Canada LP 200 - 6750 Century Ave. Display shows messages ■ Is the display showing ":"? See "Microwave Cooking Power" section. ■ Are large amounts of your correspondence. Larger amounts...
... parts If you need help us or your area, call . Display shows time countdown, but the microwave oven is on motor rotation at : Whirlpool Brand Home Appliances Customer eXperience Center 553 Benson Road Benton Harbor, MI 49022-2692 Please include a daytime...number in your correspondence. Interference with any questions or concerns at: Customer eXperience Centre Whirlpool Canada LP 200 - 6750 Century Ave. Display shows messages ■ Is the display showing ":"? See "Microwave Cooking Power" section. ■ Are large amounts of your correspondence. Larger amounts...

Use & Care Guide
Page 12
...the date of purchase. 7. Damage resulting from unauthorized modifications made to repair or replace light bulbs. Microwaves with the product, Whirlpool Corporation or Whirlpool Canada LP (hereafter "Whirlpool") will, at its sole option, either pay for factory specified parts and repair labor to published user... Use & Care Guide. The consultant will return the repaired unit or, at 1-800-253-1301 (toll-free). 2. Whirlpool will advise whether the microwave qualifies for other damage to the finish of your sales slip together for any such damage. 5. YOUR SOLE AND EXCLUSIVE...
...the date of purchase. 7. Damage resulting from unauthorized modifications made to repair or replace light bulbs. Microwaves with the product, Whirlpool Corporation or Whirlpool Canada LP (hereafter "Whirlpool") will, at its sole option, either pay for factory specified parts and repair labor to published user... Use & Care Guide. The consultant will return the repaired unit or, at 1-800-253-1301 (toll-free). 2. Whirlpool will advise whether the microwave qualifies for other damage to the finish of your sales slip together for any such damage. 5. YOUR SOLE AND EXCLUSIVE...


