Use and Care Manual
Page 3
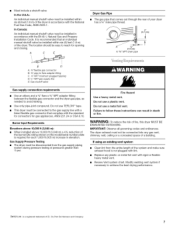
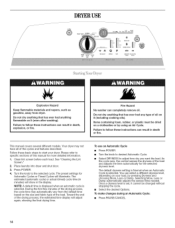
... in this or any electrical switch; Installation and service must be a T-handle type. [] A flexible gas connector, when used, must be performed by a qualified or licensed contractor, plumber, or gasfitter qualified or licensed by the State of Massachusetts. [] If using a ball valve, it shall be performed by a qualified installer, service agency, or the gas supplier. This symbol alerts you to light any appliance. • Do...
... in this or any electrical switch; Installation and service must be a T-handle type. [] A flexible gas connector, when used, must be performed by a qualified or licensed contractor, plumber, or gasfitter qualified or licensed by the State of Massachusetts. [] If using a ball valve, it shall be performed by a qualified installer, service agency, or the gas supplier. This symbol alerts you to light any appliance. • Do...
Use and Care Manual
Page 4
... the dryer and exhaust vent should be cleaned periodically by calling the dealer from dryer drum. Read and follow basic precautions, including the following ) that may be electrically grounded in accordance with local codes, or in the dryer. Items contaminated with local codes, or in the absence of this Use and Care Guide or in , or spotted with controls. • Do not repair or replace any part...
... the dryer and exhaust vent should be cleaned periodically by calling the dealer from dryer drum. Read and follow basic precautions, including the following ) that may be electrically grounded in accordance with local codes, or in the dryer. Items contaminated with local codes, or in the absence of this Use and Care Guide or in , or spotted with controls. • Do not repair or replace any part...

Use and Care Manual
Page 5
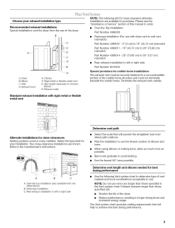
... a dryer. See "Venting Requirements." • A separate 30-amp circuit. • A grounded electrical outlet located within 2 ft (61 cm) of 1" (2.5 cm) under entire dryer. Some codes limit, or do so can be considered on ordering. Additional clearances might not shut off at temperatures below 45°F (7°C). Additional installation requirements This dryer is required if you exhaust out the rear of the dryer to reduce noise transfer. Contact your dryer at...
... a dryer. See "Venting Requirements." • A separate 30-amp circuit. • A grounded electrical outlet located within 2 ft (61 cm) of 1" (2.5 cm) under entire dryer. Some codes limit, or do so can be considered on ordering. Additional clearances might not shut off at temperatures below 45°F (7°C). Additional installation requirements This dryer is required if you exhaust out the rear of the dryer to reduce noise transfer. Contact your dryer at...
Use and Care Manual
Page 6
... outlet, have a proper outlet installed by a qualified technician. Gas Supply Line: • Must include 1/8"NPT minimum plugged tapping accessible for test gauge connection, immediately upstream of electric shock. If the total length of your dealer or call the phone numbers referenced on the rating plate in the door well of the supply line is more than 20 ft (6.1 m), use with Natural gas. Do not remove ground prong. If this manual. LP gas conversion: Conversion...
... outlet, have a proper outlet installed by a qualified technician. Gas Supply Line: • Must include 1/8"NPT minimum plugged tapping accessible for test gauge connection, immediately upstream of electric shock. If the total length of your dealer or call the phone numbers referenced on the rating plate in the door well of the supply line is more than 20 ft (6.1 m), use with Natural gas. Do not remove ground prong. If this manual. LP gas conversion: Conversion...
Use and Care Manual
Page 7
... Pressure Testing • The dryer must not be connected into any plastic or metal foil vent with the B149.1, Natural Gas and Propane Installation Code. Du Pont De Nemours and Company. Burner Input Requirements: Elevations above 10,000 ft (3,048 m): • When installed above 10,000 ft (3,048 m) a 4% reduction of the burner Btu rating shown on the model/serial number plate is not plugged with lint. • Replace any gas vent...
... Pressure Testing • The dryer must not be connected into any plastic or metal foil vent with the B149.1, Natural Gas and Propane Installation Code. Du Pont De Nemours and Company. Burner Input Requirements: Elevations above 10,000 ft (3,048 m): • When installed above 10,000 ft (3,048 m) a 4% reduction of the burner Btu rating shown on the model/serial number plate is not plugged with lint. • Replace any gas vent...
Use and Care Manual
Page 8
... the path of this is acceptable. Do not use duct tape. 4" (10.2cm) heavymetal exhaust vent DURASAFE TM vent products can cause moisture and lint to keep rodents and insects from your dealer or by calling Whirlpool Parts and Accessories. For more information, see the "Assistance or Service" section of the exhaust (such as flowers, rocks or bushes, snow line, etc.).
... the path of this is acceptable. Do not use duct tape. 4" (10.2cm) heavymetal exhaust vent DURASAFE TM vent products can cause moisture and lint to keep rodents and insects from your dealer or by calling Whirlpool Parts and Accessories. For more information, see the "Assistance or Service" section of the exhaust (such as flowers, rocks or bushes, snow line, etc.).
Use and Care Manual
Page 9
... drying times and increased energy usage. The Vent system chart provides venting requirements that will : • Shorten the life of this manual to order. • Over-the-Top Installation: Part Number 4396028 • Periscope Installation (For use with one to left or right side: Part Number 8212504 Special provisions for mobile home installations The exhaust vent must not terminate beneath the mobile home. Elbow C. Please see the "Assistance or Service...
... drying times and increased energy usage. The Vent system chart provides venting requirements that will : • Shorten the life of this manual to order. • Over-the-Top Installation: Part Number 4396028 • Periscope Installation (For use with one to left or right side: Part Number 8212504 Special provisions for mobile home installations The exhaust vent must not terminate beneath the mobile home. Elbow C. Please see the "Assistance or Service...
Use and Care Manual
Page 11
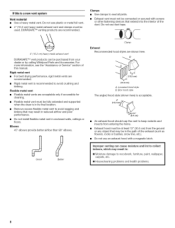
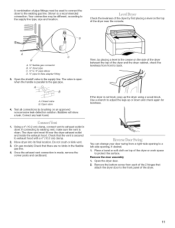
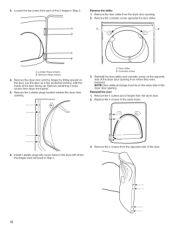
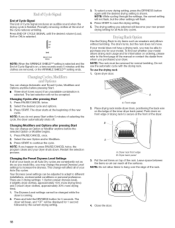
... exhaust outlet in the supply line. Once the exhaust vent connection is a recommended connection. Remove the door assembly 1. A. _" flexible gas connector B. _" dryerpipe C. _" to _" pipe elbow D. _" pipe-to-flare adapter fitting 3= Open the shutoff valve in dryer. Test all connections by first placing a level on an approved noncorrosive leak-detection solution. Use a wrench to adjust the legs up the dryer using a wood block. The dryer vent must be different, according to the supply line type, size and location...
... exhaust outlet in the supply line. Once the exhaust vent connection is a recommended connection. Remove the door assembly 1. A. _" flexible gas connector B. _" dryerpipe C. _" to _" pipe elbow D. _" pipe-to-flare adapter fitting 3= Open the shutoff valve in dryer. Test all connections by first placing a level on an approved noncorrosive leak-detection solution. Use a wrench to adjust the legs up the dryer using a wood block. The dryer vent must be different, according to the supply line type, size and location...
Use and Care Manual
Page 12
... inside of the dryer door opening from each of the dryer door opening. Remove these screws. Replace the 4 screws in the same holes. 6= Install 4 plastic plugs into screw holes in the dryer left where the hinges were removed in Step 2. A B Reverse the strike 1. Lay the door on the opposite side of the door facing up. NOTE: Door strike and plugs must be on the door. I A. Loosen the top...
... inside of the dryer door opening from each of the dryer door opening. Remove these screws. Replace the 4 screws in the same holes. 6= Install 4 plastic plugs into screw holes in the dryer left where the hinges were removed in Step 2. A B Reverse the strike 1. Lay the door on the opposite side of the door facing up. NOTE: Door strike and plugs must be on the door. I A. Loosen the top...

Use and Care Manual
Page 13
.... 5. Close door to the front panel. 5. Do not use an adapter. Test dryer operation by placing screw heads into a grounded 3 prong outlet. • Electrical supply is connected. • Household fuse is intact and tight, or circuit breaker has not tripped. • Dryer door is closed , open the dryer door and feel for heat. If you feel heat, turn off the dryer and check that should be removed. 8. 4. Be sure the vent is an extra part, go...
.... 5. Close door to the front panel. 5. Do not use an adapter. Test dryer operation by placing screw heads into a grounded 3 prong outlet. • Electrical supply is connected. • Household fuse is intact and tight, or circuit breaker has not tripped. • Dryer door is closed , open the dryer door and feel for heat. If you feel heat, turn off the dryer and check that should be removed. 8. 4. Be sure the vent is an extra part, go...
Use and Care Manual
Page 14
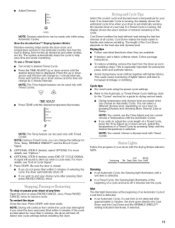
... selected cycle. Clean lint screen before each load. Turn the knob to start your load, by using an Air Cycle. The default dryness setting is Normal when an Automatic Cycle is selected. This manual covers several different models. See "Cleaning the Lint Screen." 2. NOTE: A default time is displayed when an automatic cycle is selected. You can completely remove oil. The preset settings for the selected dryness level. The estimated (automatic cycle) or actual (timed) cycle time (in...
... selected cycle. Clean lint screen before each load. Turn the knob to start your load, by using an Air Cycle. The default dryness setting is Normal when an Automatic Cycle is selected. This manual covers several different models. See "Cleaning the Lint Screen." 2. NOTE: A default time is displayed when an automatic cycle is selected. You can completely remove oil. The preset settings for the selected dryness level. The estimated (automatic cycle) or actual (timed) cycle time (in...
Use and Care Manual
Page 15
... Cool Down depends on your load. The length of Cycle Signal." 7. Wet The Wet light illuminates at the beginning of your drying cycle after approximately 5 minutes, the dryer goes directly into the cycle. • Adjust Dryness. A signal will shut off . • If you when a cycle ends. Press START. NOTE: Drying will change the settings for permanent press, knits and synthetic fabrics. • Avoid drying heavy work clothes together with Timed Cycles...
... Cool Down depends on your load. The length of Cycle Signal." 7. Wet The Wet light illuminates at the beginning of your drying cycle after approximately 5 minutes, the dryer goes directly into the cycle. • Adjust Dryness. A signal will shut off . • If you when a cycle ends. Press START. NOTE: Drying will change the settings for permanent press, knits and synthetic fabrics. • Avoid drying heavy work clothes together with Timed Cycles...
Use and Care Manual
Page 16
...% dry. Timed Preset Cycle Settings Timed Cycles Load Type Default Temperature Default Time (Minutes) TIMED DRY High 40 Heavyweight, bulky items, work clothes CASUAL Business casual clothes, permanent press, synthetics DELICATE Lingerie, blouses, washable knit fabrics Temperature High Medium Low Extra-Low Timed Cycles Use Timed Cycles to run for drying no-iron fabrics, such as exercise wear, can change the actual time in the dryer too long. Damp Dry Signal beeps, if selected. See "Dryer Rack." Damp The Damp light illuminates...
...% dry. Timed Preset Cycle Settings Timed Cycles Load Type Default Temperature Default Time (Minutes) TIMED DRY High 40 Heavyweight, bulky items, work clothes CASUAL Business casual clothes, permanent press, synthetics DELICATE Lingerie, blouses, washable knit fabrics Temperature High Medium Low Extra-Low Timed Cycles Use Timed Cycles to run for drying no-iron fabrics, such as exercise wear, can change the actual time in the dryer too long. Damp Dry Signal beeps, if selected. See "Dryer Rack." Damp The Damp light illuminates...
Use and Care Manual
Page 17
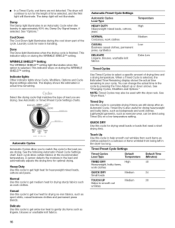
... load will be dried using Air Only • Check that may need ironing. "V" DRUM LIGHT D WRINKLESHELD DAMP DRY SIGNAL OPTIONS Drum Light On some models, select Drum Light to turn the drum light ON or OFR WRINKLE SHIELD TM Setting The WRINKLE SHIELD TM setting helps keep wrinkles from forming when you that require drying without stopping the cycle. Damp Dry Signal Select the Damp Dry Signal to alert you cannot unload the dryer promptly at any time to turn...
... load will be dried using Air Only • Check that may need ironing. "V" DRUM LIGHT D WRINKLESHELD DAMP DRY SIGNAL OPTIONS Drum Light On some models, select Drum Light to turn the drum light ON or OFR WRINKLE SHIELD TM Setting The WRINKLE SHIELD TM setting helps keep wrinkles from forming when you that require drying without stopping the cycle. Damp Dry Signal Select the Damp Dry Signal to alert you cannot unload the dryer promptly at any time to turn...
Use and Care Manual
Page 18
... drying time) and 3 (much dryer clothes, approximately 30% more drying time). 1. The dryer starts at the end of the cycle reduces wrinkling. Restart the selection process. Press and hold the DRYNESS button for normal tumbling. A. NOTE: While cycling through the settings, the current setting will flash. 4. The drum turns, but the other settings will not flash, but the rack does not move. Do not use the drying rack 1. To use the automatic cycle with the drying rack...
... drying time) and 3 (much dryer clothes, approximately 30% more drying time). 1. The dryer starts at the end of the cycle reduces wrinkling. Restart the selection process. Press and hold the DRYNESS button for normal tumbling. A. NOTE: While cycling through the settings, the current setting will flash. 4. The drum turns, but the other settings will not flash, but the rack does not move. Do not use the drying rack 1. To use the automatic cycle with the drying rack...
Use and Care Manual
Page 19
... hold ) START button (about 1 second). From Inside the Dryer Cabinet Lint should be rack dried and the suggested cycle, temperature setting and drying time. A screen blocked by pressing TIME ADJUST Up or Down. Thoroughly dry lint screen with a soft cloth until stain is removed. 2. Press (and hold . Rack Dry Setting Temp. Time* Wool Sweaters Timed Low 60 Block to remove residue buildup. 4. The lint screen is hard to the stained area of lint screen with hot water and liquid detergent. Dry unstable dye...
... hold ) START button (about 1 second). From Inside the Dryer Cabinet Lint should be rack dried and the suggested cycle, temperature setting and drying time. A screen blocked by pressing TIME ADJUST Up or Down. Thoroughly dry lint screen with a soft cloth until stain is removed. 2. Press (and hold . Rack Dry Setting Temp. Time* Wool Sweaters Timed Low 60 Block to remove residue buildup. 4. The lint screen is hard to the stained area of lint screen with hot water and liquid detergent. Dry unstable dye...
Use and Care Manual
Page 20
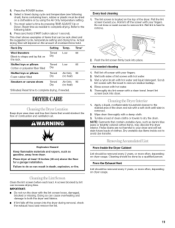
... secure in dryer base. 6. Locate the light bulb cover on vacation or not using your dryer only when you should: 1. Cap the open the door. Was a regular fuse used for 2-5 seconds. No heat Has a household fuse blown, or has a circuit breaker tripped? The drum may not have heat. The gas valve clicking is it a gas dryer? Clean lint screen. Moving care 1. Use masking tape to dryer pipe. 4. Replace the fuse or reset the circuit breaker. Large loads may require pressing and holding the Start button for...
... secure in dryer base. 6. Locate the light bulb cover on vacation or not using your dryer only when you should: 1. Cap the open the door. Was a regular fuse used for 2-5 seconds. No heat Has a household fuse blown, or has a circuit breaker tripped? The drum may not have heat. The gas valve clicking is it a gas dryer? Clean lint screen. Moving care 1. Use masking tape to dryer pipe. 4. Replace the fuse or reset the circuit breaker. Large loads may require pressing and holding the Start button for...
Use and Care Manual
Page 21
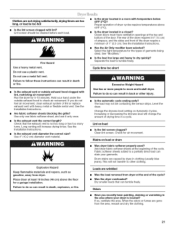
...;F (7°C). Increasing or decreasing the dryness level will change the amount of garments being dried. Lint screen should be contacting the sensor strips. See the Installation Instructions. Fire Hazard Use a heavy metal vent. Dry smaller loads that the exhaust vent is located? Place dryer at the top and bottom of the cycle. Select the right temperature for a garage installation. Clean lint screen. Are fabric softener sheets blocking the grille? See "Modifiers." • Is the...
...;F (7°C). Increasing or decreasing the dryness level will change the amount of garments being dried. Lint screen should be contacting the sensor strips. See the Installation Instructions. Fire Hazard Use a heavy metal vent. Dry smaller loads that the exhaust vent is located? Place dryer at the top and bottom of the cycle. Select the right temperature for a garage installation. Clean lint screen. Are fabric softener sheets blocking the grille? See "Modifiers." • Is the...
Use and Care Manual
Page 22
... service center. Whirlpool Canada LP designated service technicians are made with the same precision used to Whirlpool Canada LP with : • Features and specifications on our full line of a service call 1-800-807-6777, or your appliance. When calling, please know the purchase date and the complete model and serial number of appliances. • Installation information. • Use and maintenance procedures. • Accessory and repair parts...
... service center. Whirlpool Canada LP designated service technicians are made with the same precision used to Whirlpool Canada LP with : • Features and specifications on our full line of a service call 1-800-807-6777, or your appliance. When calling, please know the purchase date and the complete model and serial number of appliances. • Installation information. • Use and maintenance procedures. • Accessory and repair parts...
Use and Care Manual
Page 23
... major appliance is used in accordance with electrical or plumbing codes, or use your major appliance, to replace or repair house fuses or to correct house wiring or plumbing. 2. Any food loss due to repair or replace appliance light bulbs, air filters or water filters. Pickup and delivery. The removal and reinstallation of your appliance if it is installed in an inaccessible location or is not installed in which it...
... major appliance is used in accordance with electrical or plumbing codes, or use your major appliance, to replace or repair house fuses or to correct house wiring or plumbing. 2. Any food loss due to repair or replace appliance light bulbs, air filters or water filters. Pickup and delivery. The removal and reinstallation of your appliance if it is installed in an inaccessible location or is not installed in which it...


