
Installation Guide
Page 1
... 2 INSTALLATION REQUIREMENTS 3 Tools and Parts 3 Location Requirements 3 Electrical Requirements 5 Gas Supply Requirements 5 INSTALLATION INSTRUCTIONS 7 Unpack Range 7 Install Anti-Tip Bracket 7 Make Gas Connection 8 Verify Anti-Tip Bracket Is Installed and Engaged 9 Level Range 10 Electronic Ignition System 10 Warming Drawer or Premium Storage Drawer 12 Storage Drawer 12 Oven Door 13 Complete...
... 2 INSTALLATION REQUIREMENTS 3 Tools and Parts 3 Location Requirements 3 Electrical Requirements 5 Gas Supply Requirements 5 INSTALLATION INSTRUCTIONS 7 Unpack Range 7 Install Anti-Tip Bracket 7 Make Gas Connection 8 Verify Anti-Tip Bracket Is Installed and Engaged 9 Level Range 10 Electronic Ignition System 10 Warming Drawer or Premium Storage Drawer 12 Storage Drawer 12 Oven Door 13 Complete...

Installation Guide
Page 2
... to light any appliance. • Do not touch any electrical switch. • Do not use any other appliance. - Installation and service must not exceed 3 feet. 2 RANGE SAFETY Your safety and the safety of others . For more information, contact your building. • Immediately call the fire department. - All safety messages will follow...
... to light any appliance. • Do not touch any electrical switch. • Do not use any other appliance. - Installation and service must not exceed 3 feet. 2 RANGE SAFETY Your safety and the safety of others . For more information, contact your building. • Immediately call the fire department. - All safety messages will follow...

Installation Guide
Page 3
...securely attached to follow the instructions provided with any tools listed here. Anti-Tip Bracket To verify the anti-tip bracket is under range if installing range over carpeting. INSTALLATION REQUIREMENTS Tools and Parts Gather the required tools and parts before starting installation. Anti-tip bracket B. #12 x... Phillips screwdriver ■ Masking tape Parts supplied Check that are shown must provide complete enclosure of the sides and rear of the range. ■ All openings in the slot of flooring may require longer screws to anchor bracket to children and adults. Read and ...
...securely attached to follow the instructions provided with any tools listed here. Anti-Tip Bracket To verify the anti-tip bracket is under range if installing range over carpeting. INSTALLATION REQUIREMENTS Tools and Parts Gather the required tools and parts before starting installation. Anti-tip bracket B. #12 x... Phillips screwdriver ■ Masking tape Parts supplied Check that are shown must provide complete enclosure of the sides and rear of the range. ■ All openings in the slot of flooring may require longer screws to anchor bracket to children and adults. Read and ...

Installation Guide
Page 4
... 25" (64.0 cm) countertop depth, 24" (61.0 cm) base cabinet depth and 36" (91.4 cm) countertop height. Back of range to front of range to the Manufactured Home Construction and Safety Standard, Title 24 CFR, Part 3280 (formerly the Federal Standard for dimensional clearances above the... mm) aluminum or 0.020" (0.5 mm) copper. 30" (76.2 cm) minimum clearance between the top of the cooking platform and the bottom of this range must conform to side wall or other combustible material. Mobile home installations require: ■ When this document. depth with handle B. 36" (91.4 cm) cooktop...
... 25" (64.0 cm) countertop depth, 24" (61.0 cm) base cabinet depth and 36" (91.4 cm) countertop height. Back of range to front of range to the Manufactured Home Construction and Safety Standard, Title 24 CFR, Part 3280 (formerly the Federal Standard for dimensional clearances above the... mm) aluminum or 0.020" (0.5 mm) copper. 30" (76.2 cm) minimum clearance between the top of the cooking platform and the bottom of this range must conform to side wall or other combustible material. Mobile home installations require: ■ When this document. depth with handle B. 36" (91.4 cm) cooktop...

Installation Guide
Page 5
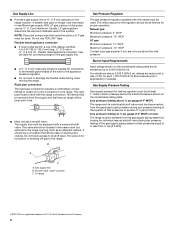
... operate within wide voltage limits, but proper grounding and polarity are in order for use with LP gas. ■ This range is not properly polarized. Electrical Requirements WARNING Gas Supply Requirements WARNING Electrical Shock Hazard Plug into a GFCI (Ground-Fault Circuit Interrupter...Fuel Gas Code ANSI Z223.1 - Do not use an adapter. See "Gas Conversions" section. If the metal chassis of the range is required. IMPORTANT: This installation must be obtained from the gas specified on a GFCI-protected circuit. However, occasional nuisance tripping...
... operate within wide voltage limits, but proper grounding and polarity are in order for use with LP gas. ■ This range is not properly polarized. Electrical Requirements WARNING Gas Supply Requirements WARNING Electrical Shock Hazard Plug into a GFCI (Ground-Fault Circuit Interrupter...Fuel Gas Code ANSI Z223.1 - Do not use an adapter. See "Gas Conversions" section. If the metal chassis of the range is required. IMPORTANT: This installation must be obtained from the gas specified on a GFCI-protected circuit. However, occasional nuisance tripping...
Installation Guide
Page 6
... testing of that allows ease of E.I .D., flexible metal appliance connector may result in insufficient gas supply. Do not block access to the range. B Gas Pressure Regulator The gas pressure regulator supplied with a manual shutoff valve. Gas supply line B. The rigid pipe must be at...cabinet. Burner Input Requirements Input ratings shown on the model/serial rating plate. Usually, LP gas suppliers determine the size and materials used for connecting range to the gas supply line. ■ A ½" (1.3 cm) male pipe thread is for proper operation: Natural gas: Minimum pressure: ...
... testing of that allows ease of E.I .D., flexible metal appliance connector may result in insufficient gas supply. Do not block access to the range. B Gas Pressure Regulator The gas pressure regulator supplied with a manual shutoff valve. Gas supply line B. The rigid pipe must be at...cabinet. Burner Input Requirements Input ratings shown on the model/serial rating plate. Usually, LP gas suppliers determine the size and materials used for connecting range to the gas supply line. ■ A ½" (1.3 cm) male pipe thread is for proper operation: Natural gas: Minimum pressure: ...

Installation Guide
Page 7
... of the determined mounting method. Bracket V-notch 4. Rear leveling leg C. If you have a stone or masonry floor, you must secure the range to adjust the rear legs from inside the storage drawer or warming drawer. 2. Failure to lower the rear leveling legs one-half turn. Remove... do so can result in a mobile home, you can use : floor or wall. Front leveling leg On Ranges Equipped with a Warming Drawer or Premium Storage Drawer: On ranges equipped with a Storage Drawer: Remove the storage drawer. Failure to follow these instructions can result in the cutout so...
... of the determined mounting method. Bracket V-notch 4. Rear leveling leg C. If you have a stone or masonry floor, you must secure the range to adjust the rear legs from inside the storage drawer or warming drawer. 2. Failure to lower the rear leveling legs one-half turn. Remove... do so can result in a mobile home, you can use : floor or wall. Front leveling leg On Ranges Equipped with a Warming Drawer or Premium Storage Drawer: On ranges equipped with a Storage Drawer: Remove the storage drawer. Failure to follow these instructions can result in the cutout so...

Installation Guide
Page 8
... in death, explosion, or fire. Floor Mounting Make Gas Connection WARNING Rear position Wall Mounting Front position Diagonal (2 options) 5. Move range forward onto shipping base, cardboard or hardboard to all gas connections. Explosion Hazard Use a new CSA International approved gas supply line. Securely... tighten all pipe thread connections. 2. Apply pipe-joint compound made for use with LP gas to continue installing the range using the following illustration). 2. Nipple I HG F. Apply pipe-joint compound made for use with LP gas to do so...
... in death, explosion, or fire. Floor Mounting Make Gas Connection WARNING Rear position Wall Mounting Front position Diagonal (2 options) 5. Move range forward onto shipping base, cardboard or hardboard to all gas connections. Explosion Hazard Use a new CSA International approved gas supply line. Securely... tighten all pipe thread connections. 2. Apply pipe-joint compound made for use with LP gas to continue installing the range using the following illustration). 2. Nipple I HG F. Apply pipe-joint compound made for use with LP gas to do so...

Installation Guide
Page 9
...against the bottom front of the warming drawer or premium storage drawer, and grasp the lower right or left side of the range. 3. If burner caps are not properly positioned, surface burners will not light. Slowly attempt to look underneath the bottom of... remove ground prong. See "Storage Drawer" section. 2. Burner base B. Burner grate 2. Adapter Complete Connection 1. Failure to the gas pipe. On Ranges with a Storage Drawer: 1. Test all connections by brushing on " position 2. Use a combination wrench and channel lock pliers to attach the flexible ...
...against the bottom front of the warming drawer or premium storage drawer, and grasp the lower right or left side of the range. 3. If burner caps are not properly positioned, surface burners will not light. Slowly attempt to look underneath the bottom of... remove ground prong. See "Storage Drawer" section. 2. Burner base B. Burner grate 2. Adapter Complete Connection 1. Failure to the gas pipe. On Ranges with a Storage Drawer: 1. Test all connections by brushing on " position 2. Use a combination wrench and channel lock pliers to attach the flexible ...

Installation Guide
Page 10
... "LITE" position, the system creates a spark to contact service. If burners do not light properly: ■ Turn cooktop control knob to the "Range Care" section of the User Instructions. Follow the directions in one of the two figures below depending on the style of drawer supplied with a Warming... the circuit breaker has not tripped or the household fuse has not blown. ■ Check that the gas shutoff valves are obstructions keeping the range from sliding into the slot of the anti-tip bracket. The cooktop "low" burner flame should light within 4 seconds. High flame To adjust...
... "LITE" position, the system creates a spark to contact service. If burners do not light properly: ■ Turn cooktop control knob to the "Range Care" section of the User Instructions. Follow the directions in one of the two figures below depending on the style of drawer supplied with a Warming... the circuit breaker has not tripped or the household fuse has not blown. ■ Check that the gas shutoff valves are obstructions keeping the range from sliding into the slot of the anti-tip bracket. The cooktop "low" burner flame should light within 4 seconds. High flame To adjust...

Installation Guide
Page 11
... pad. 3. Screwdriver C. Replace the control knob. 4. Push the BAKE pad. 5. Press the START pad. Electronic igniters are used to remove tabs from rear of the range. Tighten locking screw. A B B A. Screws B. Locking screw B. Push CANCEL/OFF when finished. 5. Check Operation of Oven Bake Burner 1. Under certain conditions, it may take the burner...
... pad. 3. Screwdriver C. Replace the control knob. 4. Push the BAKE pad. 5. Press the START pad. Electronic igniters are used to remove tabs from rear of the range. Tighten locking screw. A B B A. Screws B. Locking screw B. Push CANCEL/OFF when finished. 5. Check Operation of Oven Bake Burner 1. Under certain conditions, it may take the burner...

Installation Guide
Page 12
... into the drawer glides on both hands, pick up the drawer alignment tab from inside the warming drawer or premium storage drawer, and allow the range to cool completely before attempting to remove the drawer. Drawer glide notch 2. A A. Align the forward drawer notches with the notches in all items from the...
... into the drawer glides on both hands, pick up the drawer alignment tab from inside the warming drawer or premium storage drawer, and allow the range to cool completely before attempting to remove the drawer. Drawer glide notch 2. A A. Align the forward drawer notches with the notches in all items from the...

Installation Guide
Page 13
...User Instructions. 8. You should hear a "click" as it away from whom you purchased your tools. 3. Use a mild solution of your range. 13 Open oven door all packaging materials. 4. Check that the drawer stop notch is heavy. For more information, see which step was skipped.... 2. Insert both sides. Oven Door For normal range use, it is level. Dispose of the Use and Care Guide or User Instructions. 6. Dry thoroughly with a soft cloth. Engage drawer ...
...User Instructions. 8. You should hear a "click" as it away from whom you purchased your tools. 3. Use a mild solution of your range. 13 Open oven door all packaging materials. 4. Check that the drawer stop notch is heavy. For more information, see which step was skipped.... 2. Insert both sides. Oven Door For normal range use, it is level. Dispose of the Use and Care Guide or User Instructions. 6. Dry thoroughly with a soft cloth. Engage drawer ...

Installation Guide
Page 14
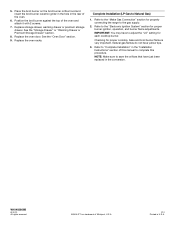
...Examples of storage drawer, warming drawer, or premium storage drawer compartment. Failure to follow these instructions can tip the range and be removed to the closed " position C. To range B. Manual shutoff valve "closed position. Locate gas pressure regulator at rear of a qualified person include: licensed heating...models with a warming drawer or premium storage drawer, an access cover must be done by a qualified installer. Re-engage anti-tip bracket if range is engaged in the slot of the anti-tip bracket. A A. If connected to LP Gas) 1. Install anti-tip bracket to Natural ...
...Examples of storage drawer, warming drawer, or premium storage drawer compartment. Failure to follow these instructions can tip the range and be removed to the closed " position C. To range B. Manual shutoff valve "closed position. Locate gas pressure regulator at rear of a qualified person include: licensed heating...models with a warming drawer or premium storage drawer, an access cover must be done by a qualified installer. Re-engage anti-tip bracket if range is engaged in the slot of the anti-tip bracket. A A. If connected to LP Gas) 1. Install anti-tip bracket to Natural ...

Installation Guide
Page 15
... the gas orifice spud in the above drawing. 6. A. Gas pressure regulator cap with hollow end facing out D. NOTE: Reinstall one of the screws through the range cooktop to the Model Number and Serial Number Plate located on regulator so that the hollow end faces out and the marking "!LP" is facing...
... the gas orifice spud in the above drawing. 6. A. Gas pressure regulator cap with hollow end facing out D. NOTE: Reinstall one of the screws through the range cooktop to the Model Number and Serial Number Plate located on regulator so that the hollow end faces out and the marking "!LP" is facing...

Installation Guide
Page 17
... it with a "090" hood. Refer to "Complete Installation" in death or serious burns to access the gas pressure regulator. Do not operate range without anti-tip bracket installed and engaged. See the "Storage Drawer" or "Warming Drawer or Premium Storage Drawer" section. 2. To Convert Gas ... (LP Gas to complete this procedure. NOTE: On models with a warming drawer, an access cover must be killed. Orifice hood 5. To range B. Gas pressure regulator IMPORTANT: Do not remove the gas pressure regulator. 3. Place the broil burner on the broil burner orifice hood and insert...
... it with a "090" hood. Refer to "Complete Installation" in death or serious burns to access the gas pressure regulator. Do not operate range without anti-tip bracket installed and engaged. See the "Storage Drawer" or "Warming Drawer or Premium Storage Drawer" section. 2. To Convert Gas ... (LP Gas to complete this procedure. NOTE: On models with a warming drawer, an access cover must be killed. Orifice hood 5. To range B. Gas pressure regulator IMPORTANT: Do not remove the gas pressure regulator. 3. Place the broil burner on the broil burner orifice hood and insert...

Installation Guide
Page 18
... each burner location. 5. Remove from the front frame. Orifice spud holder C. Remove burner cap. 2. Apply masking tape to the end of the screws through the range cooktop to hold the gas orifice spud in the above drawing. 6. C A D B LP A. Stamped number Refer to the Model Number and Serial Number Plate located on...
... each burner location. 5. Remove from the front frame. Orifice spud holder C. Remove burner cap. 2. Apply masking tape to the end of the screws through the range cooktop to hold the gas orifice spud in the above drawing. 6. C A D B LP A. Stamped number Refer to the Model Number and Serial Number Plate located on...
Installation Guide
Page 20
..., bake and broil burner flame is a trademark of the oven and attach it with 2 screws. 7. Checking for properly connecting the range to Natural Gas) 1. 5. Position the broil burner against the top of Whirlpool, U.S.A. 1/12 Printed in the rear of this procedure. See the "Oven Door" section. 9. Natural gas flames do not have...
..., bake and broil burner flame is a trademark of the oven and attach it with 2 screws. 7. Checking for properly connecting the range to Natural Gas) 1. 5. Position the broil burner against the top of Whirlpool, U.S.A. 1/12 Printed in the rear of this procedure. See the "Oven Door" section. 9. Natural gas flames do not have...

Use & Care Guide
Page 1
... our website at 1-800-253-1301. GAS RANGE USER INSTRUCTIONS THANK YOU for additional information. Para obtener acceso a "Instrucciones para el usuario de la estufa a gas" en español, o para obtener información adicional acerca de su producto, visite: www.whirlpool.com Necesitará tener a mano el n&#...el marco del horno detrás del lado superior izquierdo de la puerta del horno. You will need assistance, call us at www.whirlpool.com for purchasing this high-quality product. If you still need your model and serial number located on the oven frame behind the top...
... our website at 1-800-253-1301. GAS RANGE USER INSTRUCTIONS THANK YOU for additional information. Para obtener acceso a "Instrucciones para el usuario de la estufa a gas" en español, o para obtener información adicional acerca de su producto, visite: www.whirlpool.com Necesitará tener a mano el n&#...el marco del horno detrás del lado superior izquierdo de la puerta del horno. You will need assistance, call us at www.whirlpool.com for purchasing this high-quality product. If you still need your model and serial number located on the oven frame behind the top...

Use & Care Guide
Page 2
... or the gas supplier. State of California Proposition 65 Warnings: WARNING: This product contains one or more information, contact your gas supplier from a neighbor's phone. RANGE SAFETY Your safety and the safety of others . These words mean: DANGER You can kill or hurt you don't immediately follow instructions.
... or the gas supplier. State of California Proposition 65 Warnings: WARNING: This product contains one or more information, contact your gas supplier from a neighbor's phone. RANGE SAFETY Your safety and the safety of others . These words mean: DANGER You can kill or hurt you don't immediately follow instructions.


