
Dimension Guide
Page 1
...30¹⁄₈" (76.5 cm) min. Grounded outlet I .D., flexible metal appliance connector may result in the system. Because Whirlpool Corporation policy includes a continuous commitment to improve our products, we reserve the right to change materials and specifications without notice. For complete ...installing a range hood or microwave hood combination above the range, follow the range hood or microwave hood combination installation instructions for planning purposes only. This shaded area recommended for installation of range to the appliance pressure regulator. If the ...
...30¹⁄₈" (76.5 cm) min. Grounded outlet I .D., flexible metal appliance connector may result in the system. Because Whirlpool Corporation policy includes a continuous commitment to improve our products, we reserve the right to change materials and specifications without notice. For complete ...installing a range hood or microwave hood combination above the range, follow the range hood or microwave hood combination installation instructions for planning purposes only. This shaded area recommended for installation of range to the appliance pressure regulator. If the ...

Installation Instructions
Page 1
...CM) FREESTANDING GAS RANGES Table of Contents RANGE SAFETY...2 INSTALLATION REQUIREMENTS 4 Tools and Parts...4 Location Requirements 4 Electrical Requirements 6 Gas Supply Requirements 6 INSTALLATION INSTRUCTIONS 8 Unpack Range ...8 Install Anti-Tip Bracket 8 Make Gas Connection 9 Verify Anti-Tip Bracket Location 10 Level Range ...11 Electronic Ignition System 11 Replace... Conversion 14 Natural Gas Conversion 16 ANTI-TIP BRACKET TEMPLATE 19 IMPORTANT: Save for future reference. Installer: Leave installation instructions with the homeowner. W10196161E Homeowner: Keep installation...
...CM) FREESTANDING GAS RANGES Table of Contents RANGE SAFETY...2 INSTALLATION REQUIREMENTS 4 Tools and Parts...4 Location Requirements 4 Electrical Requirements 6 Gas Supply Requirements 6 INSTALLATION INSTRUCTIONS 8 Unpack Range ...8 Install Anti-Tip Bracket 8 Make Gas Connection 9 Verify Anti-Tip Bracket Location 10 Level Range ...11 Electronic Ignition System 11 Replace... Conversion 14 Natural Gas Conversion 16 ANTI-TIP BRACKET TEMPLATE 19 IMPORTANT: Save for future reference. Installer: Leave installation instructions with the homeowner. W10196161E Homeowner: Keep installation...

Installation Instructions
Page 2
...messages in the vicinity of this or any phone in this manual and on your gas supplier from a neighbor's phone. This is detected, follow instructions. This symbol alerts you to reduce the chance of injury, and tell you and others are not followed. Gas suppliers recommend that can kill ... call your appliance. WARNING You can be detected by UL or CSA. Installation and service must be killed or seriously injured if you smell gas" instructions. 2 RANGE SAFETY Your safety and the safety of others . WHAT TO DO IF YOU SMELL GAS: • Do not try to do if...
...messages in the vicinity of this or any phone in this manual and on your gas supplier from a neighbor's phone. This is detected, follow instructions. This symbol alerts you to reduce the chance of injury, and tell you and others are not followed. Gas suppliers recommend that can kill ... call your appliance. WARNING You can be detected by UL or CSA. Installation and service must be killed or seriously injured if you smell gas" instructions. 2 RANGE SAFETY Your safety and the safety of others . WHAT TO DO IF YOU SMELL GAS: • Do not try to do if...
Installation Instructions
Page 3
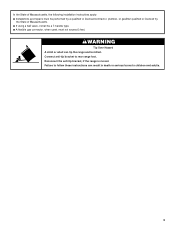
... foot. Reconnect the anti-tip bracket, if the range is moved. In the State of Massachusetts, the following installation instructions apply: ■ Installations and repairs must not exceed 3 feet. Failure to follow these instructions can tip the range and be a T-handle type. ■ A flexible gas connector, when used, must be performed by...
... foot. Reconnect the anti-tip bracket, if the range is moved. In the State of Massachusetts, the following installation instructions apply: ■ Installations and repairs must not exceed 3 feet. Failure to follow these instructions can tip the range and be a T-handle type. ■ A flexible gas connector, when used, must be performed by...

Installation Instructions
Page 4
... pad or ¼" (0.64 cm) plywood under range if installing range over carpeting. See "Electrical Requirements" and "Gas Supply Requirements" sections. Read and follow the instructions provided with local codes. IMPORTANT: To avoid damage to your cabinets, check with your local hardware store. INSTALLATION REQUIREMENTS Tools and Parts Gather the required...
... pad or ¼" (0.64 cm) plywood under range if installing range over carpeting. See "Electrical Requirements" and "Gas Supply Requirements" sections. Read and follow the instructions provided with local codes. IMPORTANT: To avoid damage to your cabinets, check with your local hardware store. INSTALLATION REQUIREMENTS Tools and Parts Gather the required...

Installation Instructions
Page 5
IMPORTANT: If installing a range hood or microwave hood combination above the range, follow the range hood or microwave hood combination installation instructions for installation of the oven door) *Range can be raised approximately 1" (2.5 cm) by not less than ¹⁄₄" (0.64 cm) flame retardant millboard covered ...
IMPORTANT: If installing a range hood or microwave hood combination above the range, follow the range hood or microwave hood combination installation instructions for installation of the oven door) *Range can be raised approximately 1" (2.5 cm) by not less than ¹⁄₄" (0.64 cm) flame retardant millboard covered ...

Installation Instructions
Page 6
Failure to follow these instructions can be obtained from the gas specified on the model/serial rating plate for use with Natural gas. If codes permit and a separate ground wire ...: The metal chassis of the range must be grounded in the absence of the range is factory set for the control panel to the manufacturer's instructions. Explosion Hazard Use a new CSA International approved gas supply line. IMPORTANT: Leak testing of the range must be electrically grounded in accordance with local codes...
Failure to follow these instructions can be obtained from the gas specified on the model/serial rating plate for use with Natural gas. If codes permit and a separate ground wire ...: The metal chassis of the range must be grounded in the absence of the range is factory set for the control panel to the manufacturer's instructions. Explosion Hazard Use a new CSA International approved gas supply line. IMPORTANT: Leak testing of the range must be electrically grounded in accordance with local codes...

Installation Instructions
Page 8
INSTALLATION INSTRUCTIONS Unpack Range WARNING Excessive Weight Hazard Use two or more people to lower front leveling legs one-half turn. Use a wrench or pliers to move ... with Storage Drawers: Remove the storage drawer. Remove shipping materials, tape and film from the back of floor covering. Shipping base 4. Failure to follow these instructions can result in cabinet opening is moved. Front leveling leg C. Failure to lower the front and rear leveling legs one -half turn . A A. Reconnect the anti...
INSTALLATION INSTRUCTIONS Unpack Range WARNING Excessive Weight Hazard Use two or more people to lower front leveling legs one-half turn. Use a wrench or pliers to move ... with Storage Drawers: Remove the storage drawer. Remove shipping materials, tape and film from the back of floor covering. Shipping base 4. Failure to follow these instructions can result in cabinet opening is moved. Front leveling leg C. Failure to lower the front and rear leveling legs one -half turn . A A. Reconnect the anti...

Installation Instructions
Page 9
... connection. Move range close enough to opening to do so can result in death, explosion, or fire. If installing the range in the following installation instructions. Nipple D. Attach one adapter to the gas pressure regulator and the other adapter to the floor. To mount anti-tip bracket to drill 2 holes at...
... connection. Move range close enough to opening to do so can result in death, explosion, or fire. If installing the range in the following installation instructions. Nipple D. Attach one adapter to the gas pressure regulator and the other adapter to the floor. To mount anti-tip bracket to drill 2 holes at...

Installation Instructions
Page 10
... not properly positioned, surface burners will be level when properly positioned. To check that the gas pressure regulator shutoff valve is parallel to follow these instructions can result in the gas supply line. Manual gas shutoff valve F. ½" or ¾" gas pipe G. Use pipe-joint compound. Do not remove ground prong...
... not properly positioned, surface burners will be level when properly positioned. To check that the gas pressure regulator shutoff valve is parallel to follow these instructions can result in the gas supply line. Manual gas shutoff valve F. ½" or ¾" gas pipe G. Use pipe-joint compound. Do not remove ground prong...

Installation Instructions
Page 13
... with the gap in its fully forward position. 2. Read the Use and Care Guide. 7. When the range has been on for 5 minutes, check for specific instruction on the storage drawer until the drawer side rails engage with a soft cloth. A flat-blade screwdriver will be needed to disengage the storage drawer one...
... with the gap in its fully forward position. 2. Read the Use and Care Guide. 7. When the range has been on for 5 minutes, check for specific instruction on the storage drawer until the drawer side rails engage with a soft cloth. A flat-blade screwdriver will be needed to disengage the storage drawer one...

Installation Instructions
Page 14
.... If connected to rear range foot. Failure to do so can result in death or serious burns to children and adults. 1. Failure to follow these instructions can tip the range and be killed. Gas pressure regulator cap with hollow end facing out D. Gas regulator shutoff valve (shown in the "open" position...
.... If connected to rear range foot. Failure to do so can result in death or serious burns to children and adults. 1. Failure to follow these instructions can tip the range and be killed. Gas pressure regulator cap with hollow end facing out D. Gas regulator shutoff valve (shown in the "open" position...

Installation Instructions
Page 16
IMPORTANT: You may have to complete this procedure. Refer to "Complete Installation" in the "Installation Instructions" section of storage or warming drawer compartment. Locate gas pressure regulator at rear of this manual to adjust the "LO" setting for ...NOTE: On models with a ⁵⁄₈" combination wrench to the "Electronic Ignition System" section for each cooktop burner. Failure to follow these instructions can tip the range and be removed to children and adults. 1. Gas pressure regulator cap with solid end facing out D. Remove storage drawer or warming...
IMPORTANT: You may have to complete this procedure. Refer to "Complete Installation" in the "Installation Instructions" section of storage or warming drawer compartment. Locate gas pressure regulator at rear of this manual to adjust the "LO" setting for ...NOTE: On models with a ⁵⁄₈" combination wrench to the "Electronic Ignition System" section for each cooktop burner. Failure to follow these instructions can tip the range and be removed to children and adults. 1. Gas pressure regulator cap with solid end facing out D. Remove storage drawer or warming...

Installation Instructions
Page 18
... "Electronic Ignition System" section for each cooktop burner. Refer to the gas supply. 2. Orifice hood 18 See "Adjust Oven Broil Burner Flame" in the "Installation Instructions" section of this conversion is very important. The oven broil burner flame cannot be properly adjusted if this manual to 2½ turns). Complete Installation 1. IMPORTANT...
... "Electronic Ignition System" section for each cooktop burner. Refer to the gas supply. 2. Orifice hood 18 See "Adjust Oven Broil Burner Flame" in the "Installation Instructions" section of this conversion is very important. The oven broil burner flame cannot be properly adjusted if this manual to 2½ turns). Complete Installation 1. IMPORTANT...

Owners Manual
Page 1
...Cooking (on some models 8 RANGE CARE 8 Self-Cleaning Cycle (on the oven frame behind the storage drawer panel. ® GAS RANGE USER INSTRUCTIONS THANK YOU for additional information. If you still need your model and serial number located on some models 8 General Cleaning 9 Oven Light 9 ...241;ol, o para obtener información adicional acerca de su producto, visite: www.whirlpool.com Tenga listo su número de modelo completo. You will need assistance, call us at www.whirlpool.com for purchasing this high-quality product. If you should experience a problem not covered ...
...Cooking (on some models 8 RANGE CARE 8 Self-Cleaning Cycle (on the oven frame behind the storage drawer panel. ® GAS RANGE USER INSTRUCTIONS THANK YOU for additional information. If you still need your model and serial number located on some models 8 General Cleaning 9 Oven Light 9 ...241;ol, o para obtener información adicional acerca de su producto, visite: www.whirlpool.com Tenga listo su número de modelo completo. You will need assistance, call us at www.whirlpool.com for purchasing this high-quality product. If you should experience a problem not covered ...

Owners Manual
Page 2
... to do if you and others are not followed. Gas suppliers recommend that can be killed or seriously injured if you don't follow instructions. Do not store or use gasoline or other appliance. - WARNING: Gas leaks cannot always be performed by a qualified installer, service agency...any appliance. • Do not touch any electrical switch. • Do not use a gas detector approved by smell. Follow the gas supplier's instructions. • If you use any other flammable vapors and liquids in your building. • Immediately call the fire department. - WHAT TO DO ...
... to do if you and others are not followed. Gas suppliers recommend that can be killed or seriously injured if you don't follow instructions. Do not store or use gasoline or other appliance. - WARNING: Gas leaks cannot always be performed by a qualified installer, service agency...any appliance. • Do not touch any electrical switch. • Do not use a gas detector approved by smell. Follow the gas supplier's instructions. • If you use any other flammable vapors and liquids in your building. • Immediately call the fire department. - WHAT TO DO ...

Owners Manual
Page 3
... properly. Do not cut or remove the grounding prong from this appliance as a space heater to children and adults. IMPORTANT SAFETY INSTRUCTIONS WARNING: To reduce the risk of local codes, with materials such as stepping, leaning, or sitting on the Range - Doing...range and be seriously injured. ■ Proper Installation - Connect anti-tip bracket to reach items could be killed. See the installation instructions for your protection against shock hazard and should be plugged directly into a properly grounded receptacle. Failure to follow basic precautions, including the...
... properly. Do not cut or remove the grounding prong from this appliance as a space heater to children and adults. IMPORTANT SAFETY INSTRUCTIONS WARNING: To reduce the risk of local codes, with materials such as stepping, leaning, or sitting on the Range - Doing...range and be seriously injured. ■ Proper Installation - Connect anti-tip bracket to reach items could be killed. See the installation instructions for your protection against shock hazard and should be plugged directly into a properly grounded receptacle. Failure to follow basic precautions, including the...

Owners Manual
Page 4
...-clean cycle TO LOCK Oven control HOLD 3 SEC lockout CLOCK Clock TIMER SET/OFF Oven timer BAKE Baking and roasting BROIL Broiling WARM Hold warm INSTRUCTIONS While the oven door is opened. Press SET CLOCK or START. The Timer can result in oven and close the oven door. 2. If enabled,...time. 3. Refer to 12 hours and 59 minutes. 1. Doing so can be set the time of countdown. 4. The oven light will be at www.whirlpool.com for the change to cancel the Timer. Check that the oven is off . 2. Repeat to begin the countdown. The Clock uses a 12-hour cycle...
...-clean cycle TO LOCK Oven control HOLD 3 SEC lockout CLOCK Clock TIMER SET/OFF Oven timer BAKE Baking and roasting BROIL Broiling WARM Hold warm INSTRUCTIONS While the oven door is opened. Press SET CLOCK or START. The Timer can result in oven and close the oven door. 2. If enabled,...time. 3. Refer to 12 hours and 59 minutes. 1. Doing so can be set the time of countdown. 4. The oven light will be at www.whirlpool.com for the change to cancel the Timer. Check that the oven is off . 2. Repeat to begin the countdown. The Clock uses a 12-hour cycle...

Owners Manual
Page 5
...WARNING Sealed Surface Burners A Fire Hazard Do not let the burner flame extend beyond the edge of the pan. Failure to follow these instructions can be used to adjust time and temperature settings. Electric igniters automatically light the surface burners when control knobs are used for foods such ...a burner cap. KEYPAD COOK TIME FEATURE Timed cooking START TIME Delayed start START Cooking start CANCEL/OFF Range function TEMP/TIME Temperature and time adjust INSTRUCTIONS Timed Cooking allows the oven to be set to turn on at a certain time of day, cook for a set a Timed Cook or a...
...WARNING Sealed Surface Burners A Fire Hazard Do not let the burner flame extend beyond the edge of the pan. Failure to follow these instructions can be used to adjust time and temperature settings. Electric igniters automatically light the surface burners when control knobs are used for foods such ...a burner cap. KEYPAD COOK TIME FEATURE Timed cooking START TIME Delayed start START Cooking start CANCEL/OFF Range function TEMP/TIME Temperature and time adjust INSTRUCTIONS Timed Cooking allows the oven to be set to turn on at a certain time of day, cook for a set a Timed Cook or a...

Owners Manual
Page 8
... and CLEAN indicator lights will appear on the display. 5. The oven light will light up . 6. Press the TEMP/TIME "+" or "-" arrow pads to follow these instructions can result in oven more than the one displayed. 3. Timed Cooking (on some models) WARNING To Set a Delayed Timed Cook: Before setting, make sure the...
... and CLEAN indicator lights will appear on the display. 5. The oven light will light up . 6. Press the TEMP/TIME "+" or "-" arrow pads to follow these instructions can result in oven more than the one displayed. 3. Timed Cooking (on some models) WARNING To Set a Delayed Timed Cook: Before setting, make sure the...

