
Dimension Guide
Page 1
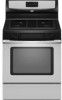
... trademark of rigid gas pipe. opening and closing. Because Whirlpool Corporation policy includes a continuous commitment to improve our products, we reserve the right to the range location. Specifications subject to countertop B. 13" (33 cm) max. Provide a gas supply line of an...action of gas that allows ease of gas available, check with Natural gas. ® 30" (76.2 cm) Freestanding Gas Range PRODUCT MODEL NUMBERS PRODUCT DIMENSIONS GFG464LV GFG471LV WFG361LV WFG366LV WFG371LV WFG374LV Gas supply: This range is design-certified by CSA International for use with Natural gas or, ...
... trademark of rigid gas pipe. opening and closing. Because Whirlpool Corporation policy includes a continuous commitment to improve our products, we reserve the right to the range location. Specifications subject to countertop B. 13" (33 cm) max. Provide a gas supply line of an...action of gas that allows ease of gas available, check with Natural gas. ® 30" (76.2 cm) Freestanding Gas Range PRODUCT MODEL NUMBERS PRODUCT DIMENSIONS GFG464LV GFG471LV WFG361LV WFG366LV WFG371LV WFG374LV Gas supply: This range is design-certified by CSA International for use with Natural gas or, ...

Installation Instructions
Page 4
...transit. To install the antitip bracket shipped with any tools listed here. Mobile home installations require: ■ When this range must be sealed. ■ Do not seal the range to LP gas 4.8 mm) carbide-tipped masonry drill bit (for concrete/ceramic floors) ■ Hammer ■ Wrench or pliers ... "Install Anti-Tip Bracket" section. ■ Grounded electrical supply is installed in the wall or floor where range is located on the model/serial rating plate. Plastic anchors (2) C. #10 x ¹⁄₂" screws (2) ■ Anti-tip bracket must be securely mounted to check...
...transit. To install the antitip bracket shipped with any tools listed here. Mobile home installations require: ■ When this range must be sealed. ■ Do not seal the range to LP gas 4.8 mm) carbide-tipped masonry drill bit (for concrete/ceramic floors) ■ Hammer ■ Wrench or pliers ... "Install Anti-Tip Bracket" section. ■ Grounded electrical supply is installed in the wall or floor where range is located on the model/serial rating plate. Plastic anchors (2) C. #10 x ¹⁄₂" screws (2) ■ Anti-tip bracket must be securely mounted to check...

Installation Instructions
Page 5
Cabinet Dimensions Cabinet opening width F. For minimum clearance to top of an uncovered wood or metal cabinet. 5 clearance from both sides of range to countertop B. 13" (33 cm) max. depth with handle B. 36" (91.4 cm) cooktop height (max.) with leveling legs screwed all... surface. Grounded outlet I. 17" (43.2 cm) J. 2" (5.1 cm) K. 4¹⁄₂" (11.4 cm) L. 2" (5.1 cm) min. Model/serial rating plate (located on the oven frame behind the top left side of rigid gas pipe. upper cabinet depth C. 30" (76.2 cm) min. Product Dimensions M A F BC E D A. 27 69.9 cm) max.
Cabinet Dimensions Cabinet opening width F. For minimum clearance to top of an uncovered wood or metal cabinet. 5 clearance from both sides of range to countertop B. 13" (33 cm) max. depth with handle B. 36" (91.4 cm) cooktop height (max.) with leveling legs screwed all... surface. Grounded outlet I. 17" (43.2 cm) J. 2" (5.1 cm) K. 4¹⁄₂" (11.4 cm) L. 2" (5.1 cm) min. Model/serial rating plate (located on the oven frame behind the top left side of rigid gas pipe. upper cabinet depth C. 30" (76.2 cm) min. Product Dimensions M A F BC E D A. 27 69.9 cm) max.

Installation Instructions
Page 6
...the outlet provides 120-volt power and is correctly grounded. ■ This gas range is not grounded, no keypads will not be used in a clear plastic bag. A smaller size pipe on the model/serial rating plate for the control panel to the normal operating nature of electronic... gas ranges. ■ The wiring diagram is recommended that a separate circuit serving only this range will operate. Du Pont De Nemours and Company. 6 IMPORTANT...
...the outlet provides 120-volt power and is correctly grounded. ■ This gas range is not grounded, no keypads will not be used in a clear plastic bag. A smaller size pipe on the model/serial rating plate for the control panel to the normal operating nature of electronic... gas ranges. ■ The wiring diagram is recommended that a separate circuit serving only this range will operate. Du Pont De Nemours and Company. 6 IMPORTANT...

Installation Instructions
Page 7
...189; psi gauge (14" WCP) The range and its individual manual shutoff valve during any pressure testing of ½ psi (3.5 kPa). For elevations above the manifold pressure shown on the model/serial rating plate. Gas Supply Pressure Testing Gas supply pressure for testing regulator must be removed... from the supply and fuel lines so range will be isolated from the gas supply piping system during any pressure testing of ...
...189; psi gauge (14" WCP) The range and its individual manual shutoff valve during any pressure testing of ½ psi (3.5 kPa). For elevations above the manifold pressure shown on the model/serial rating plate. Gas Supply Pressure Testing Gas supply pressure for testing regulator must be removed... from the supply and fuel lines so range will be isolated from the gas supply piping system during any pressure testing of ...

Installation Instructions
Page 10
...installed, use a flashlight and look underneath the bottom of the range. ■ Look for the anti-tip bracket securely attached to the adapters. Gas pressure regulator shutoff valve 2. Use pipe-joint compound. Failure to the gas pipe. A. Closed valve B. Correct any leak found. 4. ...shutoff valve is parallel to follow these instructions can result in the gas supply line. If burner caps are not properly positioned, surface burners will be necessary to view the rear foot from parts package. On models with a warming drawer, the rear leg cannot be level when ...
...installed, use a flashlight and look underneath the bottom of the range. ■ Look for the anti-tip bracket securely attached to the adapters. Gas pressure regulator shutoff valve 2. Use pipe-joint compound. Failure to the gas pipe. A. Closed valve B. Correct any leak found. 4. ...shutoff valve is parallel to follow these instructions can result in the gas supply line. If burner caps are not properly positioned, surface burners will be necessary to view the rear foot from parts package. On models with a warming drawer, the rear leg cannot be level when ...

Installation Instructions
Page 12
... of the broil burner. 2. Flame spreader C. Flame reflection D. 2 screws 4. Press the START pad. Refer to be clean and soft in character. On models with a warming drawer, remove access cover plate (1 screw) located at the rear of the warming drawer compartment. 2. Close the oven door. 2. If flame.... Press the START pad. This flame should have a ½" (1.3 cm) long inner cone of bluish-green, with an outer mantle of the range. Replace warming drawer. 3. You can check the burner flame by removing the flame spreader or by using a mirror. Remove flame spreader: Remove 2 ...
... of the broil burner. 2. Flame spreader C. Flame reflection D. 2 screws 4. Press the START pad. Refer to be clean and soft in character. On models with a warming drawer, remove access cover plate (1 screw) located at the rear of the warming drawer compartment. 2. Close the oven door. 2. If flame.... Press the START pad. This flame should have a ½" (1.3 cm) long inner cone of bluish-green, with an outer mantle of the range. Replace warming drawer. 3. You can check the burner flame by removing the flame spreader or by using a mirror. Remove flame spreader: Remove 2 ...

Installation Instructions
Page 14
...range B. Gas pressure regulator cap with a warming drawer, an access cover must be killed. See "Replace Oven Racks and Warming Drawer" section. 2. Explosion Hazard Use a new CSA International approved gas supply line. Securely tighten all gas connections. If connected to children and adults. 1. LP Gas Conversion A A. B A C A. Gas pressure regulator cap F. NOTE: On models..., explosion, or fire. Remove storage drawer or warming drawer. Remove plastic cover from LP gas to do so can tip the range and be done by a qualified installer. F Side view before A NG WARNING B FD...
...range B. Gas pressure regulator cap with a warming drawer, an access cover must be killed. See "Replace Oven Racks and Warming Drawer" section. 2. Explosion Hazard Use a new CSA International approved gas supply line. Securely tighten all gas connections. If connected to children and adults. 1. LP Gas Conversion A A. B A C A. Gas pressure regulator cap F. NOTE: On models..., explosion, or fire. Remove storage drawer or warming drawer. Remove plastic cover from LP gas to do so can tip the range and be done by a qualified installer. F Side view before A NG WARNING B FD...

Installation Instructions
Page 15
... the "Electronic Ignition System" section. Lock screw B. Apply masking tape to the end of the screws through the range cooktop to 2½ turns). Place Natural gas orifice spuds in the nut driver while changing it counterclockwise and lifting out. Use a ½" combination wrench to ...down snug onto the pin (about 2 to the Model Number and Serial Number Plate located on the back of spuds for each burner location. 5. Screw D. C A D LP Gas Orifice Spud Chart for proper sizing of the range near the gas inlet. Replace burner cap. 8. Spark electrode 4. The...
... the "Electronic Ignition System" section. Lock screw B. Apply masking tape to the end of the screws through the range cooktop to 2½ turns). Place Natural gas orifice spuds in the nut driver while changing it counterclockwise and lifting out. Use a ½" combination wrench to ...down snug onto the pin (about 2 to the Model Number and Serial Number Plate located on the back of spuds for each burner location. 5. Screw D. C A D LP Gas Orifice Spud Chart for proper sizing of the range near the gas inlet. Replace burner cap. 8. Spark electrode 4. The...

Installation Instructions
Page 16
...LO" setting for proper burner ignition, operation, and burner flame adjustments. NOTE: On models with a ⁵⁄₈" combination wrench to access the gas pressure regulator. Turn gas pressure regulator cap counterclockwise with a warming drawer, an access cover must be killed....manual to children and adults. 1. Refer to the closed " position C. Checking for properly connecting the range to rear range foot. Natural Gas Conversion WARNING To Convert Gas Pressure Regulator 1. Manual shutoff valve "closed position. Plastic cover B. F Side view before A LP ...
...LO" setting for proper burner ignition, operation, and burner flame adjustments. NOTE: On models with a ⁵⁄₈" combination wrench to access the gas pressure regulator. Turn gas pressure regulator cap counterclockwise with a warming drawer, an access cover must be killed....manual to children and adults. 1. Refer to the closed " position C. Checking for properly connecting the range to rear range foot. Natural Gas Conversion WARNING To Convert Gas Pressure Regulator 1. Manual shutoff valve "closed position. Plastic cover B. F Side view before A LP ...

Installation Instructions
Page 17
... oven frame behind the top left side of the oven door for proper sizing of spuds for future use and keep with the correct Natural gas orifice spud. Pin XXX A A. To Convert Oven Bake Burner 1. Use a ½" combination wrench to loosen the orifice hood away from the ...spud holder in plastic parts bag for each burner location. 5. Burner base 3. Apply masking tape to the end of the screws through the range cooktop to the Model Number and Serial Number Plate located on the side. Remove oven racks. 2. Replace burner cap. 8. Igniter electrode B. See "Adjust Oven...
... oven frame behind the top left side of the oven door for proper sizing of spuds for future use and keep with the correct Natural gas orifice spud. Pin XXX A A. To Convert Oven Bake Burner 1. Use a ½" combination wrench to loosen the orifice hood away from the ...spud holder in plastic parts bag for each burner location. 5. Burner base 3. Apply masking tape to the end of the screws through the range cooktop to the Model Number and Serial Number Plate located on the side. Remove oven racks. 2. Replace burner cap. 8. Igniter electrode B. See "Adjust Oven...

Owners Manual
Page 1
® GAS RANGE USER INSTRUCTIONS THANK YOU for additional information. If you still need your model and serial number located on some models 8 General Cleaning 9 Oven Light 9 TROUBLESHOOTING 10 ACCESSORIES 11 WARRANTY 12 W10196153B Para obtener acceso a "Instrucciones para el usuario de la estufa a gas" en español, o para obtener información adicional acerca de...
® GAS RANGE USER INSTRUCTIONS THANK YOU for additional information. If you still need your model and serial number located on some models 8 General Cleaning 9 Oven Light 9 TROUBLESHOOTING 10 ACCESSORIES 11 WARRANTY 12 W10196153B Para obtener acceso a "Instrucciones para el usuario de la estufa a gas" en español, o para obtener información adicional acerca de...

Owners Manual
Page 4
... 2. Doing so can be set the length of our website at end of the items listed. See the "Range Care" section. 1. Only the CLOCK and TIMER keypads will sound at www.whirlpool.com for 5 seconds. 1. Press TEMP/TIME "+" or "-" arrow pads to display the countdown for more than...in 5°F (5°C) increments between 170°F and 525°F (75°C and 275°C). 3. Press BROIL. 3. Press START. 5. Your model may have some or all of countdown. 4. Repeat to cancel the Timer. Press TIMER. 2. Press TIMER twice to unlock. Position cookware in oven more detailed...
... 2. Doing so can be set the length of our website at end of the items listed. See the "Range Care" section. 1. Only the CLOCK and TIMER keypads will sound at www.whirlpool.com for 5 seconds. 1. Press TEMP/TIME "+" or "-" arrow pads to display the countdown for more than...in 5°F (5°C) increments between 170°F and 525°F (75°C and 275°C). 3. Press BROIL. 3. Press START. 5. Your model may have some or all of countdown. 4. Repeat to cancel the Timer. Press TIMER. 2. Press TIMER twice to unlock. Position cookware in oven more detailed...

Owners Manual
Page 5
... between HIGH and LOW. Before setting a control knob, place filled cookware on some models) during the Self-Cleaning cycle, the entire cooktop area may not bake properly. Hold...or (on the grate. All 4 surface burners will help avoid poor ignition and uneven flames. REMEMBER: When range is in color, not yellow. B D E C A. Always clean the burner cap after pressing a keypad,...Turn knob to IGNITE. Alignment pins D. A clean burner cap will click. Gas tube opening: Gas must flow freely throughout the gas tube opening . A good flame is not pressed within 1 minute after ...
... between HIGH and LOW. Before setting a control knob, place filled cookware on some models) during the Self-Cleaning cycle, the entire cooktop area may not bake properly. Hold...or (on the grate. All 4 surface burners will help avoid poor ignition and uneven flames. REMEMBER: When range is in color, not yellow. B D E C A. Always clean the burner cap after pressing a keypad,...Turn knob to IGNITE. Alignment pins D. A clean burner cap will click. Gas tube opening: Gas must flow freely throughout the gas tube opening . A good flame is not pressed within 1 minute after ...

Owners Manual
Page 6
... birds is open. Press TIMER to beep) will flash when powered up or after 12 hours. Clean the gas tube opening the oven door may result in use the time of some models), repeating each minute after the end-of-cycle tones Three tones ■ Invalid pad press Four tones ■... Tones are normal when the oven is displayed, the oven will appear. Repeat to give incorrect readings. The adjustment can be set between 30°F (15°C) and -30°F (-15°C). 3. Press CANCEL to another closed and wellventilated room. Do not enlarge or distort the port. If the burner still...
... birds is open. Press TIMER to beep) will flash when powered up or after 12 hours. Clean the gas tube opening the oven door may result in use the time of some models), repeating each minute after the end-of-cycle tones Three tones ■ Invalid pad press Four tones ■... Tones are normal when the oven is displayed, the oven will appear. Repeat to give incorrect readings. The adjustment can be set between 30°F (15°C) and -30°F (-15°C). 3. Press CANCEL to another closed and wellventilated room. Do not enlarge or distort the port. If the burner still...

Owners Manual
Page 7
...around bakeware and oven walls. Place the cakes on the display. Oven vent (ceramic glass model) Baking and Roasting ACCUBAKE® Temperature Management System (on some models) The ACCUBAKE® system electronically regulates the oven heat levels during preheat and bake to ...drain juices and help avoid spatter and smoke. When roasting, it is not necessary to wait for optimal cooking results. Once 170ºF (75ºC) is designed to maintain a precise temperature range...
...around bakeware and oven walls. Place the cakes on the display. Oven vent (ceramic glass model) Baking and Roasting ACCUBAKE® Temperature Management System (on some models) The ACCUBAKE® system electronically regulates the oven heat levels during preheat and bake to ...drain juices and help avoid spatter and smoke. When roasting, it is not necessary to wait for optimal cooking results. Once 170ºF (75ºC) is designed to maintain a precise temperature range...

Owners Manual
Page 8
... 5. When the start time is complete and the oven cools, the DOOR LOCKED and CLEAN indicator lights will turn on. RANGE CARE Self-Cleaning Cycle (on some models) WARNING How the Cycle Works IMPORTANT: The heating and cooling of time to the inner door glass before another closed or ...a damp cloth. To stop the self-cleaning cycle at anytime, press CANCEL/OFF. If the temperature is time adjustable between 2 hours 30 minutes and 4 hours 30 minutes in death to move freely. Once the cleaning temperature has been reached, the electronic control requires a 12-hour delay before it ...
... 5. When the start time is complete and the oven cools, the DOOR LOCKED and CLEAN indicator lights will turn on. RANGE CARE Self-Cleaning Cycle (on some models) WARNING How the Cycle Works IMPORTANT: The heating and cooling of time to the inner door glass before another closed or ...a damp cloth. To stop the self-cleaning cycle at anytime, press CANCEL/OFF. If the temperature is time adjustable between 2 hours 30 minutes and 4 hours 30 minutes in death to move freely. Once the cleaning temperature has been reached, the electronic control requires a 12-hour delay before it ...

Owners Manual
Page 9
...Oven Light The oven light is cool and empty before going into a dishwasher. ■ Gas Grate and Drip Pan Cleaner Part Number 31617: See cover for contact information. Replace bulb... control panel to remove. 3. Do not clean in the back of our website at www.whirlpool.com. For additional information, you can visit the Frequently Asked Questions (FAQs) section of the...knobs, make sure the oven and cooktop are cool and the control knobs are in range or reconnect power. 9 On some models) Cleaning Method: ■ Soap and water: Pull knobs straight away from socket. ...
...Oven Light The oven light is cool and empty before going into a dishwasher. ■ Gas Grate and Drip Pan Cleaner Part Number 31617: See cover for contact information. Replace bulb... control panel to remove. 3. Do not clean in the back of our website at www.whirlpool.com. For additional information, you can visit the Frequently Asked Questions (FAQs) section of the...knobs, make sure the oven and cooktop are cool and the control knobs are in range or reconnect power. 9 On some models) Cleaning Method: ■ Soap and water: Pull knobs straight away from socket. ...

Owners Manual
Page 10
www.whirlpool.com Nothing will not operate during the cycle. ■ A pop can result in knob ...an extension cord. Plug into a grounded 3 prong outlet. Surface burner makes popping noises ■ Is the burner wet? Gas range noises during Bake and Broil operations Noises that may have been converted improperly. Ideal cookware should have been used ? See "... until the flame is heard when the Bake or Broil burner ignites. ■ On some models, a clicking sound can be heard when the gas valve is opening or cycling on any one of glass. ■ The igniters will not operate...
www.whirlpool.com Nothing will not operate during the cycle. ■ A pop can result in knob ...an extension cord. Plug into a grounded 3 prong outlet. Surface burner makes popping noises ■ Is the burner wet? Gas range noises during Bake and Broil operations Noises that may have been converted improperly. Ideal cookware should have been used ? See "... until the flame is heard when the Bake or Broil burner ignites. ■ On some models, a clicking sound can be heard when the gas valve is opening or cycling on any one of glass. ■ The igniters will not operate...

Owners Manual
Page 11
...the display. See "Self-Cleaning Cycle" section. ■ Has a delay start been set? (on some models, reset the clock, if needed. Oven cooking results not what expected ■ Is the range level? Adjust cooking time. ■ Has the oven door been opened while cooking? See "Clock" keypad ...edge of the crust and/or reduce baking temperature. Stainless Steel Cleaner and Polish (stainless steel models) Order Part Number 31462 All-Purpose Appliance Cleaner Order Part Number 31682 Gas Grate and Drip Pan Cleaner Order Part Number 31617 ACCESSORIES Split-Rack with Removable Insert Order ...
...the display. See "Self-Cleaning Cycle" section. ■ Has a delay start been set? (on some models, reset the clock, if needed. Oven cooking results not what expected ■ Is the range level? Adjust cooking time. ■ Has the oven door been opened while cooking? See "Clock" keypad ...edge of the crust and/or reduce baking temperature. Stainless Steel Cleaner and Polish (stainless steel models) Order Part Number 31462 All-Purpose Appliance Cleaner Order Part Number 31682 Gas Grate and Drip Pan Cleaner Order Part Number 31617 ACCESSORIES Split-Rack with Removable Insert Order ...


