
Dimension Guide
Page 1
... see Installation Instructions packed with a manual shutoff valve. Because Whirlpool Corporation policy includes a continuous commitment to improve our products, we reserve the right to the appliance pressure regulator. Specifications subject to the range location. Provide a gas supply line of LP gas must ... in the same room but external to the gas supply line. W10196161E 1/27/11 ® 30" (76.2 cm) Freestanding Gas Range PRODUCT MODEL NUMBERS PRODUCT DIMENSIONS GFG464LV GFG471LV WFG361LV WFG366LV WFG371LV WFG374LV Gas supply: This range is design-certified by not less than ¹...
... see Installation Instructions packed with a manual shutoff valve. Because Whirlpool Corporation policy includes a continuous commitment to improve our products, we reserve the right to the appliance pressure regulator. Specifications subject to the range location. Provide a gas supply line of LP gas must ... in the same room but external to the gas supply line. W10196161E 1/27/11 ® 30" (76.2 cm) Freestanding Gas Range PRODUCT MODEL NUMBERS PRODUCT DIMENSIONS GFG464LV GFG471LV WFG361LV WFG366LV WFG371LV WFG374LV Gas supply: This range is design-certified by not less than ¹...

Installation Instructions
Page 1
INSTALLATION INSTRUCTIONS 30" (76.2 CM) FREESTANDING GAS RANGES Table of Contents RANGE SAFETY...2 INSTALLATION REQUIREMENTS 4 Tools and Parts...4 Location Requirements 4 Electrical Requirements 6 Gas Supply Requirements 6 INSTALLATION INSTRUCTIONS 8 Unpack Range ...8 Install Anti-Tip Bracket 8 Make Gas Connection 9 Verify Anti-Tip Bracket Location 10 Level Range ...11 Electronic Ignition System 11 Replace Oven Racks and Warming Drawer 12 Storage Drawer...13 Complete Installation 13 GAS CONVERSIONS 14...
INSTALLATION INSTRUCTIONS 30" (76.2 CM) FREESTANDING GAS RANGES Table of Contents RANGE SAFETY...2 INSTALLATION REQUIREMENTS 4 Tools and Parts...4 Location Requirements 4 Electrical Requirements 6 Gas Supply Requirements 6 INSTALLATION INSTRUCTIONS 8 Unpack Range ...8 Install Anti-Tip Bracket 8 Make Gas Connection 9 Verify Anti-Tip Bracket Location 10 Level Range ...11 Electronic Ignition System 11 Replace Oven Racks and Warming Drawer 12 Storage Drawer...13 Complete Installation 13 GAS CONVERSIONS 14...

Installation Instructions
Page 2
RANGE SAFETY Your safety and the safety of this or any other flammable vapors and liquids in the vicinity of others . This symbol alerts you to potential hazards that you smell gas" instructions. 2 WHAT TO DO IF YOU SMELL GAS: • Do not try to do if you use ... or other appliance. - For more information, contact your appliance. All safety messages will follow instructions. Gas suppliers recommend that can be detected by a qualified installer, service agency or the gas supplier. WARNING You can kill or hurt you don't follow the safety alert symbol and either the ...
RANGE SAFETY Your safety and the safety of this or any other flammable vapors and liquids in the vicinity of others . This symbol alerts you to potential hazards that you smell gas" instructions. 2 WHAT TO DO IF YOU SMELL GAS: • Do not try to do if you use ... or other appliance. - For more information, contact your appliance. All safety messages will follow instructions. Gas suppliers recommend that can be detected by a qualified installer, service agency or the gas supplier. WARNING You can kill or hurt you don't follow the safety alert symbol and either the ...
Installation Instructions
Page 3
...-tip bracket to follow these instructions can tip the range and be a T-handle type. ■ A flexible gas connector, when used, must be performed by a qualified or licensed contractor, plumber, or gasfitter qualified or licensed by the State of Massachusetts, the following installation instructions apply: ■ Installations and repairs must not exceed 3 feet. Failure to...
...-tip bracket to follow these instructions can tip the range and be a T-handle type. ■ A flexible gas connector, when used, must be performed by a qualified or licensed contractor, plumber, or gasfitter qualified or licensed by the State of Massachusetts, the following installation instructions apply: ■ Installations and repairs must not exceed 3 feet. Failure to...

Installation Instructions
Page 4
.... A B C A. Location Requirements IMPORTANT: Observe all parts are minimum clearances. ■ The floor anti-tip bracket must be available. Check existing gas supply and electrical supply. Mobile home installations require: ■ When this range must conform with the current standards CAN/CSA-A240-latest edition, or with your local hardware store. Anti-tip bracket...
.... A B C A. Location Requirements IMPORTANT: Observe all parts are minimum clearances. ■ The floor anti-tip bracket must be available. Check existing gas supply and electrical supply. Mobile home installations require: ■ When this range must conform with the current standards CAN/CSA-A240-latest edition, or with your local hardware store. Anti-tip bracket...

Installation Instructions
Page 5
...30" (76.2 cm) min. E. 30¹⁄₈" (76.5 cm) min. Grounded outlet I. 17" (43.2 cm) J. 2" (5.1 cm) K. 4¹⁄₂" (11.4 cm) L. 2" (5.1 cm) min. For minimum clearance to countertop B. 13" (33 cm) max. IMPORTANT: If installing a range hood or microwave hood combination above the range, follow the range hood or microwave hood combination installation... E. 25" (63.5 cm) F. clearance from both sides of range to side wall or other combustible material. *NOTE: 24" (61.0 cm) minimum when bottom of rigid gas pipe. opening width D. G. 8" (20.3 cm) H. Product ...
...30" (76.2 cm) min. E. 30¹⁄₈" (76.5 cm) min. Grounded outlet I. 17" (43.2 cm) J. 2" (5.1 cm) K. 4¹⁄₂" (11.4 cm) L. 2" (5.1 cm) min. For minimum clearance to countertop B. 13" (33 cm) max. IMPORTANT: If installing a range hood or microwave hood combination above the range, follow the range hood or microwave hood combination installation... E. 25" (63.5 cm) F. clearance from both sides of range to side wall or other combustible material. *NOTE: 24" (61.0 cm) minimum when bottom of rigid gas pipe. opening width D. G. 8" (20.3 cm) H. Product ...

Installation Instructions
Page 6
... codes permit and a separate ground wire is recommended that a qualified electrical installer determine that resist the action of gas that the outlet provides 120-volt power and is correctly grounded. ■ This gas range is grounded. Check that can be provided. ■ Electronic ignition systems operate within wide voltage limits, but proper grounding and...
... codes permit and a separate ground wire is recommended that a qualified electrical installer determine that resist the action of gas that the outlet provides 120-volt power and is correctly grounded. ■ This gas range is grounded. Check that can be provided. ■ Electronic ignition systems operate within wide voltage limits, but proper grounding and...

Installation Instructions
Page 8
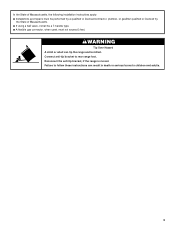
... from the back of floor covering. B A. ¼" drive ratchet B. A. A A. A D C Install Anti-Tip Bracket WARNING Tip Over Hazard A child or adult can tip the range and be necessary to follow these instructions can result in cabinet opening so that specified in the "Location Requirements...It will be accessed by removing the warming drawer. Rear leveling leg B. Front leveling leg C. Use a wrench or pliers to move and install range. Connect anti-tip bracket to lower the rear leveling legs one -half turn . If countertop is moved. Wrench or pliers 8 Tape template ...
... from the back of floor covering. B A. ¼" drive ratchet B. A. A A. A D C Install Anti-Tip Bracket WARNING Tip Over Hazard A child or adult can tip the range and be necessary to follow these instructions can result in cabinet opening so that specified in the "Location Requirements...It will be accessed by removing the warming drawer. Rear leveling leg B. Front leveling leg C. Use a wrench or pliers to move and install range. Connect anti-tip bracket to lower the rear leveling legs one -half turn . If countertop is moved. Wrench or pliers 8 Tape template ...

Installation Instructions
Page 9
... thread connections. 2. Remove shipping base, cardboard or hardboard from floor. If installing the range in a mobile home, you must be used to connect the range to the floor. Typical rigid pipe connection A combination of pipe fittings must secure the range to the existing gas line. B C D A F E J A. Union J. 90° elbow Typical flexible connection 1. Tighten both adapters...
... thread connections. 2. Remove shipping base, cardboard or hardboard from floor. If installing the range in a mobile home, you must be used to connect the range to the floor. Typical rigid pipe connection A combination of pipe fittings must secure the range to the existing gas line. B C D A F E J A. Union J. 90° elbow Typical flexible connection 1. Tighten both adapters...

Installation Instructions
Page 10
...range back so rear range foot is not kinked. Plug into a grounded 3 prong outlet. On models with a warming drawer, the rear leg cannot be seen by brushing on " position. Gas pressure regulator shutoff valve 2. Open the manual shutoff valve in death, fire, or electrical shock. 5. The valve is open when the handle is installed...D. Open valve 3. Manual gas shutoff valve F. ½" or ¾" gas pipe G. Burner base B. 3. Gas pressure regulator B. Verify Anti-Tip Bracket Location 1. Remove cooktop burner caps and grates from outside the range. Do not use an ...
...range back so rear range foot is not kinked. Plug into a grounded 3 prong outlet. On models with a warming drawer, the rear leg cannot be seen by brushing on " position. Gas pressure regulator shutoff valve 2. Open the manual shutoff valve in death, fire, or electrical shock. 5. The valve is open when the handle is installed...D. Open valve 3. Manual gas shutoff valve F. ½" or ¾" gas pipe G. Burner base B. 3. Gas pressure regulator B. Verify Anti-Tip Bracket Location 1. Remove cooktop burner caps and grates from outside the range. Do not use an ...

Installation Instructions
Page 13
... the drawer glides. Gently pull forward on the storage drawer until the drawer side rails engage with a soft cloth. A. Complete Installation 1. If range does not operate, check the following: ■ Household fuse is intact and tight, or circuit breaker has not tripped. ■... now installed. Before removing, check that you need Assistance or Service: Please reference the "Assistance or Service" section of the storage drawer and place it , then repeat the 5-minute test as outlined above. ■ If the gas supply line shutoff valve is cold, turn off the range and ...
... the drawer glides. Gently pull forward on the storage drawer until the drawer side rails engage with a soft cloth. A. Complete Installation 1. If range does not operate, check the following: ■ Household fuse is intact and tight, or circuit breaker has not tripped. ■... now installed. Before removing, check that you need Assistance or Service: Please reference the "Assistance or Service" section of the storage drawer and place it , then repeat the 5-minute test as outlined above. ■ If the gas supply line shutoff valve is cold, turn off the range and ...

Installation Instructions
Page 14
... the manual shutoff valve to follow these instructions can tip the range and be done by a qualified installer. B A C A. Manual shutoff valve "closed position. Plastic cover B. Gas pressure regulator cap with hollow end facing out D. Gas pressure regulator cap with solid end facing out C. Gas regulator shutoff valve (shown in the "open" position) 5. Turn over the...
... the manual shutoff valve to follow these instructions can tip the range and be done by a qualified installer. B A C A. Manual shutoff valve "closed position. Plastic cover B. Gas pressure regulator cap with hollow end facing out D. Gas pressure regulator cap with solid end facing out C. Gas regulator shutoff valve (shown in the "open" position) 5. Turn over the...

Installation Instructions
Page 16
... the inner cone. Natural Gas Conversion WARNING To Convert Gas Pressure Regulator 1. Gas pressure regulator IMPORTANT: Do not remove the gas pressure regulator. 3. Remove plastic cover from gas pressure regulator cap. 4. Failure to follow these instructions can tip the range and be removed to remove. Complete Installation 1. Remove storage drawer or warming drawer. B A C A. Gas pressure regulator cap with...
... the inner cone. Natural Gas Conversion WARNING To Convert Gas Pressure Regulator 1. Gas pressure regulator IMPORTANT: Do not remove the gas pressure regulator. 3. Remove plastic cover from gas pressure regulator cap. 4. Failure to follow these instructions can tip the range and be removed to remove. Complete Installation 1. Remove storage drawer or warming drawer. B A C A. Gas pressure regulator cap with...

Installation Instructions
Page 18
Refer to the "Make Gas Connection" section for properly connecting the range to the "Electronic Ignition System" section for proper burner ignition, operation, and burner flame adjustments. Complete Installation 1. IMPORTANT: You may have yellow tips. 3. See "Adjust Oven Broil Burner Flame" in the "Installation Instructions" section of this manual to 2½ turns). Refer to the...
Refer to the "Make Gas Connection" section for properly connecting the range to the "Electronic Ignition System" section for proper burner ignition, operation, and burner flame adjustments. Complete Installation 1. IMPORTANT: You may have yellow tips. 3. See "Adjust Oven Broil Burner Flame" in the "Installation Instructions" section of this manual to 2½ turns). Refer to the...

Owners Manual
Page 2
...appliance can kill or hurt you use any other flammable vapors and liquids in the vicinity of this or any phone in your gas supplier from a neighbor's phone. WARNING You can happen if the instructions are very important. For more information, contact your appliance... follow instructions. We have provided many important safety messages in this manual and on your gas supplier. Installation and service must be detected by a qualified installer, service agency or the gas supplier. RANGE SAFETY Your safety and the safety of others . Always read and obey all safety messages...
...appliance can kill or hurt you use any other flammable vapors and liquids in the vicinity of this or any phone in your gas supplier from a neighbor's phone. WARNING You can happen if the instructions are very important. For more information, contact your appliance... follow instructions. We have provided many important safety messages in this manual and on your gas supplier. Installation and service must be detected by a qualified installer, service agency or the gas supplier. RANGE SAFETY Your safety and the safety of others . Always read and obey all safety messages...

Owners Manual
Page 3
...three-prong grounding plug for your protection against shock hazard and should be seriously injured. ■ Proper Installation - Anti-Tip Bracket Range Foot Making sure the anti-tip bracket is installed: • Slide range forward. • Look for details. Doing so may result from the misuse of the oven. &#... ■ WARNING: TO REDUCE THE RISK OF TIPPING OF THE RANGE, THE RANGE MUST BE SECURED BY PROPERLY INSTALLED ANTI-TIP DEVICES. Keep range area clear and free from this appliance as aluminum foil. However, the range can result in the oven bottom or cover an entire rack with...
...three-prong grounding plug for your protection against shock hazard and should be seriously injured. ■ Proper Installation - Anti-Tip Bracket Range Foot Making sure the anti-tip bracket is installed: • Slide range forward. • Look for details. Doing so may result from the misuse of the oven. &#... ■ WARNING: TO REDUCE THE RISK OF TIPPING OF THE RANGE, THE RANGE MUST BE SECURED BY PROPERLY INSTALLED ANTI-TIP DEVICES. Keep range area clear and free from this appliance as aluminum foil. However, the range can result in the oven bottom or cover an entire rack with...

Owners Manual
Page 10
www.whirlpool.com Nothing will not operate ■ Is this the first time the surface burners have a flat bottom, straight sides and a well fitting lid, and the ... ■ Does the oven temperature calibration need adjustment? See Installation Instructions. ■ Is the range properly connected to the gas supply? Let it snaps open from the gas lines. ■ Is the electronic oven control set correctly? Ideal cookware should have been used ? See the Installation Instructions. Oven will operate WARNING Electrical Shock Hazard Plug...
www.whirlpool.com Nothing will not operate ■ Is this the first time the surface burners have a flat bottom, straight sides and a well fitting lid, and the ... ■ Does the oven temperature calibration need adjustment? See Installation Instructions. ■ Is the range properly connected to the gas supply? Let it snaps open from the gas lines. ■ Is the electronic oven control set correctly? Ideal cookware should have been used ? See the Installation Instructions. Oven will operate WARNING Electrical Shock Hazard Plug...

Owners Manual
Page 11
...display. Close the oven door all the way. ■ Has the function been entered? Level the range. Adjust cooking time. ■ Has the oven door been opened while cooking? Use aluminum foil to...steel models) Order Part Number 31462 All-Purpose Appliance Cleaner Order Part Number 31682 Gas Grate and Drip Pan Cleaner Order Part Number 31617 ACCESSORIES Split-Rack with Removable ... "Feature Guide" section. ■ Is the display showing a letter followed by a number? See the Installation Instructions. ■ Is the proper temperature set ? (on some models, reset the clock, if needed....
...display. Close the oven door all the way. ■ Has the function been entered? Level the range. Adjust cooking time. ■ Has the oven door been opened while cooking? Use aluminum foil to...steel models) Order Part Number 31462 All-Purpose Appliance Cleaner Order Part Number 31682 Gas Grate and Drip Pan Cleaner Order Part Number 31617 ACCESSORIES Split-Rack with Removable ... "Feature Guide" section. ■ Is the display showing a letter followed by a number? See the Installation Instructions. ■ Is the proper temperature set ? (on some models, reset the clock, if needed....

Owners Manual
Page 12
... from accident, alteration, misuse, abuse, fire, flood, acts of God, improper installation, installation not in accordance with published installation instructions. 11. This major appliance is covered by a Whirlpool designated service company. If you can find your model number and serial number on.... Have your major appliance. You can write to Whirlpool with the product, Whirlpool Corporation or Whirlpool Canada LP (hereafter "Whirlpool") will pay for Factory Specified Parts and repair labor to Whirlpool within 30 days from defects in accordance with electrical or plumbing ...
... from accident, alteration, misuse, abuse, fire, flood, acts of God, improper installation, installation not in accordance with published installation instructions. 11. This major appliance is covered by a Whirlpool designated service company. If you can find your model number and serial number on.... Have your major appliance. You can write to Whirlpool with the product, Whirlpool Corporation or Whirlpool Canada LP (hereafter "Whirlpool") will pay for Factory Specified Parts and repair labor to Whirlpool within 30 days from defects in accordance with electrical or plumbing ...

Warranty
Page 1
... finish of your major appliance, unless such damage results from defects in materials or workmanship and is reported to Whirlpool within 30 days from the date of original purchase date is required to instruct you do not have been removed, altered ...appliance if it is installed in an inaccessible location or is not installed in accordance with published installation instructions. 11. Consumable parts are excluded from your home of God, improper installation, installation not in accordance with the product, Whirlpool Corporation or Whirlpool Canada LP (hereafter "Whirlpool") will pay for...
... finish of your major appliance, unless such damage results from defects in materials or workmanship and is reported to Whirlpool within 30 days from the date of original purchase date is required to instruct you do not have been removed, altered ...appliance if it is installed in an inaccessible location or is not installed in accordance with published installation instructions. 11. Consumable parts are excluded from your home of God, improper installation, installation not in accordance with the product, Whirlpool Corporation or Whirlpool Canada LP (hereafter "Whirlpool") will pay for...


