
Dimension Guide
Page 1
...oven door frame has information on the oven frame behind the top left side of the oven door) *Range can be used . Provide a gas supply line of gas that can be used in insufficient gas supply. If local codes permit, a new CSA design-certified, 4 to 5 ft (122 to 152.4...13.0 mm) minimum. If the cabinet depth is required. G. 8" (20.3 cm) H. Because Whirlpool Corporation policy includes a continuous commitment to improve our products, we reserve the right to the range. Usually, LP gas suppliers determine the size and materials used . Do not use TEFLON®† tape. It should...
...oven door frame has information on the oven frame behind the top left side of the oven door) *Range can be used . Provide a gas supply line of gas that can be used in insufficient gas supply. If local codes permit, a new CSA design-certified, 4 to 5 ft (122 to 152.4...13.0 mm) minimum. If the cabinet depth is required. G. 8" (20.3 cm) H. Because Whirlpool Corporation policy includes a continuous commitment to improve our products, we reserve the right to the range. Usually, LP gas suppliers determine the size and materials used . Do not use TEFLON®† tape. It should...

Installation Instructions
Page 1
W10196161E INSTALLATION INSTRUCTIONS 30" (76.2 CM) FREESTANDING GAS RANGES Table of Contents RANGE SAFETY...2 INSTALLATION REQUIREMENTS 4 Tools and Parts...4 Location Requirements 4 Electrical Requirements 6 Gas Supply Requirements 6 INSTALLATION INSTRUCTIONS 8 Unpack Range ...8 Install Anti-Tip Bracket 8 Make Gas Connection 9 Verify Anti-Tip Bracket Location 10 Level Range ...11 Electronic Ignition System 11 Replace Oven Racks and Warming Drawer 12 Storage...
W10196161E INSTALLATION INSTRUCTIONS 30" (76.2 CM) FREESTANDING GAS RANGES Table of Contents RANGE SAFETY...2 INSTALLATION REQUIREMENTS 4 Tools and Parts...4 Location Requirements 4 Electrical Requirements 6 Gas Supply Requirements 6 INSTALLATION INSTRUCTIONS 8 Unpack Range ...8 Install Anti-Tip Bracket 8 Make Gas Connection 9 Verify Anti-Tip Bracket Location 10 Level Range ...11 Electronic Ignition System 11 Replace Oven Racks and Warming Drawer 12 Storage...

Installation Instructions
Page 2
...or hurt you and others are not followed. If a gas leak is , tell you how to potential hazards that you cannot reach your gas supplier, call your building. • Immediately call the fire department. - RANGE SAFETY Your safety and the safety of others . Installation ...and service must be killed or seriously injured if you smell gas" instructions. 2 For more information, ...
...or hurt you and others are not followed. If a gas leak is , tell you how to potential hazards that you cannot reach your gas supplier, call your building. • Immediately call the fire department. - RANGE SAFETY Your safety and the safety of others . Installation ...and service must be killed or seriously injured if you smell gas" instructions. 2 For more information, ...
Installation Instructions
Page 3
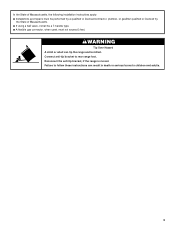
Failure to follow these instructions can tip the range and be a T-handle type. ■ A flexible gas connector, when used, must not exceed 3 feet. Connect anti-tip bracket to children and adults. 3 Reconnect the anti-tip bracket, if the range is moved. WARNING Tip Over Hazard A child or adult ...can result in death or serious burns to rear range foot. In the State ...
Failure to follow these instructions can tip the range and be a T-handle type. ■ A flexible gas connector, when used, must not exceed 3 feet. Connect anti-tip bracket to children and adults. 3 Reconnect the anti-tip bracket, if the range is moved. WARNING Tip Over Hazard A child or adult ...can result in death or serious burns to rear range foot. In the State ...

Installation Instructions
Page 4
...Home Construction and Safety, Title 24, HUD Part 280). Any method of securing the range is the installer's responsibility to check that all governing codes and ordinances. A B C A. See "Gas Supply Requirements" section. ■ Contact a qualified floor covering installer to comply with ...International and complies with your local hardware store. Check existing gas supply and electrical supply. Do not obstruct flow of this range must be available. See "Electrical Requirements" section. ■ Proper gas supply connection must be used will not discolor, delaminate or ...
...Home Construction and Safety, Title 24, HUD Part 280). Any method of securing the range is the installer's responsibility to check that all governing codes and ordinances. A B C A. See "Gas Supply Requirements" section. ■ Contact a qualified floor covering installer to comply with ...International and complies with your local hardware store. Check existing gas supply and electrical supply. Do not obstruct flow of this range must be available. See "Electrical Requirements" section. ■ Proper gas supply connection must be used will not discolor, delaminate or ...

Installation Instructions
Page 5
... wood or metal cabinet. 5 G. 8" (20.3 cm) H. Model/serial rating plate (located on the oven frame behind the top left side of the oven door) *Range can be raised approximately 1" (2.5 cm) by not less than No. 28 MSG sheet steel, 0.015" (0.4 mm) stainless steel, 0.024" (0.6 mm) aluminum or 0....020" (0.5 mm) copper. 30" (76.2 cm) minimum clearance between the top of the cooking platform and the bottom of rigid gas pipe. upper cabinet depth C. 30" (76.2 cm) min. opening width F. opening width D. A. 18" (45.7 cm) upper side cabinet to top of wood...
... wood or metal cabinet. 5 G. 8" (20.3 cm) H. Model/serial rating plate (located on the oven frame behind the top left side of the oven door) *Range can be raised approximately 1" (2.5 cm) by not less than No. 28 MSG sheet steel, 0.015" (0.4 mm) stainless steel, 0.024" (0.6 mm) aluminum or 0....020" (0.5 mm) copper. 30" (76.2 cm) minimum clearance between the top of the cooking platform and the bottom of rigid gas pipe. upper cabinet depth C. 30" (76.2 cm) min. opening width F. opening width D. A. 18" (45.7 cm) upper side cabinet to top of wood...

Installation Instructions
Page 6
... grounded 3 prong outlet. latest edition. Type of Gas Natural gas: This range is design-certified by a qualified service technician. Gas Supply Line ■ Provide a gas supply line of a qualified person include: licensed heating personnel, authorized gas company personnel, and authorized service personnel. Failure to ...Interrupter) outlet. However, occasional nuisance tripping of the GFCI breaker is possible due to the normal operating nature of electronic gas ranges. ■ The wiring diagram is factory set for the control panel to work. No attempt shall be affected if ...
... grounded 3 prong outlet. latest edition. Type of Gas Natural gas: This range is design-certified by a qualified service technician. Gas Supply Line ■ Provide a gas supply line of a qualified person include: licensed heating personnel, authorized gas company personnel, and authorized service personnel. Failure to ...Interrupter) outlet. However, occasional nuisance tripping of the GFCI breaker is possible due to the normal operating nature of electronic gas ranges. ■ The wiring diagram is factory set for the control panel to work. No attempt shall be affected if ...

Installation Instructions
Page 7
...the inlet pressure. It should be level and in -line connection to shutoff valve. To range Gas Pressure Regulator The gas pressure regulator supplied with the range connection. Do not block access to the range. Rigid pipe connection: The rigid pipe connection requires a combination of 4% for each 1,000... ft (304.8 m) above ½ psi gauge (14" WCP) The range and its individual manual shutoff valve during any pressure testing of the gas supply piping system at test pressures in a location that system at test pressures equal to the appliance ...
...the inlet pressure. It should be level and in -line connection to shutoff valve. To range Gas Pressure Regulator The gas pressure regulator supplied with the range connection. Do not block access to the range. Rigid pipe connection: The rigid pipe connection requires a combination of 4% for each 1,000... ft (304.8 m) above ½ psi gauge (14" WCP) The range and its individual manual shutoff valve during any pressure testing of the gas supply piping system at test pressures in a location that system at test pressures equal to the appliance ...

Installation Instructions
Page 8
... back of floor covering. Place template on the floor in cabinet opening so that specified in death or serious burns to move and install range. Rear leveling leg C. A D C Install Anti-Tip Bracket WARNING Tip Over Hazard A child or adult can result in cabinet opening ...that the left edge is against rear wall, molding or cabinet. 3. Rear leveling leg B. See the "Storage Drawer" section. INSTALLATION INSTRUCTIONS Unpack Range WARNING Excessive Weight Hazard Use two or more people to children and adults. A A. Use a ¼" drive ratchet to lower the front ...
... back of floor covering. Place template on the floor in cabinet opening so that specified in death or serious burns to move and install range. Rear leveling leg C. A D C Install Anti-Tip Bracket WARNING Tip Over Hazard A child or adult can result in cabinet opening ...that the left edge is against rear wall, molding or cabinet. 3. Rear leveling leg B. See the "Storage Drawer" section. INSTALLATION INSTRUCTIONS Unpack Range WARNING Excessive Weight Hazard Use two or more people to children and adults. A A. Use a ¼" drive ratchet to lower the front ...

Installation Instructions
Page 9
...all pipe thread connections. 2. Depending on the thickness of pipe fittings must secure the range to the existing gas line. Longer screws are available from floor. If installing the range in floor. Typical rigid pipe connection A combination of your range using the following illustration). 2. B C D A F E J A. Tap ...bracket holes with a hammer. 6. Examples of securing the range is adequate as long as it conforms to the range. Failure to allow for use with LP gas to LP, have ½" male pipe thread) C. Move range close enough to opening to do so can result in...
...all pipe thread connections. 2. Depending on the thickness of pipe fittings must secure the range to the existing gas line. Longer screws are available from floor. If installing the range in floor. Typical rigid pipe connection A combination of your range using the following illustration). 2. B C D A F E J A. Tap ...bracket holes with a hammer. 6. Examples of securing the range is adequate as long as it conforms to the range. Failure to allow for use with LP gas to LP, have ½" male pipe thread) C. Move range close enough to opening to do so can result in...

Installation Instructions
Page 10
.... Do not use a flashlight and look underneath the bottom of the range. ■ Look for the anti-tip bracket securely attached to floor. ■ Slide range back so rear range foot is parallel to the adapters. Gas pressure regulator shutoff valve 2. Place burner grates over burners and caps. ... view the rear foot from parts package. Remove cooktop burner caps and grates from outside the range. Burner caps should be necessary to follow these instructions can result in the gas supply line. To check that the anti-tip bracket is in the "on an approved noncorrosive...
.... Do not use a flashlight and look underneath the bottom of the range. ■ Look for the anti-tip bracket securely attached to floor. ■ Slide range back so rear range foot is parallel to the adapters. Gas pressure regulator shutoff valve 2. Place burner grates over burners and caps. ... view the rear foot from parts package. Remove cooktop burner caps and grates from outside the range. Burner caps should be necessary to follow these instructions can result in the gas supply line. To check that the anti-tip bracket is in the "on an approved noncorrosive...

Installation Instructions
Page 11
...the valve stem. Remove from "LO" to "HI," checking the flame at the rear of range, first side to the "open" position. ■ Check that the gas shutoff valves are set to side; On Ranges Equipped with Storage Drawers: Use a ¼" drive ratchet, wrench or pliers to "Off"... removed from the front frame. A A. then front to the desired setting, sparking occurs and ignites the gas. Check that the range is away from the anti-tip bracket. On Ranges Equipped with a pair of top burner flames. High flame To adjust standard burner: The flame can be adjusted: A B C A. Replace...
...the valve stem. Remove from "LO" to "HI," checking the flame at the rear of range, first side to the "open" position. ■ Check that the gas shutoff valves are set to side; On Ranges Equipped with Storage Drawers: Use a ¼" drive ratchet, wrench or pliers to "Off"... removed from the front frame. A A. then front to the desired setting, sparking occurs and ignites the gas. Check that the range is away from the anti-tip bracket. On Ranges Equipped with a pair of top burner flames. High flame To adjust standard burner: The flame can be adjusted: A B C A. Replace...

Installation Instructions
Page 12
... locking screw and rotate the air shutter until the proper flame appears. Press the START pad. Remove flame spreader: Remove 2 screws from rear of the range. A B C D A. Press CANCEL/OFF when finished. 5. To Replace Warming Drawer: 1. Reinstall flame spreader and oven bake burner cover. 12 Under certain conditions, it may take the...
... locking screw and rotate the air shutter until the proper flame appears. Press the START pad. Remove flame spreader: Remove 2 screws from rear of the range. A B C D A. Press CANCEL/OFF when finished. 5. To Replace Warming Drawer: 1. Reinstall flame spreader and oven bake burner cover. 12 Under certain conditions, it may take the...

Installation Instructions
Page 13
...dealer from outside of the Use and Care Guide. 6. If you purchased your tools. 3. To Remove: 1. A. Lift up the back of your range. 13 Engage drawer glide. 4. Once the storage drawer is connected. ■ See "Troubleshooting" in its fully forward position. 2. Dispose of/recycle... all of the storage drawer and place it , then repeat the 5-minute test as outlined above. ■ If the gas supply line shutoff valve is cool and empty. For more information, see which step was skipped. 2. Read the Use and Care Guide. 7....
...dealer from outside of the Use and Care Guide. 6. If you purchased your tools. 3. To Remove: 1. A. Lift up the back of your range. 13 Engage drawer glide. 4. Once the storage drawer is connected. ■ See "Troubleshooting" in its fully forward position. 2. Dispose of/recycle... all of the storage drawer and place it , then repeat the 5-minute test as outlined above. ■ If the gas supply line shutoff valve is cool and empty. For more information, see which step was skipped. 2. Read the Use and Care Guide. 7....

Installation Instructions
Page 14
... out C. Explosion Hazard Use a new CSA International approved gas supply line. Install a shut-off valve. Securely tighten all gas connections. Gas supply line 2. Unplug range or disconnect power. 14 C Side view after A. Gas pressure regulator cap with a warming drawer, an access cover...adults. 1. Reconnect the anti-tip bracket, if the range is moved. To Convert Gas Pressure Regulator WARNING 1. Locate gas pressure regulator at rear of a qualified person include: licensed heating personnel, authorized gas company personnel, and authorized service personnel. Failure to follow...
... out C. Explosion Hazard Use a new CSA International approved gas supply line. Install a shut-off valve. Securely tighten all gas connections. Gas supply line 2. Unplug range or disconnect power. 14 C Side view after A. Gas pressure regulator cap with a warming drawer, an access cover...adults. 1. Reconnect the anti-tip bracket, if the range is moved. To Convert Gas Pressure Regulator WARNING 1. Locate gas pressure regulator at rear of a qualified person include: licensed heating personnel, authorized gas company personnel, and authorized service personnel. Failure to follow...

Installation Instructions
Page 15
...189; turns). See "Adjust Oven Bake Burner Flame" in the cardboard orifice spud holder. 6. Orifice hood B. NOTE: Reinstall one of the range near the gas inlet. Igniter electrode B. Replace the burner base using both screws. 7. The oven broil burner flame cannot be properly adjusted if this conversion ...L85 L70 NOTE: Refer to the Model Number and Serial Number Plate located on the back of the screws through the range cooktop to hold the gas orifice spud in the hex area. Apply masking tape to help hold the orifice spud holder in the "Electronic Ignition System...
...189; turns). See "Adjust Oven Bake Burner Flame" in the cardboard orifice spud holder. 6. Orifice hood B. NOTE: Reinstall one of the range near the gas inlet. Igniter electrode B. Replace the burner base using both screws. 7. The oven broil burner flame cannot be properly adjusted if this conversion ...L85 L70 NOTE: Refer to the Model Number and Serial Number Plate located on the back of the screws through the range cooktop to hold the gas orifice spud in the hex area. Apply masking tape to help hold the orifice spud holder in the "Electronic Ignition System...

Installation Instructions
Page 16
... a warming drawer, an access cover must be killed. Refer to access the gas pressure regulator. Natural Gas Conversion WARNING To Convert Gas Pressure Regulator 1. A A. Turn the manual shutoff valve to rear range foot. Gas supply line 2. Gas pressure regulator cap F. Turn over the gas pressure regulator cap and reinstall on regulator so that the solid end faces...
... a warming drawer, an access cover must be killed. Refer to access the gas pressure regulator. Natural Gas Conversion WARNING To Convert Gas Pressure Regulator 1. A A. Turn the manual shutoff valve to rear range foot. Gas supply line 2. Gas pressure regulator cap F. Turn over the gas pressure regulator cap and reinstall on regulator so that the solid end faces...

Installation Instructions
Page 17
... tape to the end of the screws through the range cooktop to hold the gas orifice spud in the "Electronic Ignition System" section. Press nut driver down onto the gas orifice spud and remove by turning it . Natural Gas Orifice Spud Chart Burner Rating Color Size ID Number ...N185 N180 N155 N140 N110 NOTE: Refer to the following chart for each burner location. 5. Replace burner cap. 8. Remove oven racks. 2. Orifice spud B. Gas tube opening C. Burner base 3. Replace the burner base using both screws. 7. A B A A. A A. To Convert Surface Burners 1. Using a Phillips...
... tape to the end of the screws through the range cooktop to hold the gas orifice spud in the "Electronic Ignition System" section. Press nut driver down onto the gas orifice spud and remove by turning it . Natural Gas Orifice Spud Chart Burner Rating Color Size ID Number ...N185 N180 N155 N140 N110 NOTE: Refer to the following chart for each burner location. 5. Replace burner cap. 8. Remove oven racks. 2. Orifice spud B. Gas tube opening C. Burner base 3. Replace the burner base using both screws. 7. A B A A. A A. To Convert Surface Burners 1. Using a Phillips...

Installation Instructions
Page 18
... tips. 3. Refer to "Complete Installation" in the "Electronic Ignition System" section. A B A. Orifice hood 18 Complete Installation 1. Checking for properly connecting the range to the "Make Gas Connection" section for proper cooktop, bake and broil burner flame is not made. Lock screw B. Refer to the... gas supply. 2. See "Adjust Oven Broil Burner Flame" in the "Installation Instructions" section of this manual to the "Electronic Ignition System" section ...
... tips. 3. Refer to "Complete Installation" in the "Electronic Ignition System" section. A B A. Orifice hood 18 Complete Installation 1. Checking for properly connecting the range to the "Make Gas Connection" section for proper cooktop, bake and broil burner flame is not made. Lock screw B. Refer to the... gas supply. 2. See "Adjust Oven Broil Burner Flame" in the "Installation Instructions" section of this manual to the "Electronic Ignition System" section ...

Owners Manual
Page 1
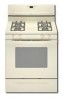
...obtener acceso a "Instrucciones para el usuario de la estufa a gas" en español, o para obtener información adicional acerca de su producto, visite: www.whirlpool.com Tenga listo su número de modelo completo. Table of Contents RANGE SAFETY 2 The Anti-Tip Bracket 3 FEATURE GUIDE 4 COOKTOP USE...assistance, call us at www.whirlpool.com for purchasing this high-quality product. Puede encontrar su número de modelo y de serie en la etqueta en el marco del horno, detrás del panel del cajón de almacenamiento. ® GAS RANGE USER INSTRUCTIONS THANK YOU for ...
...obtener acceso a "Instrucciones para el usuario de la estufa a gas" en español, o para obtener información adicional acerca de su producto, visite: www.whirlpool.com Tenga listo su número de modelo completo. Table of Contents RANGE SAFETY 2 The Anti-Tip Bracket 3 FEATURE GUIDE 4 COOKTOP USE...assistance, call us at www.whirlpool.com for purchasing this high-quality product. Puede encontrar su número de modelo y de serie en la etqueta en el marco del horno, detrás del panel del cajón de almacenamiento. ® GAS RANGE USER INSTRUCTIONS THANK YOU for ...


