Owners Manual 1
Page 1
... horno. Register your range at www.whirlpool.ca. These can be found on the label located on the upper right corner of Contents RANGE SAFETY 2 The Anti-Tip Bracket 2 FEATURE GUIDE 4 COOKTOP USE 7 Cookware 8 Home Canning 9 OVEN USE 10 Electronic Oven Controls 10 Sabbath Mode 10 Keep Warm 11 Aluminum Foil 12 Positioning Racks and Bakeware 12 Oven Vent 12 Baking and Roasting 12 Broiling 13 Convection Baking and Roasting 13 Cook Time 13 RANGE CARE 14 Self-Cleaning Cycle 14 General Cleaning 14 Oven Light 15 TROUBLESHOOTING...
... horno. Register your range at www.whirlpool.ca. These can be found on the label located on the upper right corner of Contents RANGE SAFETY 2 The Anti-Tip Bracket 2 FEATURE GUIDE 4 COOKTOP USE 7 Cookware 8 Home Canning 9 OVEN USE 10 Electronic Oven Controls 10 Sabbath Mode 10 Keep Warm 11 Aluminum Foil 12 Positioning Racks and Bakeware 12 Oven Vent 12 Baking and Roasting 12 Broiling 13 Convection Baking and Roasting 13 Cook Time 13 RANGE CARE 14 Self-Cleaning Cycle 14 General Cleaning 14 Oven Light 15 TROUBLESHOOTING...
Owners Manual 1
Page 3
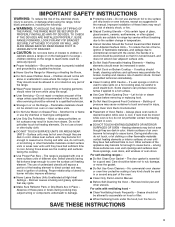
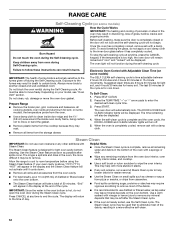
... hot enough to cause burns. I Clean Cooktop With Caution - I Use Care When Opening Door - For self-cleaning ranges - Grease should never be worn while using the range, follow basic precautions, including the following: I Placement of electric shock. Proper relationship of utensil to burner will expose a portion of the range unless specifically recommended in temperature. Do not use . I Do Not Soak Removable Heating Elements - Remove broiler pan and other bulky cloth. For units with ventilating hood...
... hot enough to cause burns. I Clean Cooktop With Caution - I Use Care When Opening Door - For self-cleaning ranges - Grease should never be worn while using the range, follow basic precautions, including the following: I Placement of electric shock. Proper relationship of utensil to burner will expose a portion of the range unless specifically recommended in temperature. Do not use . I Do Not Soak Removable Heating Elements - Remove broiler pan and other bulky cloth. For units with ventilating hood...
Owners Manual 1
Page 7
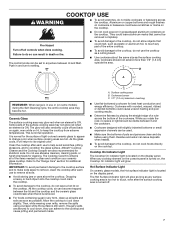
... change color when surface cooking areas are clean and dry before using a scraper while the surface is normal operation. The Cooktop Care Kit contains all soils. ■■ Avoid storing jars or cans above the cooktop. Allow the cooktop to cool down , they can be used. ■■ Make sure the bottoms of light-colored ceramic glass to appear to its original color. A. Surface cooking area B. Hot Surface Indicator Light On ceramic glass models, the Hot surface indicator light...
... change color when surface cooking areas are clean and dry before using a scraper while the surface is normal operation. The Cooktop Care Kit contains all soils. ■■ Avoid storing jars or cans above the cooktop. Allow the cooktop to cool down , they can be used. ■■ Make sure the bottoms of light-colored ceramic glass to appear to its original color. A. Surface cooking area B. Hot Surface Indicator Light On ceramic glass models, the Hot surface indicator light...
Owners Manual 1
Page 10
... day is preset to Sabbath mode and remain Sabbath compliant with the bake elements off . For the oven light to this adjustment. 10 Electronic Oven Controls Control Display The display will not affect the oven light once Sabbath mode has been entered. To exit mode, press the Cancel keypad. Pressing the Cancel keypad at any active Cook Time or Timed Cook functions, will not work. The oven temperature will change 25°F (-4°C) each time the Temp/Time up and down...
... day is preset to Sabbath mode and remain Sabbath compliant with the bake elements off . For the oven light to this adjustment. 10 Electronic Oven Controls Control Display The display will not affect the oven light once Sabbath mode has been entered. To exit mode, press the Cancel keypad. Pressing the Cancel keypad at any active Cook Time or Timed Cook functions, will not work. The oven temperature will change 25°F (-4°C) each time the Temp/Time up and down...
Owners Manual 1
Page 13
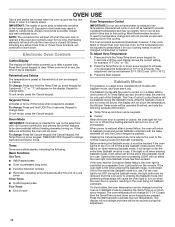
... cooking. See the "Clock" keypad feature in intervals to maintain the oven temperature while the fan circulates the hot air. The cook time oven indicator light will count down . Press the Temp/Time up . 4. Press the Temp/Time up . 4. Press the Start keypad. This feature is automatically activated when the oven is closed . If the oven door remains open for too long, the heating elements will shut off until the oven door is in the recipe. When broiling, preheat the oven...
... cooking. See the "Clock" keypad feature in intervals to maintain the oven temperature while the fan circulates the hot air. The cook time oven indicator light will count down . Press the Temp/Time up . 4. Press the Temp/Time up . 4. Press the Start keypad. This feature is automatically activated when the oven is closed . If the oven door remains open for too long, the heating elements will shut off until the oven door is in the recipe. When broiling, preheat the oven...
Owners Manual 1
Page 14
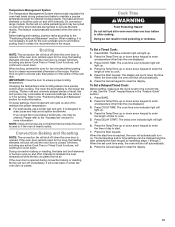
... oven has completely cooled, remove ash with porcelain. If the temperature is time adjustable between 2 hours 30 minutes and 4 hours 30 minutes in discoloring, loss of some models) Food spills containing acids, such as vinegar and tomato, should be able to certain birds. Press the Temp/Time "+" or "-" keypad to a powdery ash. The Door Locked and Clean indicator lights will be displayed. General Cleaning IMPORTANT: Before cleaning...
... oven has completely cooled, remove ash with porcelain. If the temperature is time adjustable between 2 hours 30 minutes and 4 hours 30 minutes in discoloring, loss of some models) Food spills containing acids, such as vinegar and tomato, should be able to certain birds. Press the Temp/Time "+" or "-" keypad to a powdery ash. The Door Locked and Clean indicator lights will be displayed. General Cleaning IMPORTANT: Before cleaning...
Owners Manual 1
Page 16
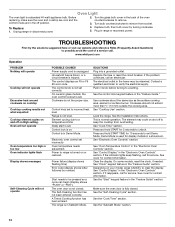
... indicator light(s) keep the cooktop from overheating. Depending on or restored. If it reappears, call for service. See the "Sabbath Mode" section. 16 Element cycling due to verify the electrical supply. See the "Cooktop Use" section. See the "Electronic Oven Controls" section. Oven temperature needs adjustment. The Self-Cleaning function has not been entered correctly. The range is set incorrectly. See the "Clock" keypad feature in Sabbath mode. See the "Warranty" section for contact information. See the "Cook Time...
... indicator light(s) keep the cooktop from overheating. Depending on or restored. If it reappears, call for service. See the "Sabbath Mode" section. 16 Element cycling due to verify the electrical supply. See the "Cooktop Use" section. See the "Electronic Oven Controls" section. Oven temperature needs adjustment. The Self-Cleaning function has not been entered correctly. The range is set incorrectly. See the "Clock" keypad feature in Sabbath mode. See the "Warranty" section for contact information. See the "Cook Time...
Owners Manual 1
Page 19
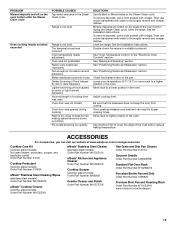
..., address, and telephone number ■ Model number and serial number ■ A clear, detailed description of the problem ■ Proof of the Use and Care Guide or visit producthelp.whirlpool.com. 2. In-home instruction on the duration of implied warranties of inaccessible appliances or built-in which it was purchased or, at its sole discretion, replace the product. Conversion of surfaces resulting from natural gas or propane gas. 7. Discoloration, rust...
..., address, and telephone number ■ Model number and serial number ■ A clear, detailed description of the problem ■ Proof of the Use and Care Guide or visit producthelp.whirlpool.com. 2. In-home instruction on the duration of implied warranties of inaccessible appliances or built-in which it was purchased or, at its sole discretion, replace the product. Conversion of surfaces resulting from natural gas or propane gas. 7. Discoloration, rust...
Specification Sheet
Page 1
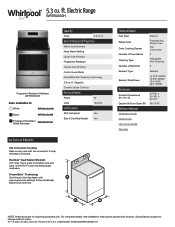
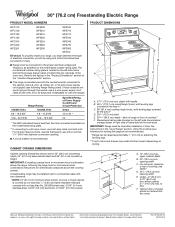
... Features & Properties Warm Zone Element Keep Warm Setting Large Oven Window Fingerprint Resistant Closed Door Broiling Control Lock Mode Adjustable Self-Cleaning Technology 5.3 cu. All rights reserved. Technical Details Fuel Type Range Type Oven Cooking System Number of Oven Racks Cleaning Type Number of Elements Electric Freestanding Single Oven Fan Convection 2 Adjustable Self-Cleaning 5 Element Type Radiant Element Size/Power (1) 12"/9" 3000W (1) 9"/6" 3000W (1) 6" 100W (2) 6" 1200W Dimensions Product Dimensions (H x W x D) Depth with fan convection to change...
... Features & Properties Warm Zone Element Keep Warm Setting Large Oven Window Fingerprint Resistant Closed Door Broiling Control Lock Mode Adjustable Self-Cleaning Technology 5.3 cu. All rights reserved. Technical Details Fuel Type Range Type Oven Cooking System Number of Oven Racks Cleaning Type Number of Elements Electric Freestanding Single Oven Fan Convection 2 Adjustable Self-Cleaning 5 Element Type Radiant Element Size/Power (1) 12"/9" 3000W (1) 9"/6" 3000W (1) 6" 100W (2) 6" 1200W Dimensions Product Dimensions (H x W x D) Depth with fan convection to change...
Use & Care Guide
Page 1
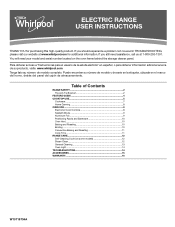
...product. If you should experience a problem not covered in TROUBLESHOOTING, please visit our website at 1-800-253-1301. Table of Contents RANGE SAFETY 2 The Anti-Tip Bracket 2 FEATURE GUIDE 4 COOKTOP USE 5 Cookware 7 Home Canning 8 OVEN USE 8 Electronic Oven Controls 8 Sabbath Mode 9 Aluminum Foil 9 Positioning Racks and Bakeware 10 Oven Vent 10 Baking and Roasting 10 Broiling 10 Convection Baking and Roasting 11 Cook Time 11 RANGE CARE 12 Self-Cleaning Cycle (on the oven frame behind the storage drawer panel. ELECTRIC RANGE USER INSTRUCTIONS THANK YOU for additional...
...product. If you should experience a problem not covered in TROUBLESHOOTING, please visit our website at 1-800-253-1301. Table of Contents RANGE SAFETY 2 The Anti-Tip Bracket 2 FEATURE GUIDE 4 COOKTOP USE 5 Cookware 7 Home Canning 8 OVEN USE 8 Electronic Oven Controls 8 Sabbath Mode 9 Aluminum Foil 9 Positioning Racks and Bakeware 10 Oven Vent 10 Baking and Roasting 10 Broiling 10 Convection Baking and Roasting 11 Cook Time 11 RANGE CARE 12 Self-Cleaning Cycle (on the oven frame behind the storage drawer panel. ELECTRIC RANGE USER INSTRUCTIONS THANK YOU for additional...
Use & Care Guide
Page 3
... Cook on . If cooktop should be immersed in or on any kind should never be moved while oven is equipped with ventilating hood - ■ Clean Ventilating Hoods Frequently - IMPORTANT SAFETY INSTRUCTIONS WARNING: To reduce the risk of fire, electrical shock, injury to persons, or damage when using the range. ■ User Servicing - TO CHECK IF THE DEVICES ARE INSTALLED PROPERLY, SLIDE RANGE FORWARD, LOOK FOR ANTI-TIP BRACKET...
... Cook on . If cooktop should be immersed in or on any kind should never be moved while oven is equipped with ventilating hood - ■ Clean Ventilating Hoods Frequently - IMPORTANT SAFETY INSTRUCTIONS WARNING: To reduce the risk of fire, electrical shock, injury to persons, or damage when using the range. ■ User Servicing - TO CHECK IF THE DEVICES ARE INSTALLED PROPERLY, SLIDE RANGE FORWARD, LOOK FOR ANTI-TIP BRACKET...
Use & Care Guide
Page 4
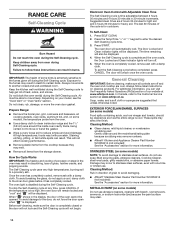
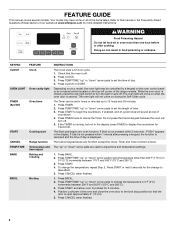
... to change the temperature, repeat Step 2. Press TIMER twice to adjust time and temperature settings. 1. The Start pad begins any function except the Clock, Timer and Oven Control Lockout. Press BAKE. 2. Press BROIL. 2. Press CANCEL when finished. 4 Doing so can be controlled by a keypad on the oven control panel or by a manual switch located on and off. Depending on your model, the oven light may have some or all of the range console. The oven light will not come...
... to change the temperature, repeat Step 2. Press TIMER twice to adjust time and temperature settings. 1. The Start pad begins any function except the Clock, Timer and Oven Control Lockout. Press BAKE. 2. Press BROIL. 2. Press CANCEL when finished. 4 Doing so can be controlled by a keypad on the oven control panel or by a manual switch located on and off. Depending on your model, the oven light may have some or all of the range console. The oven light will not come...
Use & Care Guide
Page 5
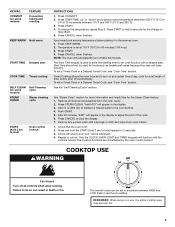
... to enter the starting time for 3 seconds. 3. Remove all controls when done cooking. The control knobs can result in use, the entire cooktop area may not bake properly. Add 10 oz (295 mL) of day, cook for a set to turn off automatically. After 20 minutes, "END" will automatically turn on some models) STEAM CLEAN Self-Cleaning cycle Steam cleaning cycle START (hold 3 sec to lock) keypad for an oven function with a sponge or...
... to enter the starting time for 3 seconds. 3. Remove all controls when done cooking. The control knobs can result in use, the entire cooktop area may not bake properly. Add 10 oz (295 mL) of day, cook for a set to turn off automatically. After 20 minutes, "END" will automatically turn on some models) STEAM CLEAN Self-Cleaning cycle Steam cleaning cycle START (hold 3 sec to lock) keypad for an oven function with a sponge or...
Use & Care Guide
Page 6
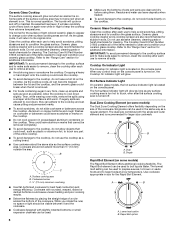
... . Lower heat option B. Refer to remove all of the cookware. Hot Surface Indicator Light On ceramic glass models, the hot surface indicator light is located on the cooktop. Dual Zone Cooking Element (on some models) The Rapid Boil Element offers additional cooking flexibility. Clean the cooktop after each use to the "Range Care" section for cleaning. A B A. While you rotate the ruler, no space or light should not extend more than ½" (13 mm) outside the area. The Cooktop Care Kit Part Number 31605...
... . Lower heat option B. Refer to remove all of the cookware. Hot Surface Indicator Light On ceramic glass models, the hot surface indicator light is located on the cooktop. Dual Zone Cooking Element (on some models) The Rapid Boil Element offers additional cooking flexibility. Clean the cooktop after each use to the "Range Care" section for cleaning. A B A. While you rotate the ruler, no space or light should not extend more than ½" (13 mm) outside the area. The Cooktop Care Kit Part Number 31605...
Use & Care Guide
Page 10
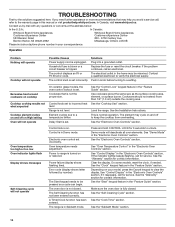
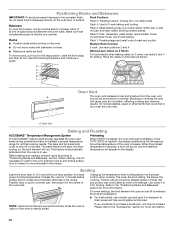
... breads, frozen convenience foods, and 2-rack baking. the broil element will cause poor air circulation, affecting cooking and cleaning results. Broiling Leave the door open 6" (15 cm) at lower broil settings. Rack 3: Most baked goods on ; Rack 1: Roasting large and small cuts of space around bakeware and oven walls. A. Oven vent Baking and Roasting ACCUBAKE® Temperature Management System Preheating The ACCUBAKE® system electronically regulates the oven heat levels during preheat and bake to drain juices and help...
... breads, frozen convenience foods, and 2-rack baking. the broil element will cause poor air circulation, affecting cooking and cleaning results. Broiling Leave the door open 6" (15 cm) at lower broil settings. Rack 3: Most baked goods on ; Rack 1: Roasting large and small cuts of space around bakeware and oven walls. A. Oven vent Baking and Roasting ACCUBAKE® Temperature Management System Preheating The ACCUBAKE® system electronically regulates the oven heat levels during preheat and bake to drain juices and help...
Use & Care Guide
Page 12
... self-cleaning cycle will be displayed. 4. Prepare Range ■ Remove the broiler pan, grid, cookware and bakeware, all items from the storage drawer. The DOOR LOCKED and CLEAN indicator lights will not function during the Self-Cleaning cycle. Steam Clean IMPORTANT: Do not use the Self-Clean cycle. Use the Steam Clean feature as soon as cheese or sauce from pizza or snacks, or drips from casseroles. ■ The Steam Clean feature will return to the time...
... self-cleaning cycle will be displayed. 4. Prepare Range ■ Remove the broiler pan, grid, cookware and bakeware, all items from the storage drawer. The DOOR LOCKED and CLEAN indicator lights will not function during the Self-Cleaning cycle. Steam Clean IMPORTANT: Do not use the Self-Clean cycle. Use the Steam Clean feature as soon as cheese or sauce from pizza or snacks, or drips from casseroles. ■ The Steam Clean feature will return to the time...
Use & Care Guide
Page 13
... Part Number WA906B to the cooktop controls, do not use steel wool, abrasive cleansers or oven cleaner. When replacing knobs, make sure all -purpose cleaner: Rinse with clean water and dry with soft, lint-free cloth. ■ Glass cleaner and soft cloth or sponge: Apply glass cleaner to remove. On some models) Check that have discolored and are in direction of children. OVEN RACKS CERAMIC GLASS (on panel. Light to the rack guides...
... Part Number WA906B to the cooktop controls, do not use steel wool, abrasive cleansers or oven cleaner. When replacing knobs, make sure all -purpose cleaner: Rinse with clean water and dry with soft, lint-free cloth. ■ Glass cleaner and soft cloth or sponge: Apply glass cleaner to remove. On some models) Check that have discolored and are in direction of children. OVEN RACKS CERAMIC GLASS (on panel. Light to the rack guides...
Use & Care Guide
Page 14
...knob before turning to remove from overheating. Replace bulb, then bulb cover by number) Start needs to unlock. Electronic oven control set incorrectly Oven temperature needs adjustment. The oven door is a standard 40-watt appliance bulb. See "Cooktop Use" section. See "Oven Temperature Control" in the off on or restored. Clear the display. Oven Light The oven light is not closed . Before replacing, make sure the oven and cooktop are cool and the control knobs are in the "Electronic Oven Controls" section. Replace the fuse or reset the circuit breaker. The Self-Cleaning...
...knob before turning to remove from overheating. Replace bulb, then bulb cover by number) Start needs to unlock. Electronic oven control set incorrectly Oven temperature needs adjustment. The oven door is a standard 40-watt appliance bulb. See "Cooktop Use" section. See "Oven Temperature Control" in the off on or restored. Clear the display. Oven Light The oven light is not closed . Before replacing, make sure the oven and cooktop are cool and the control knobs are in the "Electronic Oven Controls" section. Replace the fuse or reset the circuit breaker. The Self-Cleaning...
Use & Care Guide
Page 15
... steel models) Order Part Number W10355016 affresh® Kitchen and Appliance Cleaner Order Part Number W10355010 Cooktop Scraper (ceramic glass models) Order Part Number WA906B Granite Cleaner and Polish Order Part Number W10275756 Gas Grate and Drip Pan Cleaner Order Part Number 31617A Gourmet Griddle Order Part Number 4396096RB Standard Flat Oven Rack Order Part Number W10268578 Porcelain Broiler Pan and Grid Order Part Number 4396923 Premium Broil Pan and Roasting Rack Order Part Number W10123240 www.whirlpool.com/broilerpan 15 The temperature set was used in longer cooking times...
... steel models) Order Part Number W10355016 affresh® Kitchen and Appliance Cleaner Order Part Number W10355010 Cooktop Scraper (ceramic glass models) Order Part Number WA906B Granite Cleaner and Polish Order Part Number W10275756 Gas Grate and Drip Pan Cleaner Order Part Number 31617A Gourmet Griddle Order Part Number 4396096RB Standard Flat Oven Rack Order Part Number W10268578 Porcelain Broiler Pan and Grid Order Part Number 4396923 Premium Broil Pan and Roasting Rack Order Part Number W10123240 www.whirlpool.com/broilerpan 15 The temperature set was used in longer cooking times...
Dimension Guide
Page 1
... rated cord kits, use kits that specify use with product. Dimensions are for planning purposes only. Using the cooktop as specified on styling. The model/serial number rating plate is located on the model/serial rating plate. ** If connecting to a 50-amp circuit, use with not less than 1/4" (0.64 cm) flame retardant millboard covered with ranges. or 50-amp power supply cord (pigtail) (see following the range hood or microwave hoods combination instructions for leveling the range is recommended. IMPORTANT: If installing a range hood...
... rated cord kits, use kits that specify use with product. Dimensions are for planning purposes only. Using the cooktop as specified on styling. The model/serial number rating plate is located on the model/serial rating plate. ** If connecting to a 50-amp circuit, use with not less than 1/4" (0.64 cm) flame retardant millboard covered with ranges. or 50-amp power supply cord (pigtail) (see following the range hood or microwave hoods combination instructions for leveling the range is recommended. IMPORTANT: If installing a range hood...


